Cleaning the Epson print head with a syringe
A procedure such as cleaning and washing the Epson print head (like any other printer) must be carried out as needed. When some cartridges start to print poorly.
There are many different methods available at the moment. We will look at flushing both programmatically and physically, without disassembling the printer.
When cleaning is needed
- When running a nozzle test, part of the image is skipped on the sheet, white stripes are visible when printing, colors are not reproduced correctly, or one of them is completely missing. Such signs of clogging occur when the printer is used very intensively.
- The printer did not print documents for a long time. Water-based liquid inks may dry out. For different models, the drying time of the paint varies from several days to a month. If the device has been idle for a long time, has inkjet printing technology, and after turning it on, printing has deteriorated significantly or even blank sheets are coming out, it is likely that the print head has dried out completely.
- Different types of dyes were filled in or the cartridge was filled with paint from another manufacturer. When mixing solutions of different chemical compositions, a reaction occurs inside the ink tank, which can result in rapid thickening of the ink and failure of some elements of the head. If there is a need to use another brand of ink, first thoroughly wash the cartridge, the channels through which the ink is delivered, and the head itself.
- Refilling ink. After each cartridge refill, you need to clean the print head for preventive maintenance.
Quick ways to clean and rinse printer nozzles (nozzles) from Epson, HP, Canon and others
Most often, cleaning procedures are carried out by owners of Epson, HP, and Canon equipment. This manual contains several options for cleaning the printer head. All steps are described in detail and contain explanations for the most inexperienced.
Cleaning the printer print head is required for any model of inkjet machine when the quality of its operation begins to deteriorate over time. Cleaning involves a kind of direct physical washing of the nozzles, the nozzles through which ink flows onto sheets of paper. Their clogging leads to poor printing and wear on the printer itself. You can wash the head, like any other unit of the device, with special liquids that can be easily purchased at any computer store.
- 1 Signs that cleaning is needed
- 2 Software cleaning
- 3 Manual cleaning 3.1 What to clean with
- 3.2 Cleaning other important components
- 3.3 Cleaning methods
- 3.3.1 Flushing
- 3.3.3 Broaching
- 3.3.4 Ultrasonic bath
- 3.3.5 Head disassembly
3.3.2 Soaking
Signs you need cleaning
Any printing equipment requires timely maintenance to avoid malfunctions, operational problems or complete failure. Carrying out preventive measures is a sign of good form in modern realities. If in a large office the services of specialized companies are used for such purposes, then at home everything can be done independently.
The printer itself will “inform” its owner about the need for cleaning due to the poor quality of printed text or photographs. The first signs may be:
- If, when printing a test sheet for checking the nozzles (head nozzles), gaps, white lines, and incorrect color reproduction are visible (for example, the printer prints in a red or pink tint), while one of them may be completely absent, then there is a high probability that a blockage has occurred. This problem occurs from time to time when printing equipment is used intensively.
If you decide to use consumables from another manufacturer, then before refilling it is necessary to completely flush the ink containers, delivery channels inside the device and the head itself.
Software cleaning
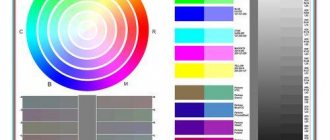
Epson, HP, Canon nozzle test We recommend performing this before starting any actions with the cartridge.
The simplest and most accessible way to clean the head on any personal computer is special software. It is supplied by the equipment manufacturer and installed on the PC when connecting and setting up a printing device. It is recommended to use the software method before starting more complex manual physical influence.
To use this program and perform cleaning, follow the instructions:
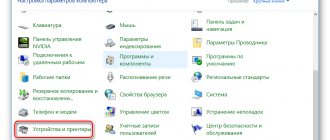
- Open the “Devices and Printers” tab through the “Start” button and “Control Panel”.
- Find your printing device in the list.
- From the context menu, select Printer Properties.
- On the tabs at the top of the window that opens, find “Maintenance” or “Service”, depending on the manufacturer and model, the names may be different.
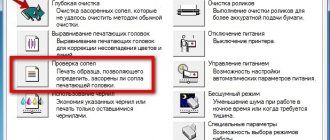
- Click on the "Print Head Cleaning" button or the "Deep Cleaning" option. You can carry out the procedure several times.
- Print a nozzle check sheet or any color picture to see the result.
If after 3-4 times of cleaning the print quality remains at the same level, then the only solution to the problem will be manual mechanical washing of the print head.
Manual cleaning
First you need to choose a place to carry out work. An ordinary room table is best suited, but it is recommended to cover it with paper or old newspaper in several layers to avoid contamination. Also prepare:
- Rubber household gloves to protect hands.
- A syringe with a needle can be easily purchased at a pharmacy.
- A small flat vessel that you won’t mind throwing away later.
- Cotton swabs or lint-free wipes.
- Small diameter plastic tubes.
How to clean
The ideal option is to use products from one manufacturer. In this case, consumables and flushing fluid. If you can’t do this, then there’s nothing wrong with it. Any certified cleaning cleaner will not cause damage or negative changes in the operation of the printing device. But, depending on the type of dyes used, you need to buy the appropriate products.
If water-soluble paint is used, then the best option for removing it from surfaces would be:
- Special water from which all chemical salts have been removed.
- Distilled water, which is easy to buy at a car store.
- A self-prepared solution of distilled water and ten percent ammonia. The proportion is determined by the condition of the contaminated parts.
Pigment ink has a completely different chemical composition and requires different washing fluids:
- Isopropyl alcohol.
- Special substances for dissolving pigment dyes.
When choosing a cleaner, pay attention to WWM products, namely products W01, CL-10, CL-04, CL-06, CL-08. As a budget option, you can consider using window cleaning products. The most famous Mister Muscle. At home, it is often used successfully.
Cleaning liquid for inkjet printers DIY methods.
Cleaning Other Important Components
Many modern models of inkjet printers from Epson, Canon, HP and other companies use built-in print head cleaning systems and ink drying protectors for nozzles and nozzles. We are talking about a knife and a mouthguard. The knife in an inkjet printer is a special part that automatically mechanically removes excess ink from the surface. This allows you to increase the service life and postpone the washing process for some time. The mouth guard absorbs moisture, is located under the head, and when not working, the nozzles are located in it, which prevents them from drying out quickly. Over time, these parts themselves become contaminated and cease to fully perform their job. Also require cleaning.
The knife can be gently wiped with a lint-free cloth moistened with liquid. The situation with the mouthguard is a little more complicated - it requires complete rinsing. Brief instructions for your actions:
- Disconnect the printer from power.
- Open the front cover.
- Remove anything that is blocking access to the knife and mouth guard.
- Wipe the knife.
- Draw a little cleaner into the syringe.
- Slowly insert it into the mouth guard.
- Leave it for a while.
- Draw out the product using a syringe.
- Carry out the procedure until the evacuated cleaner stops being stained with paints from the tray.
Cleaning methods
Flushing
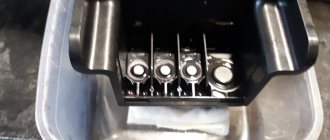
- Place the print head in the prepared container.
- Select a syringe with a size that will allow you to easily and tightly fit it onto the head fittings.
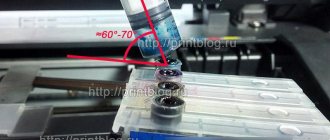
- Fill up with cleaning solution.
- Release the air from the syringe.
- Place it on the fitting.
- Slowly start skipping.
- The liquid should flow into the container.
- As soon as the color of the cleaner stops changing, you can finish washing.
- Carry out the procedure with each fitting.
- Wipe all elements and allow time to dry.
If you notice that the liquid flows poorly or is not absorbed at all, then you need to move on to a more aggressive method, which is described below.
Maceration
- Leave the head in the same container.
- Fill the syringe with cleaner.
- Put on the needle.
- Place a few drops onto the fitting.
- Carry out the procedure for several hours.
- For severe stains, you can leave it overnight.
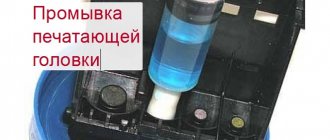
- Prepare plastic tubes that are easy to put on and fill them with cleaning agent as shown in the picture.
Broach
If all else fails, try the forced pulling method.
- Pour cleaning agent into the bottom of the container.
- Release from the syringe everything that remains there after the last procedures.
- Place it tightly onto the fitting.
- Smoothly try to draw the cleaner through the head into the syringe.
Ultrasonic bath
Recently, an ultrasonic bath has become a popular method for cleaning the print head of a printer. It requires special equipment and some skills to perform the procedure. Judging by the reviews and opinions of experts, it is impossible to make a clear positive choice towards this option. The risk of permanently losing an expensive element of a printing device is very high. A bath can be used if none of the methods helps.
Head disassembly
This option for eliminating print defects caused by clogged nozzles and nozzles is not recommended to be done at home without experience. The likelihood of damage to small structural elements is very likely. This type of work should be delegated to experienced specialists at office equipment service centers in your city. It is advisable to choose a certified company or an official representative of the device brand.
Prevention
At the same time, it would not be amiss to carry out extraordinary cleaning, preventive maintenance and inspection of the printer itself. This will ensure that all other parts are in good working order and protect the equipment from serious damage. Check for dust, dirt, jammed paper, or foreign objects inside the device. Remove them if necessary.
When using continuous ink supply systems, you should check the ink pumping hoses from the containers to the head for clogging, air, kinks, and mechanical damage. An important point will be that there is sufficient paint above the average level, which will prevent air from being sucked into the system.
Regular program cleaning will help avoid the need for physical washing over a long period of use of the printing device.
Video
Cleaning methods
To clean the print head, there are three categories of methods:
- through software on a computer;
- cleaning through the printer control panel on the body;
- manual resuscitation.
First, it is recommended to clean it programmatically.
If you manually clean it yourself, there is a high risk of damaging the part. You will need to purchase a new head, which can cost more than half the cost of the entire printer.
Place and align
To reassemble the device:
- Install the head into a Canon printer.
- Press it with the clamp.
- Replace the cartridges. There should be a palette on the carriage. Don't mix up the colors.
- Close the lid.
- Do a test print.
If uneven lines appear on the sheet, calibrate the device. Most likely the carriage has moved. Canon heads need to be aligned.
Manually cleaning the print head
The easiest way to wash the print head is to soak it. It is relevant only if the PG is easily removed.
- Remove the print head from the printer.
- Pour a small amount of service fluid into a saucer.
- Immerse the PG with nozzles into the service liquid approximately 2 mm.
- Keep the PG in the liquid for 7-10 minutes (do not allow the PG to be completely immersed in the liquid or any electronic parts except the bottom platform with the nozzles to get wet).
- Wipe the PG, reinstall it and run a nozzle test.
- If the test is unsatisfactory, try 2-3 additional cleanings and, if there is no positive dynamics, move on to more complex methods.
If the print head is not removable, cleaning may require a technique using a syringe and a large number of wipes.
- Detailed instructions for cleaning an Epson printer
When to clean the print head
The procedure for cleaning the printer's print head is not very complicated, but it still requires skill and accuracy. There is no point in doing it unnecessarily.
However, there are cases when such a process simply cannot be avoided:
- Printing defects. Very often, the printer suddenly begins to produce sheets with stripes, or does not supply color at all to the printed image, smears the image, or goes beyond the edges.
- Long downtime. When the machine is not used every day, ink can clog the printer head, drying out around the edges of the output holes. Then first you should conduct a nozzle test from the menu of your device, that is, try to clean the print head using the standard software. If nothing works, then cleanse it manually.
- Replacing paint. When changing the ink in the printer, you can take an ink with a different composition, for example, the same cartridge, only from a different manufacturer. If you are changing one dye to another, then you must first thoroughly rinse the ink supply system, for example, with washing liquid for inkjet printers, to remove any residue, and then install the new dye.
Cleaning your HP laser printer
A laser printer is different from a dot matrix and an inkjet printer. The action is based on a photosensitive drum with powder toner. Electric charge and high temperature transfers the image to paper. A laser printer can also produce defects when printing and can also be cleaned.
The first thing you need to do is unplug the printer and let it cool down. The toner cartridge can then be removed and gently cleaned with a brush or wipes. The cartridge can also be vacuumed. After which you can put the printer back together and do a test print. You cannot clean the drum yourself, as it contains fragile parts. It's better to leave this to the professionals.
Advice! Do not run the printer head cleaning function too often! Do this only when clearly necessary. Otherwise, you'll just waste ink and shorten the life of the print head.
Hardware cleaning
Blockages in inkjet printers are a common problem. After all, the paint dries in all devices. Therefore, they often add a self-service function. You can clean the Canon print head without even removing it. When connecting a gadget, the system must find and install the driver. But it is better to install the software from the disk that comes with the device.
The manufacturer's website has utilities for managing the printer. They have different settings and interface. It is not necessary to download them. You can also wash the nozzles this way.
- Refill the cartridges.
- Connect your gadget to your PC.
- Insert a blank sheet of paper into it.
- On your computer, open Control Panel.
- "Devices and Printers" menu.
- Right-click on the Canon icon.
- “Properties” item.
- Section "Service".
- Select the type of cleaning (“Standard” or “Deep”) and cartridges.
- Printing will begin. The printer will supply ink under high pressure. A jet of paint will break through the blockage.
- After cleaning, the system will offer to print a test page.
- To run the test yourself, click on the “Check Nozzles” button in the same “Maintenance” section.
First, perform a standard “rinse”. It may not work the first time. Try twice and print a test page. If it doesn't work, run a deep clean. Don't forget to refill the cartridges - a lot of ink is consumed. Do not remove the part yet. Wait a day. Then try cleaning again. If this does not help, you need to wash it manually.
Alternative - refilling cartridges in St. Petersburg
With constant workload of printing devices, problems with print heads often occur. This occurs when documents are printed with streaks or gaps on the paper. Basically, inkjet printers produced by well-known companies Epson, HP and Canon suffer from this problem.
Contaminants and ways to eliminate them
Even under normal operating conditions of printing equipment, you cannot be sure that all elements will work perfectly. If the use of consumables cannot be properly controlled, unexpected equipment failures often occur. We can name several variants of events in which the most sensitive working parts of the printer, namely the head, are affected. Nozzle clogging occurs when:
- the ink inside the head has dried out;
- paint supply channels are clogged;
- the level of ink supply to the cartridge has increased;
- The ink supply system has become depressurized.
To solve problems with a clogged head, the creators of printing equipment included a special utility in the system for monitoring its operation. In most cases, it helps get rid of printing defect problems.
Stages of cleaning an Epson printer
There are two ways to clean the print head: hardware and manual. In the first case, you need to do the following:
Through the “Start” menu, open the “Devices and Printers” window;
select the connected printer with this problem and open the “Printing Settings” context menu by right-clicking on it;
In the “Service” tab, find the “Print head cleaning” function and perform it.
It may be necessary to carry out this procedure several times so that the ink under operating pressure penetrates the nozzles of the head. To check print quality, print a test page, which the device will automatically prompt you to do after each cleaning.
Restoring Canon and HP devices
Exactly the same steps need to be carried out to clean the heads in Canon printing devices.
HP inkjet printer drivers have a software monitoring system that links to the HP Problem Resolution Center. You can access it through the printer’s “Settings” menu, where you will find “Printer Toolbar”. The Cleaning tab will help you program print head cleaning, similar to the above procedure.
Removing severe head clog
If flushing the print head is unsuccessful, then you should use a more effective cleaning method. It will take a lot of time and effort to complete all the steps provided.
Step-by-step algorithm:
- The medical tube for droppers is cut into several parts. The length of each of them should be about 6 cm.
- Tubes are inserted into all holes.
- Pour in cleaning agent.
- If the blockage does not allow liquid to penetrate inside, then repeat similar steps several more times.
- As soon as the plug is partially broken, the head is left for 2 days.
- Check the cleaning agent level every 2 hours. If necessary, top it up.
- After 2 days, the liquid mixed with ink is drawn out with a syringe.
There is another way to get rid of severe blockage. To carry out the work, you will additionally need a plastic container and several napkins. Having prepared these items, perform the following steps:
- Place 2 napkins at the bottom of the plastic container.
- A small amount of the selected detergent is poured onto them.
- The part to be cleaned is placed on top.
- It is pressed to the bottom of the container.
- Use a syringe to draw out the liquid.
- Repeat the operation 5 times, constantly adding a little cleaning agent.
Special cases when washing
Washing the print head is carried out in several cases: clogging (drying) of the print head, washing the print head when changing the type or manufacturer of ink, preventive washing of the print head and other options in which washing is extremely rare. Let's consider each of these cases separately.
Flushing the print head when changing the type or manufacturer of ink is the most common reason for flushing the print head of your printer. In this situation, everything must be done according to the instructions; washing is considered complete when the washing liquid begins to flow out of the cartridge without ink impurities.
Clogged (drying) print head - washing a dried or clogged print head takes much more time than just washing off ink residues. In this case, the print head remains in the container for washing the ink after dripping for several hours, dripping is carried out until the ink is cleaned (in our practice, there was a Canon printer whose print head was washed for three weeks). Every few hours it is necessary to drop cleaning liquid into each channel and replace the cleaning liquid in the container.
Canon head cleaners
Canon printer heads are cleaned with special cleaning fluids. For example, for pigment inks, OCP LCF III wash fluid is used.
Cleaning of water-soluble inks is carried out with RSL basic service fluid.
Cleaning begins with slightly aggressive liquids and ends with aggressive ones. The performance of the head when using aggressive flushes is not guaranteed. But almost always clients go through with the cleaning until the end - no one needs a half-working head.
You can use an ultrasonic bath to clean Canon heads. But here you need great care and experience so as not to damage the head.
The best cleaning effect can be achieved using combined cleaning, using liquids and a bath.
When cleaning a Canon head, you need to clean all colors, even if they worked fine before.
Everything you need to know about flushing fluids
You need to wash the head of an HP or any other printer with a special solution - cleaner. It is best to use a cleaner of the same brand as the ink, since the manufacturer is the same, he selects the optimal compositions of dye and solvent that will help more effectively than just any cleaner.
There are several types:
- For external cleansing.
- To remove water-soluble ink, for example when cleaning a Canon print head.
- For removing pigment dyes.
- For removing special heavily dried toners and clearing large dirt and blockages. This often happens when cleaning the Epson print head.
To remove water-soluble ink, use either demineralized water (WWM W01) or distilled water. Experienced craftsmen also prepare a special solution from a mixture of distilled water and ammonia (5-10%). The proportions are 1:10:1. Each master calculates the optimal proportions empirically, depending on how well the contaminants are removed. The finished mixture must be filtered through a fine mesh of 0.01 microns and can be used.
If you need to remove pigment dye, for example, when washing the Epson print head, then the cleaner must contain isopropyl alcohol, as well as various specialized liquids. WWM specializes in such cleaning mixtures. In addition to demineralized water, pigment remover and water-soluble paint, they even produce a special solution for washing and soaking.
Advice! When your wallet doesn’t allow you to look at special liquids, for example, to remove dirt on an HP print head, but you want to “fix” the printer, then a simple “Mr. Muscle” glass cleaning liquid will do.
The most important thing here is to choose the right color of the solution: ammonia-based “Muscle” will do an excellent job with green and pink ink, and a blue and orange alcohol-based solution is for pigment spots. Many experts advise heating such a solution to a temperature of 30-60 degrees, so the cleansing is more intense.
Severe blockage
If the head does not allow liquid to pass through at all, then the blockage is severe. But you can get rid of it too.
- As in the previous instructions, place the part on a napkin.
- Cut it into small pieces. About 5–7 centimeters.
- Place them on the paint intake pipes.
- Pour washing liquid into them.
- Refill and change wipes periodically.
Take the IV tube.
There are also extreme methods. For example, you can insert a syringe without a needle into the nozzle and squeeze out the liquid. Or fill the cartridges with washing liquid instead of ink. But it's risky.
Epson cx4300 - head washing after a long break
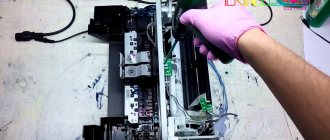
Use the usual software method to clean the device. If it turns out to be unsuccessful due to the head being heavily clogged with debris and dried ink, Epson can use the physical nozzle cleaning method. Stock up on a syringe, IV tube, flushing fluid, scissors, tissue and gloves. After cutting the IV tube to a length of 5 to 10 cm, it is placed on the syringe. Flushing liquid is drawn into the tube. You need to turn on the printer and open the lid, wait for the carriage with cartridges to move out until the replacement position.
Next, the device turns off. The print head is manually moved to the right, a napkin is applied and the head is pressed onto it. The cartridges are removed, and a tube with a syringe is inserted into their connectors one by one to supply 2-3 cubes of the flushing composition.
After the procedure is completed, the system is put back together and 2 cleanings are performed using the printer driver. If in the future you do not want to frequently repeat cleaning the device, it is advisable to print one color sheet at least once every 7 days so that the ink does not dry out and clog the printer head.
By learning how to clean your device at home, you will save yourself from going to service centers and paying for their services.
The age of technology and widespread computerization has long weaned people from handwriting and gluing photographs into albums. Modern technologies are rapidly developing, constantly expanding the range and improving the characteristics of electronic devices. Printers have firmly entered the everyday life of computer equipment users and occupy their niche not only in the office space, but also in many homes.
Devices for displaying information differ in functionality, operating principle, and connection method. Like any equipment, they all need care from the owner. For correct operation and long service life of the printer, it is necessary to periodically service the device. If in offices, where there can be a lot of devices, a specially trained maintenance employee is usually called for this purpose, then at home you can easily handle it yourself.
How to remove the print head
Canon iP3600 Print Head Release
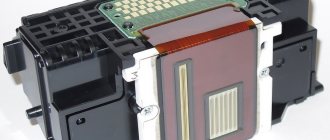
Open the cover while the printer is turned on to allow the carriage to move out of the parking space. Turn off the printer. Remove the cartridges. The print head is clearly visible, but it is too early to remove it.
In different printer models, the latch holding the PG looks different, although the principle of operation is the same in almost all models. On the right side there is a lever, or the frame has a certain shape. You need to lift it up.
The MG5440 model has a slightly different principle. The latch here is a bar with the image of ink colors, which does not rise up: you need to pull it towards you until it clicks. Now the PG is free, tilt it forward and carefully remove it from the printer.
Cleaning the ink channels and printer head
To work you need to acquire some attributes:
- liquid for cleaning the head of inkjet printers (sold in specialized stores);
- 10–20 ml syringe;
- a small flexible tube that can be placed over the nozzle of the syringe.
- To disassemble the printing mechanism, you must first remove the top cover of the printer. Unscrew the bolts securing it. The cable connecting the housing to the mechanism can be removed from the board to provide access to the mechanism.
- Take out the cartridges and place them on a previously prepared surface so as not to smear everything around with ink.
Replacing a Canon print head
Open the cover while the printer is turned on to allow the carriage to move out of the parking space. Turn off the printer. Remove the cartridges. The print head is clearly visible, but it is too early to remove it.
In different printer models, the latch holding the PG looks different, although the principle of operation is the same in almost all models. On the right side there is a lever, or the frame has a certain shape. You need to lift it up.
The MG5440 model has a slightly different principle. The latch here is a bar with the image of ink colors, which does not rise up: you need to pull it towards you until it clicks. Now the PG is free, tilt it forward and carefully remove it from the printer. Cleaning canon printer nozzles Make sure that the PG of your printer has no burns near the nozzles, the nozzles are intact, and flushing
Burnouts in the nozzle area make sense. If so, prepare: 1. rinsing liquid; 2. gauze, napkins or bandage; 3. syringe; 4. a low plastic container where the GHG will fit; 5. tube from a medical IV. Cover the table with newspapers and place a piece of bandage, folded several times, soaked in the washing liquid, under the PG. Using another piece of cloth, also soaked in the cleaner, gently blot the intake grates.
Remove the rubber seals, wash them, and thoroughly wipe the head body around the intake holes. Drying of ink in these places can lead to depressurization of the system. As a result, air may be sucked in, the Canon print head will begin to work incorrectly, and ink will flow intermittently. It is a good idea to periodically clean the O-rings for preventive purposes, even when there are no problems with the seal.
Cleaning the mouthguard and knife
The cap and knife are the places where accumulated dust will immediately depress the system and lead to defective printing, since air bubbles will immediately rush there.
First you need to unlock the carriage - the container for cartridges. For example, to clean the Epson print head, this can be easily done through the software, and then simply turn off the printer.
Attention! All washing actions must be carried out in a device that is disconnected from the power supply!
Then use a syringe to pour the cleaner into the mouth guard and leave the liquid there for 10 minutes. Afterwards the cleaner needs to be drained.
The rubber knife can be wiped with a napkin or bandage also soaked in a special solution. How do you know that you have washed everything completely? The cleaner stops staining.
Note! In some devices, the rubber blade is located inside the housing, and not immediately behind the mouthguard. First look at the instructions for the device, where the locations of the parts are explained.
First option for cleaning the head
Next, remove the print head and use a bandage with cleaner to remove dirt at the bottom of the part. If there is a lot of dirt, then repeat the process until the blockage is cleared.
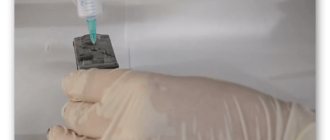
After this, you need to remove the cartridge from the print head and carefully use a syringe to blow through the special holes - fittings for collecting ink.
You need to rinse the fitting very carefully, not allowing the cleaner to get on the head; if this happens, you need to quickly wipe it with a napkin or remove drops with a second syringe. And then the printer will need to be left for a day until the moisture has completely evaporated.
After cleaning, wipe everything dry and install the cartridge in the carriage.
Option two – for “serious” cases
It is also possible to revive the printer head in case of more complex soiling; in this case, the disassembly process is the same, only you will have to wash the fittings not by blowing them out, but by using a cleaner to dig through the entire grid around and the holes themselves. In this case, a bandage is placed under the head, which will collect excess fluid.
You need to drip slowly, over 1.5 - 2 hours, but this method will most effectively remove dirt. If, nevertheless, the holes of the fittings do not give in, then you can use heavier artillery - cut out pieces from plastic tubes, attach them to the head and pour cleaner into them from above. Under the pressure of the solvent, dried paint will sooner or later, usually a day, disappear.
Important! It is easy to determine which of the fittings is more contaminated - the cleaner does not flow well into that particular tube, and it is more difficult to fill it to the required level.
This cleaning procedure can be repeated once a week.
The third option is forced traction of the cleaner
For very advanced cases, there is a hard flushing algorithm: the plan is exactly the same as in the previous paragraph, only after connecting the tube to the fitting, you will also need to connect a syringe filled to the top with cleaner. Place a small plastic container under the head and press the syringe firmly onto the tube, releasing liquid through the tube. And then do the opposite operation: moisten the bandage with a cleaner and draw out a special solution through the head with a syringe.
If this method does not help, then it is best to entrust your device to a specialist, since after “forced” washing the head must be completely disassembled. During this operation, a non-professional can easily damage the nozzles or the head board, after which they will have to completely replace this part. Thus, cleaning the print head is a rather complex and painstaking process, in which it is important to be careful and, most importantly, to prevent moisture from getting on the contacts.
