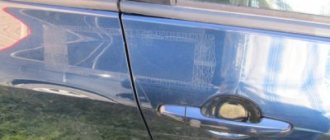
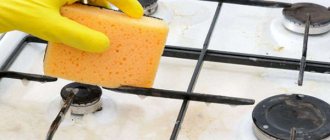
Sometimes things happen that make a mirror on a closet, for one reason or another, need to be removed and replaced to avoid trouble. If a chip has formed on it, hopelessly spoiling the appearance, or a crack, it is better not to keep such a thing in the house and try to replace it with a new one as soon as possible.
In such a situation, your mirror not only spoils the appearance of the interior, but also becomes a direct threat to the residents, especially if there are small children in the house who are fond of active games. You can get rid of a cabinet decor element that has become superfluous in several ways, depending on the fastening, and the main tool is you and your hands. Our article is about how to peel off a mirror from a cabinet, remove it from a wall, or separate it from a wardrobe door if it was glued with liquid nails, double-sided tape or other glue.
If you do everything correctly, you will easily cope and will not spend a day waiting for a specialist and, most importantly, money.
Is it possible to peel off an extra decorative element yourself?
The answer is clear: yes. But for beginners, the process is quite labor-intensive and requires high concentration and careful attention, so it is better to arrange for yourself an environment in which nothing can distract you.
If you follow all the rules, follow safety precautions and follow the recommendations, you can remove the mirror at home in half an hour or less , but in cases of difficulties or complex fasteners, it is better to contact specialists with experience in such work with this issue.
General Tips
For those who often face the need to remove glue residues, we can give several useful recommendations:
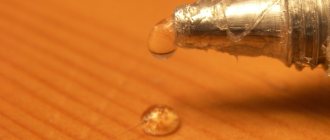
when gluing tape to a painted surface, you need to be prepared for the fact that this area will lighten a little over time;- fresh traces of glue are much easier to remove than old ones;
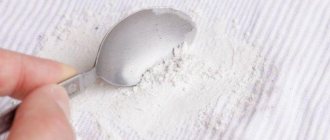
- Solvent 646, in addition to ethers and alcohols, contains acetone; this mixture will cope with any type of glue;
- There are special products on sale for removing adhesive tape, for example, Label Remover; you need to look for them in construction stores;
- Fire starter fluid will also help remove remaining adhesive tape; however, it is only able to dissolve certain types of glue;
- You can replace acetone with a more gentle composition - nail polish remover.
Tips on how to easily and safely remove a mirror from a cabinet door
Of course, if you adhere to the rules and instructions described above, then the whole process will go through without any difficulties. However, you should also consider tips that will certainly make this work easier.
- When cutting drywall, it is advisable to make the edges even. This will make your future work much easier when you restore the surface or make repairs.
- When you cut through the glue, you should hold the mirror. You can even call another person to help you perform this function.
- To eliminate residues that are located at the site of the removed product, it is recommended to use a solvent. He will do an excellent job with this task. It is better to use this method in cases where further interaction with the element is planned.
- Remember that during the dismantling process all actions must be smooth and proceed carefully. Sudden movement is prohibited.
- When using the ruler, it is not recommended to raise it high, otherwise the mirror may break.
Now removing the mirror from the cabinet door will not be difficult for you.
Subscribe to our Social networks
How to peel off a mirror - step by step instructions
First of all, it is necessary to dismantle the supporting structure. The door must be in a horizontal plane to prevent deformation as a result of mechanical stress. Don’t forget that you also need to completely remove the mirror fixing elements. These can be decorative inserts that are fixed on the inside of the door.
The mirror can be attached to the main surface using “liquid nails” or glue, double-sided tape or suction cups, staples and screws.
The next step is to glue the tape along the entire plane of the element to be separated with a slight overlap on the previous strips. This is necessary to ensure that the damaged areas do not harm others.
Before removing the mirror, you need to remove the element on which it is located (cabinet door or frame).
It is important to know! It is necessary to paste over the mirror after heating the element with a hairdryer. Otherwise, the tape or film will lose its size, as well as the quality of its fixation. Moreover, the adhesive base of the tape releases caustic substances when heated.
Mirror separation by points
Attaching an element is much easier than removing it. After heating and pasting, the glue applied on the back surface of the product retains its plasticity for at least 10 minutes. During this time, you will need to separate its layer by using a metal ruler.
It is easier and more convenient to carry out the dismantling procedure in a horizontal plane.
First of all, work is carried out in the corners, but to a depth of no more than 15 cm from each point. Uniform destruction of the adhesive layer guarantees the release of the stress acquired by the mirror as the glue hardens.
Worth knowing! It is not recommended to use a “nail” for such purposes. Its thickness significantly reduces the chances of safe dismantling and the product maintaining its appearance. The same applies to kitchen knives.
Warm-up duplication
After completing the work with the corners, you can proceed to the central part. Heating with a hairdryer is carried out in the same way for several minutes. There is no need to wait for the smell of glue to form. This is a consequence of overheating, which will also inevitably damage the monochrome coating of the mirror and increase its haze.
If the mirror you are removing is already damaged, then it is better to avoid dismantling it yourself and entrust it to professionals.
It is important to know! The optimal distance for working with a hairdryer is at least 12-14 cm when working with doors made of pressed wood materials, with external PVC film covering. 7-10 cm for cabinets made of solid wood. An additional recommendation is to isolate previous sections where work has already been completed.
Once heating is complete, the central part is further protected with tape. Double-sided tape will do the best job for this purpose. Its use allows you to additionally attach a lifting plane that provides uniform tearing force without mechanical damage. Such remembering elements can be wooden trowels for plaster or suction cups for glass from any accessories.
If brute physical force is used, the mirror is unlikely to be suitable for further use, so you must act extremely carefully during dismantling.
The average mechanical force that household glue can withstand does not exceed 20 J. Therefore, for the last stage of work you will not need to use any tools.
In this simple way, you can figure out how to peel off a mirror from a cabinet without damaging it, while maintaining the possibility of subsequent use.
What is the best way to disconnect?
- The first method is suitable for cabinets from which the door can be removed. Do not remove the mirror when it is in a vertical position, as you may break it and injure yourself.
- For the second method, you will need wire, and it works like this: with movements to the left and right, you need to cut off both the layer of liquid nails and other adhesive mass that attaches your mirror to the cabinet. This option is very convenient and the safest: nothing will burst or crack if you do not overdo it with sharp movements.
- The third method is intended for a wardrobe, when working with which it is especially recommended to be more careful and adjust the level of brute force if the mirror is not to be damaged.
What tools will you need?
To safely peel off the mirror you will need the following set of tools:
- construction hair dryer (can be replaced with a household hair dryer, but with an increase in heating period);
- metal ruler or copper wire;
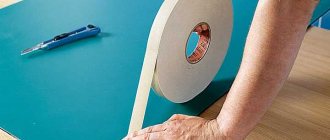
- regular or double-sided tape;
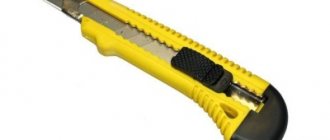
- stationery knife;
- screwdriver figured or flat.
In fact, the set of tools is small. Thanks to it, you can remove the door from the cabinet and start working with the mirror element. Even if the closet has mirrors with an area of more than 2 square meters, you can make do with improvised means by zoning the work in advance. This is the first thing you need to do before learning how to peel a mirror off a cabinet door.
If the mirror is attached with a special fastener system, then dismantling is simple, but if the mirror is held on by “liquid nails” or special glue, then the task is much more difficult.
Step-by-step guide on how to remove unwanted surface
Method number one:
- Using a screwdriver, remove the cabinet element on which the mirror to be removed is attached, holding it and twisting the fasteners.
- Place the door on a horizontal surface that is most comfortable to work on.
- Take a metal ruler and sharpen it at the narrow end using sandpaper - this will be the main thing.
- Cover the mirror with tape so that the fragments do not fly to the sides and into your eyes, this way there will be less debris around.
Important: the more free space, the less likely it is to make a mistake.
- Insert the sharp end between the mirror and the door and start tapping the opposite end of the ruler with a hammer, gradually driving it deeper with light blows and peeling off the mirror. Do not overdo it! Do not lift the ruler too high and tap it carefully so that the mirror does not crack.
- Carefully remove the mirror separated from the door and remove the fragments if it breaks.
Method number two:
- Take the cutting wire and unwind it, tying a wooden block to each end to make it comfortable to hold your tool and prevent the possibility of cutting your fingers.
- Start by wrapping the wire around the edge of the mirror and “filing” it, moving from one corner to the other.
- Slowly pass it between the mirror and the surface. The threaded and moving wire will cut off the glue on which the mirror is attached.
- It is advisable to involve a second person in the work who will hold the mirror so that it does not fall or break if you are working in a vertical position. The safest thing to do is remove the door.
Method number three:
- Take the tape and start covering the front side of the mirror.
- Slide the chisel under the mirror surface and gently press, starting to separate it from the door.
- Since the mirror may burst, after work you should collect the fragments in a bag.
Possible methods of dismantling
There are three options for the outcome of events that can be carried out even at home. Let's look at each of them.
First:
- For the first task, you need to first sharpen a metal ruler so that its narrow edge is as sharp as possible.
- This section of the product should be carefully inserted into the gap between the glass and the surface.
- To gradually and constantly deepen the ruler, it is advisable to tap the edge. This will take you to the other edge of the mirror.
Second:
- First, it is recommended to cover the outer part of the structure with a special film or tape. This is necessary in order to prevent the occurrence of a large number of fragments.
- Next, take a cutting wire, which can be purchased at any auto parts store, and run it behind the extreme corner of the mirror. At this point, the main thing is to move it smoothly. It is worth remembering that you need to hold the product by pressing it to the surface.
- Once the glue has been cut through, you can carefully remove the unit.
Third:
- Take a saw and cut out the part of the drywall where the mirror is located.
- Next, fill it with water and leave it to get wet.
- After the surface gradually dissolves, you can use wire to eliminate its remnants.
- The final stage is drying the product.
As you understand, there is nothing complicated about this. The main thing is to choose the best method based on what your mirror is mounted on.
How to remove?
Before you begin removing double-sided tape, you must carefully read the instructions and removal tips, because any careless movement can ruin the surface on which traces of the tape are located.
There are dozens, maybe hundreds of methods for removing adhesive marks, but the most effective ones are revealed below. Let's look at each of them in more detail.
Stationery knife
If it was not possible to remove all the adhesive tape at once, and pieces remain, you need to lift the edge of the adhesive tape again with the tip of a knife, and so on until it is completely removed.
Rubber (caoutchouc) disc
A soft attachment for a drill or screwdriver will help you cut off adhesive tape from a large area . The rubber disc will remove the top sticky layer without leaving scratches on the surface.
The tool must be set to minimum speed. Plastic rubber will not harm even the paintwork.
Glue heated to 80-100°C is removed faster. You can use either a hair dryer or a hair dryer to dry your hair. They can be replaced with an iron set to the minimum temperature.
The advantage of this method is the absence of scratches even on paper . The most tightly attached tape can be removed without difficulty.
But there is no need to heat non-heat-resistant objects to high temperatures, especially with a powerful hair dryer - they will immediately deform. It is better to expose them to the sun for a short time or keep them under steam - the glue will noticeably soften.
Oil
The glue will easily slide off if you lubricate the area of contamination with vegetable or essential (for example, eucalyptus) oil . They contain organic unsaturated acids that can dilute polymers:
- You can lay a rag soaked in oil on a horizontal tabletop or bedside table for about 20 minutes.
- If the stain is stubborn, it is best to leave the greased stain on overnight. In the morning the stain will come off without effort.
- All that remains is to wash off the oil. Easy to clean surfaces (glass, polished furniture, plastic) do not absorb grease, so there will be no problems.
This method is not acceptable for paper wallpaper.
Eraser
If you rub the remaining glue with a regular eraser, it will form pellets and come off easily . Just rub it with a cloth.
Gasoline, acetone, white spirit
The main advantage of the method is the ease and speed of removal:
How to glue a mirror to a cabinet door yourself
When you plan to do the work yourself, it is better to choose a method that requires the use of simple tools. Moreover, it must correspond to the parameters of the mirror: weight, dimensions. The best option is an adhesive sealant.
Materials for work
It is recommended to use silicone-based elastic material. It is distinguished by safety: it does not contain toxic substances, and no harmful compounds are released during application. In addition, silicone sealant will not disturb the amalgam of the mirror. The main advantage of the material is its high adhesion, and the glue even fixes structures with smooth surfaces.
Prepare a substance for degreasing the cabinet wall and the back of the mirror. To do this, use white spirit or another product with similar properties. If you skip this step, the quality of the coupling will decrease.
Tool
Prepare for work:
- a special gun for working with sealant, such a tool allows you to regulate the consumption of the adhesive and perform installation carefully;
- tape measure for marking;
- a simple pencil (this method is used for application, and it is better not to use a marker for this purpose, since its traces will be visible after installing the mirror);
- screwdriver (needed to remove the door).
Before starting work, prepare large items that are characterized by heavy weight. They will be used as a weighting agent.
Fastening process, step-by-step instructions
- The cabinet door is removed. It is placed horizontally.
- The surface of the door is cleaned of dust with a damp cloth.
- Marking in progress.
- Immediately before applying the glue, the door is degreased.
- The mirror is prepared according to the same scheme.
- An adhesive composition is applied along the perimeter, while performing zigzag movements.
- The design with a reflective surface is installed on the cabinet door.
Cans of water or other heavy objects are placed on top of the structure. When the glue dries, the door is returned to its place.
How to cut or tear off a mirror panel glued with double-sided tape from a door?
Double-sided tape does not seem as impressive as liquid nails, but this is not entirely true, because the mirror can be glued to it not only in the middle and along the edges, but also over the entire area. If desired, the mirror can be torn away from its mounting location, but there is a high risk of breaking the thing and injuring your hands with large fragments, so it is better to discard this method immediately and not try to use it under any circumstances.
A good way to remove a mirror from double-sided tape is similar to the one described above using cutting wire. If you don’t have an item for exactly this purpose, you can take a strong string or any thin but strong wire that will pass between the mirror and the door and will not break during the sawing process.
How to remove a glued mirror
How to remove a mirror glued with silicone or double-sided tape.
How to remove a mirror from a closet door?
Well, you never know, for whatever reasons, whether the form didn’t suit the client, or something else, it doesn’t matter, but it needs to be removed...
Then you will need:
- rubber hammer,
- metal carpenter's ruler 1 meter long.
Any adhesive connection, and especially adhesive tape, has its own thickness, that is, there will always be a couple of millimeters between the mirror and the chipboard. This means we place the edge of the ruler there. In order not to scratch the mirror amalgam during work, the narrow edge of the ruler should be lightly sanded with fine sandpaper. This is necessary in order to remove burrs from the metal and sharpen it slightly.
Action 1 . With light blows of a rubber hammer on the other end of the ruler, we move it under the mirror, 10-15 centimeters. (If the edge is successfully separated, we deepen the ruler further at intervals of 10 cm).
Action 2 . Without lifting the ruler from the plane, holding the free edge, we make horizontal movements (as shown by arrow No. 2 in the photo), cutting off the silicone or tape. By the way, tape is much easier to cut than silicone, which once again confirms that tape is not reliable for attaching heavy mirrors.
Under no circumstances try to lift the free edge of the ruler high above the plane, this is tantamount to moving to a bend. The mirror may burst.
If it is not convenient for you to “twist” the ruler along the plane and you just want to lift the free edge and grab it more comfortably, then be sure to hold the ruler on the plane at the base of the mirror with your other hand.
So, gradually moving the ruler deeper, we cut off all the glue. There is no need to cut off only one side at once; it would be much more correct to cut off gradually, alternately from all sides.
Before applying the new mirror, do not forget to clean off the old silicone.
There is another way to remove a mirror without breaking it, this is the cutting method using nichrome wire, which is very often used by furniture makers. But it has several significant disadvantages:
- this process is much more labor-intensive, requiring the work of at least two people,
- it is very difficult to remove a mirror of a large area,
- In 100% of cases, nichrome thread leaves marks on the amalgam, hopelessly damaging the mirror.
And the best thing is to always think in advance, and not correct your mistakes later.
Questions and discussion on the forum:
Supporting Information.
There are many reasons for disassembling a car side mirror. This may be a desire to paint it, or to put it in order after it was caught by some reckless driver.
How to disassemble a car mirror, and before that, how to quickly and easily remove it, is of interest to many car enthusiasts.
Due to inept movements, a car mirror can become completely unusable and then it will be necessary to purchase a new one, and as a result, the mirror will be installed in a car service center.
But there are many brands and, moreover, models of cars, as well as mirrors for them. There are also many types of mirrors - electrically driven, folding, with turning elements, and so on. The most important thing is how to remove it so as not to damage it. Below are general steps to disassemble a car side mirror.
Removing the mirror
First we dismantle
Naturally, it will be more convenient to disassemble a mirror removed from the car, so it should be removed. What is needed for this?
Removing a power mirror. First, you need to remove the mirror adjuster locking bracket, unscrew the three screws that secure the mirror to the door frame, and then remove the mirror itself.
Removing the electric mirror. The first thing to do is disconnect the negative terminal from the battery. Next, you need to disconnect the block from the electric drive wires, unscrew the three screws securing the mirror to the door and remove it.
Disassembling the mirror
Disassembly example
There are several ways to disassemble a car mirror.
First way
Using a curved object or a screwdriver, unclip the mirror by gently pressing it from the inside. Trying to pry the mirror off from the edge may damage it. Some car enthusiasts use a wide variety of objects to remove the mirror element.
It could even be all kinds of kitchen spatulas. Some wrap the edge of the spatula with electrical tape so as not to damage, or rather, scratch the mirror surface. Others use one hard spatula to fix the gap, and a second softer one to thread it into the resulting gap.
Second way
In order to remove the mirror element, you should sharply hit the body with a soft object - it can be anything.
How to peel off a mirror
In order to disconnect the mirror housing itself from the triangular mount, you need to remove the spring, unscrew the adjusting rod and remove the pin. Assembly and installation of the mirror is usually carried out in the reverse order.
Detailed and universal method
Universal method
Inside the car, you need to unclip the plastic cover that covers the mirror mounting screws. After removing the cover, unscrew the three screws that hold the mirror in place and remove it. After this, you need to carefully remove the rubber gaskets -
If the rubber gaskets are damaged, it will be very difficult to buy new ones; they are rarely sold separately.
Now you need to unscrew the two screws securing the mirror adjustment joystick. Disassembling the joysticks themselves is a simple procedure; you just need to carefully remember the position of the cables and the color, since different colors are responsible for their adjustment.
Next, you need to remove the three screws that are located on the lower plastic corner - it is most susceptible to damage during vehicle operation. After that you need to remove it too. How to remove the mirror element has already been described above.
After removing the mirror element, you need to unscrew the four screws and remove everything else.
Place on silicone glue
The easiest way, of course, is to ask a mechanic you know or send the car to a car service center if you need to replace the mirror or paint it. But most owners are accustomed to repairing their car themselves - after all, this is a significant saving of money.
How to disassemble the side mirror on a VAZ 2110, see the following video:
Mirror removal services
Every home, office, restaurant has such an interior item as a mirror. There comes a time when this item may deteriorate or break. In this case, it must be dismantled immediately.
Cost and prices
Minimum order service
| Dismantling works | 3,500 rubles |
If you still have questions about how much the work costs, don’t hesitate to call our managers! Our rates are really low!
Difficulties of the dismantling process
Removing a damaged or broken mirror is a traumatic and difficult job, especially if the mirror is glued or very firmly fixed in the frame. Dismantling manipulations in this case are associated with possible cuts.
Therefore, in order to avoid unpleasant situations, it is necessary to use the services of our professionals, who will remove the old mirror cloth from the frame or from the cabinet door in a matter of minutes. Masters have the necessary skills and also use special protective equipment and special tools.
How to remove marks on the wall after dismantling?
Once the mirror has been removed, you can begin to peel off the old adhesive layer . You can do this in the usual way, using a spatula or knife, if this place then covers the mirror again. To preserve the surface and not scratch it, you can use the second option: here the main assistant is gasoline or solvent.
The solution with dissolution is more successful if there is information about the composition of the glue. You need to apply a solvent to the surface of the cabinet and wait until it softens the glue and allows it to be wiped off. You can stick a new mirror onto the cleaned area, but this must be done carefully so as not to break it.
How to peel off a mirror from a cabinet if it is attached to it using construction substances
In this case, construction substances will be understood as disposable fasteners, represented by condensed liquids that have pronounced fastening properties.
So, we are talking, of course, about:
- double-sided tape (tape on which a layer of adhesive is applied);
- liquid nails (special construction adhesive, especially strong when hardened, which is used for mounting various parts, and in particular, installing a mirror);
- construction adhesive specifically used for working with specific surfaces.
Using liquid adhesives as a way to secure the mirror to the surface of the cabinet, you must understand that removing the mirror will most likely break it into many pieces
Removing a mirror from a closet door without damaging the mirror and also without getting hurt is very difficult if you don’t know specific tricks that will at least help you protect yourself. The fact is that when the required substances mentioned above are used, subsequently the mirror turns out to be tightly fixed and it is really very difficult to separate it without breaking it.
Features of cleaning marks depending on the type of surface
Before you begin to deal with tape residues, you should consider which method will be not only more effective, but also the safest and most gentle. It can be different for each type of surface.
Glass, mirror
Any removal method will do, except using abrasives or metal brushes , since it is not difficult to scratch the glass surface:
- You can use oil, alcohol, solvents or glass cleaners.
- Baking soda, which is a weak abrasive, and a school eraser will not leave visible marks on the glass or mirror.
- Paper tape can be soaked in hot water in advance to remove the top paper layer.
You can learn more about ways to remove tape residue from glass here.
Plastic
It is even easier to damage than glass, so no brushes or scrapers . Products made from polymers should also not be heated - some types of plastic may lose their shape and warp at elevated temperatures.
Find out more about removing tape marks from plastic surfaces here.
Tree
When transporting furniture, adhesive tape is used quite often. After all, it is so convenient to fix doors that are trying to open. But then the torment comes. It seems that the tape is firmly stuck to the smooth surface.
How to remove from a wooden surface:
The varnish will crack when exposed to high temperatures. In this case, there is no need to use active chemical reagents and solvents.
- The ideal method for cleaning varnished surfaces from adhesive residues is vegetable or essential oil, alcohol or glass cleaner. They will not leave any marks on the surface.
- It is prohibited to use vegetable oil only on unvarnished wood - the fat will be easily absorbed into it.
- You can rub the contaminated area with purified gasoline. It is not capable of dissolving varnish and paint.
- A rubber eraser can easily handle small areas. A dry cloth will help to completely remove any remaining tape.
Read more about how to clean tape and its residues from furniture in this article.
Laminate
Even a coating with a high wear resistance class can be damaged by an overly sharp blade. Scratching a regular laminated panel with a knife is even easier. Therefore, no knives .
Treating the surface with a solvent to avoid removing the polymer coating is also prohibited.
Since laminate does not tolerate large amounts of water, this is done with a slightly damp cloth,
Painted or wallpapered walls
Removing tape from such a surface is most problematic. It will be removed along with paper, acrylic or water-based emulsion. It is especially difficult to remove it from non-uniform, uneven surfaces.
First, the glue is softened with an iron: it should be warm, but not hot . Iron the problem area through gauze or a thin napkin. The softened tape will come off easily.
How to Remove a Mirror Glued to Liquid Nails
Treacherous Contentment
How to fix a mirror on the wall
Pull the cutting wire around the corner of the mirror. The fragments were used as a mirror. Using a homemade “thread saw” you can remove
glue
a mirror
from the wall without resorting to a hammer and chisel.
I remove mirrors from all surfaces that are glued to F/G or double-sided tape . The method is quite simple, but labor-intensive. Carefully place the string behind the mirror , heat the glass itself with a hairdryer (evenly) and saw the fastening (w/g or tape) with the string.
How to remove the steering column on a UAZ Bukhanka ~. We lead the string down. After a quarter of the volume has passed, glue the suction cup to the upper (passed) part of the mirror.
Many bathrooms have large mirrors that are simply glued directly to the wall without any framing.
How to fix a mirror on the wall
There are 2 main ways to remove a mirror, after which the mirror will remain intact for further use. You'll be using wire between the mirror and the drywall, so you'll need a length of wire longer than the diagonal size of your mirror.
This will minimize the number of fragments that will occur if the mirror cracks. Even if you want to use a mirror
going forward, this step is a necessary precaution.
Begin to smoothly stretch the wire between the mirror and the drywall in any corner, pressing it tightly against the wall. Move the wire back and forth to wedge it behind the mirror. How to remove the headlight unit on a Tuareg: how to remove the headlight unit on a Tuareg.md.
Once the wire is behind the mirror, stretch it to the opposite corner. By using a sawing motion, back and forth, the wire will not get stuck behind the mirror.
Choosing a method for mounting a mirror on the wall
This mirror removal method involves removing the entire piece of drywall that is glued to the mirror. Any adhesive connection, and especially adhesive tape, has its own thickness, that is, there will always be a couple of millimeters between the mirror and the chipboard. In order not to scratch the mirror amalgam during work, the narrow edge of the ruler should be lightly sanded with fine sandpaper.
Under no circumstances try to lift the free edge of the ruler high above the plane, this is tantamount to moving to a bend. Mirror
may burst. Before applying the new mirror, do not forget to clean off the old silicone.
There is another way to remove the mirror
without breaking it, this is a cutting method using nichrome wire, which is very often used by furniture makers.
In 100% of cases it leaves marks on the amalgam, hopelessly damaging the mirror .
Glue and Liquid Nails
According to archaeologists, people used mirrors back in the Stone Age, rubbing pieces of tin, gold or platinum until they shine. But the prototype of the modern glass mirror appeared only in 1240, when people learned to blow glass bottles.
Removing a large mirror
The science.
flat mirror only at the beginning of the 16th century in France. Removing and installing the rear bumper on a Ford Focus 2, how to remove the trim. The modern glass mirror is familiar to everyone and is a sheet of polished glass, on one side of which a thin layer of metal called amalgam is sprayed.
End-to-end mirror installation
After all, everyone knows that it is forbidden to store gasoline in plastic containers, since literally after a few hours the container turns into a liquid mass... We take a broaching string (from corrugated material), a hair dryer and a suction cup.
MAKE SURE THAT THE GLASS DOES NOT OVERHEAT AND THE TEMPERATURE IS EVEN DISTRIBUTED OVER THE ENTIRE SURFACE AREA.
The advantage of these mirrors is that they are cheap and easy to install, but there is a small risk of falling and breaking during use or cleaning.
Cover the front of the mirror with clear packing tape. This is the fastest and safest method if you are still planning to renovate the room and replace the drywall.
Make sure you wear pants and long sleeves when working with fragile glass. How to remove a mirror
, glued to silicone or
double-sided tape
.
Well, you never know, for whatever reasons, whether the form didn’t suit the client, or something else, it doesn’t matter, but take it off
necessary……
This is necessary in order to remove burrs from the metal and sharpen it slightly. We recommend leaving the old dowels in the wall, since during the process of removing them, the hole from the dowel often becomes even larger.
Method 1 of 2: Remove the wall mirror using a cutting wire
8. Laying cables in the wall Laying cables under plaster is one of the most labor-intensive and dirty jobs. Often home craftsmen do this with a hammer and chisel.
Hammer small nails crosswise into the wall near the cable, then cover the channel with plaster. After the plaster has dried, remove the nails and seal the holes with plaster. 15.
A good knot Even if this advice seems ridiculous, it will serve you well.
16. How to remove and clean a scooter carburetor; On my quad, like yours, the CF 500 started dripping. Choosing a paint rollerLong-nap rollers are especially good for liquid paints. 18.
Checking the base If the old paint on the wall stains your hand as shown in the photo, one thing is clear: neither the wallpaper nor the new paint will stick here. Such coated old paint must be thoroughly washed off with water.
After drying, the wall is covered with a layer of primer and only then paint.
20. Making work easier To easily paint high walls and ceilings, use a telescopic rod that extends up to 3 m. The paint roller is simply attached to the telescopic rod. How to disassemble the side mirror on an Octavia Tour? How to disassemble the Skoda Felicia GTZ?. Apply the next strip of paint nearby (while the paint is still wet) and spread again. Paint the walls completely without taking breaks.
26. Battery protection Although special rollers for painting batteries fit perfectly into the distance between the wall and the battery, they can significantly stain the battery with paint. 35.
Room temperature When painting, as well as when wallpapering, the room temperature should be normal. 37. Glue in the direction of the light Ceilings are always wallpapered in the direction of the light.
Thus, the wallpaper joints become invisible and do not create penumbra.
43. Trimming wallpaperOften the wallpaper ends up being several centimeters longer than the wall, and therefore a protrusion is formed. 45.
Behind the radiator To cover the wall behind the radiator, cut the wallpaper into a scallop shape: leave the upper part untouched and divide the lower part into strips. 46.
Accurate calculation The distance between the mounting supports behind the battery is measured, the roll is cut according to the measurements and cutouts are made. In this case, the wallpaper will be glued right up to the mounting supports behind the batteries.
However, removing an adhesive mirror can be challenging. Remove the entire drywall panel from the wall. Once you have cut out the entire perimeter around the mirror, take that piece of drywall with the mirror attached to the wall and set it aside. Therefore, when attaching a mirror to the wall, you must work very carefully so as not to accidentally damage the delicate mirror coating and the glass itself.
Safety rules at work
- The first and most important rule is to cover your body with clothing so that if something happens, the fragments do not cut your skin.
- The second rule is to work in an open place, preferably on the street. If this is not possible, it is necessary to thoroughly clean the room in which all work will be carried out, and to prevent any residue in the form of small fragments on the floor.
- The third rule is not to allow children to approach the tools or touch the door with the mirror, as the child may accidentally push it off or cut himself.
- The fourth rule is to regularly check your hands for small fragments and stop working if you notice that fragments have gotten into them.
- The fifth rule is that it is advisable to work in protective glasses so as not to injure yourself.
Removing mirrors at home is an activity that requires patience and the ability to take your time, as well as increased safety in working conditions. If you are not sure that you have sufficient skills for dismantling, and you do not know whether you can do it yourself, it is better not to tempt fate and call a specialist, paying, but saving your nerves and health.
However, using the methods described above and taking into account safety precautions, you can do it yourself in a short time, without losing money, which you will certainly succeed with the step-by-step help provided.
Safety regulations
Since it is quite difficult to peel off a mirror, and the procedure itself is not safe, it is important to follow the following safety rules:
- clothing should completely cover the entire body, and the elastic bands on the sleeves and legs should fit snugly to the body;
- Be sure to use glasses (it is better if it is a full-size face shield);
- all work is carried out in an open space, preferably not indoors;
- when working, it is necessary to exclude the presence of children;
- After work, wet cleaning is carried out several times;
- Hands are washed with soap more than 2-3 times to completely wash off all glass microparticles.
Although dismantling a mirror is considered a simple process, it is dangerous, because the mirror can burst at any moment, flying into pieces.
Note! Automotive hand cleaning paste is the best solution for washing your hands if your mirror is cracked or has visible defects.
Is it possible to glue a mirror with double-sided tape?
For more than 25 years, mirrors in the furniture and glass industries have been attached to double-sided foam tape. This made it possible to significantly improve the appearance of the products and simplify the installation of the mirror. ... Gluing a mirror in the bathroom or on a closet door is a simple task, easily solved with the help of self-adhesive tape.
Interesting materials:
How to change the departure date of an s7 e-ticket? How to change an electronic ticket to a paper one? How to change an electronic ticket for another date? How to change an electronic plane ticket? How to change a non-refundable ticket? How to change train tickets for another date? How to present an electronic train ticket? How to present an electronic Russian Railways ticket? How to present an electronic train ticket? How to present an e-ticket?
How to remove and insert into kitchen cabinet door?
Most often in kitchen cabinets it is secured using plastic L-shaped fasteners and self-tapping screws. It is easy to replace such glass sheet.
- Remove the cabinet door, place it on a horizontal surface, covering it with a soft cloth to avoid scratching the facade.
- Use a screwdriver to unscrew the screws, remove the holders, carefully remove the fragment and put it aside.
- Place a new canvas on the façade, ensuring that the edges overlap the façade equally. This is necessary to avoid accidentally fixing the glass, leaving the glass holder visible from the outside.
- The first element is fixed at a distance of 5 cm from the edge, the subsequent ones - 20 cm from each other.
If you are afraid that the glass holders may not support the weight, place them larger at a shorter distance.When using new glass holders, pierce them with an awl to make tightening the screws easier.
- Using a screwdriver, gradually screw in the screws so that the workpiece does not burst from excessive force.
Attention
Glass holders will firmly secure the new fragment to the facade of the kitchen cabinet. There is no risk that it will come off or fall off.
Mounting to plastic holders is the simplest, but least aesthetically pleasing way.