Your child will need a toy box for several years, and you can make it yourself.
It is not always advisable to purchase a special box for storing toys, since its main function is not aesthetics, but practicality. Spending incredible amounts of money on a piece of furniture that children will mercilessly exploit is not a very rational approach.
The best way to get functional storage for a nursery is to make a toy box with your own hands.
Scroll through: How to organize toy storage in a nursery
Toy cabinet
When the children in the family are over five years old, they need to be taught order, so the wooden box with toys needs to be replaced with more modern options.
This could be a chest of drawers or your own personal closet for storing toys. You can either make a closet yourself, or simply make a compartment in the furniture that is in your apartment. Making a toy compartment in an existing closet will be the easiest, since you can simply create a vertical partition to prevent toys from falling out, and teach your child to put them there when he is not playing with them. But since children always have a lot of clothes, not every family can afford to use up useful closet space just to store toys. Therefore, we have to make a separate cabinet. It is he who takes the place of the toy basket and thanks to this there is free space in the room.
The design of the cabinet, as well as the material of manufacture, can be very diverse. But it is best to make the option from wood, plywood or chipboard, since these are environmentally friendly materials that do not have harmful fumes, and accordingly they are excellent for children's rooms.
It is best to make a cabinet with a drawer at the bottom and an opening door at the top. You can store soft toys at the top, but at the bottom there are just small toys that are hard to put away every day. This toy storage cabinet is suitable for almost any child. True, the size of the closet itself depends on the number of toys that the child has.
You won’t have any problems with making it yourself, since you can buy accessories and materials in almost any store of this type, and the only tools you will need are a jigsaw and a drill to put everything together beautifully.
Making a storage box
It’s good when you can allocate a separate room for the nursery.
Then the presence of drawers is assumed in children's furniture. But if this is not possible, you have to optimize your living space. And preferably at no additional cost. Let's try to make a storage basket with our own hands. What is the difference between a box and a basket? A box is the same container, but requires a lid. And the basket is open, with handles.
Master Class
For this we need:
- Durable box.
- Stationery knife
- Glue
- Scotch
- Remnants of wallpaper or self-adhesive film
- Fabric, lace
If you don’t have a suitable box at home, you can visit the nearest store
It doesn’t matter if it’s grocery or household. Get acquainted with the back room worker, the guys who work there are usually very responsive
It’s good if you have a tape measure or a tailor’s yardstick in your pocket.
Of course, a wooden box would be stronger and more durable. But fruit boxes are usually not very durable and have splinters. They teach how to assemble a three-dimensional box from a flat blank in third grade labor lessons. The size of the box that will turn into a toy basket is determined by the size of the child. He will carry it himself. It’s unlikely that a two-year-old can handle a refrigerator box.
The thickness of the corrugated cardboard the box is made from will determine its durability. Even if a child accidentally sits on it, it will not break immediately.
If the box does not have holes for carrying, you will need to cut them. To do this you will need either a stationery knife or just a kitchen knife. It should be comfortable for children's hands to carry the toy basket.
Cover the bottom of the box with several layers of tape. A lot of grief comes from accidentally falling out of the bottom.
Glue, preferably PVA. It adheres wonderfully, dries quickly, can be washed with water, and does not leave marks if the work is not done very carefully. But it’s even more economical if you’ve just completed a renovation and still have some wallpaper glue left. Don't pour out excess! Pour it into a mineral water bottle; it will come in handy more than once in a family of handicrafts.
The outside of the box can be covered with self-adhesive film. It is sold in hardware stores that sell wallpaper. Often even by footage. If you have several boxes of the same size, the external design will help you determine the target accessory at a glance: where are the cubes, where is the LEGO, where is the railroad, and where are the doll household utensils.
Instead of film, you can use the remains of the wallpaper that covered your room. Then the box will not be conspicuous. And to determine what exactly is stored in it, paste pictures from donated boxes with construction toys, or advertising booklets, or thematic clippings from children's magazines.
The DIY storage box is ready. The design clearly indicates that we have a scattering of building material in it, can we load it? Wait! For a box with small parts, an insert is absolutely necessary! Yes, one that will allow you to send the entire construction site into a box with one easy movement.
To do this, you will again need some sewing skills and about a square meter, or better yet one and a half, of fabric. You can reuse old organza curtains, or a raincoat, or a sheet. The main requirement here is lightness and strength.
We cut out a circle with a diameter equal to or slightly larger than the perimeter of the box in height. We make a hem around the circumference to insert the lace. We leave holes at opposite ends of the diameter. In each of the holes we insert a lace slightly longer than the circumference, with a lock at the end. If we now pull both ends of the lace in different directions, our circle will turn into a small bag.
All the parts lying on it will be inside and together, without loss, together with the bag will move into the box. The reverse process is just as easy and simple - the sack is taken out of the box and laid out on the construction site. And here any part is much easier to find than in the box.
For doll outfits, a chest will be more convenient. After all, in any fairy tale, all valuables and gifts are stored in a chest. A hinged lid is perfect for this role. If you cover it with shiny self-adhesive, then Koschey the Immortal himself will envy such a chest.
For every small toy, you can make a small organizer with your own hands from fabric - based on a plastic five-liter bottle. This will also show the child ways to solve environmental problems - recycling.
Textile
Skillful hands can make a lot of interesting things out of fabric. For example, beautiful baskets for toys. You can also sew wall pockets for storing toys. This is a great DIY dollhouse. For small items such as toys from kinders, legos, etc., you can sew a fabric bag.
If storing toys becomes a large-scale problem in your family, do not rush to the store for special baskets and boxes. It is better to make them yourself from scrap materials. It is desirable that there are many such boxes; they should all be of different sizes. If the child knows that each toy has its own place, cleaning the room will take no more than 10 minutes.
Every child should have a lot of toys, because what would childhood be without them? Often children really have a lot of toys that they play with with great pleasure, but the question is - where to store them? Of course, any mother will agree that every children's room needs a special box for storing toys. It is very convenient and, in addition, it can help discipline the child, turning cleaning into an exciting game. Toy boxes are the weak points of every mother. Of course, you can simply purchase this accessory in a store, but it is much more interesting to make a toy box with your own hands.
How to make a toy box?
In order to make a toy box with your own hands, we will need the following list of materials:
- cardboard 2 mm thick, its quantity depends on the size of the box you want to make;
- PVA glue;
- tube of Moment glue;
- a huge number of magazines, newspapers, flyers and other unnecessary waste paper;
- scissors;
- knitting needle for rolling paper.
Let's get started:
1. For the box, it is better to take sheet cardboard with a width of 2 mm, no less, because the walls must be solid and stable. The box needs four walls and a bottom. If you also want to make a lid for the box, you will need another bottom and four smaller walls.
2. Using Moment glue, glue all sides of the box to the bottom one by one.
3. To consolidate the result and the box does not fall apart during use, we will need PVA glue and newspaper fragments.
4. We cover all seams with newspapers outside and inside. If you are making a box with a lid, you should strengthen the lid in the same way.
5. The base for the box is already ready, but its appearance is clearly not presentable. You can decorate the box in many ways - pasting it with fabric, paper, wallpaper, doing decoupage and, finally, the most interesting thing - pasting it with newspaper tubes, which is what we will do. Let's start making newspaper tubes. To do this, we take sheets of magazines and newspapers and cut them into strips about 15 centimeters wide.
6. Lubricate one edge of the newspaper strip with PVA glue and begin to wind the strip of paper at an angle of 45 degrees.
7. We make a sufficient number of newspaper tubes to cover the box.
8. Now we are all ready to decorate the toy box.
9. We begin to paste the tubes over the outside of the box. We glue the bottom and top of the lid in any chosen direction, but it’s still better that they coincide, and we glue the side edges vertically.
10. Of course, our tubes turned out to be of different heights. Now, using scissors, we align the height of the tubes with the height of the sides of the box.
11. The outside of the box is almost finished, let’s start finishing the inside of the box. Here we will make everything as simple as possible, we will cover the inner walls of the box with ordinary thick white paper.
If you have children, then you have probably noticed that your home is gradually turning into a branch of a toy store. Sometimes there are so many toys that there is a problem with storing them. In this case, broken toys should be thrown away, and old ones should be given to children who do not have many of them. The remaining toys are best stored in containers or special baskets.
In this article we will tell you how to sew a toy basket with your own hands.
- thick fabric in matching colors
- centimeter
- scissors
- pins
- thread and needle or sewing machine
- iron and ironing board
- a fairly large round object instead of a template (a large plate or pan lid)
Creative DIY storage
Modern furniture for a children's room is very functional, but it is not suitable for everyone and in most cases is quite expensive. You can show your imagination and create special storage devices yourself. The child can also participate in this, which will contribute to creative development.
If you have an old Soviet suitcase lying around on the mezzanine, you can put it to good use by attaching legs or furniture wheels. You should decorate the outside of the product with fabric or paint it with paints, change the upholstery inside and the unusual piece of furniture is ready.
Also, don't throw away shoe boxes. They can be excellent containers for storing various small toys, books, and creative items. You can cover them with colored paper or magazine clippings, paint them with bright colors and write on them about the contents.
Please note: when painting containers and boxes, it is better to use acrylic paints or art paints in a spray can. They are not washed off with water, and such storage devices will last longer. You can use wooden vegetable boxes to store toys
You need to attach furniture wheels to the bottom for convenience, and sand the box itself with sandpaper to remove any unevenness and paint it. The baby will be able to transport such a piece of furniture with him from room to room.
You can use wooden vegetable boxes to store toys. You need to attach furniture wheels to the bottom for convenience, and sand the box itself with sandpaper to remove any unevenness and paint it. The baby will be able to transport such a piece of furniture with him from room to room.
As you can see, the choice of storage systems for toys is quite extensive. The main thing to consider is safety.
Watch an interesting video about storing toys in a children's room:
Purpose
Plywood boxes have found their application in household needs, as well as during the transportation of goods. Such containers are quite popular at present; they can have the following purposes:
Valuable and fragile cargo is transported in plywood boxes. In addition to shipping boxes, decorative plywood boxes are in great demand, for example, for wrapping gifts for February 23rd. This type of container is also used on CNC machines, as well as for the manufacture of furniture bottoms.
Expert opinion
Strebizh Viktor Fedorovich, leading construction foreman
Before you start using plywood containers, it should be processed to level the surface and seal excess holes using wood putty. If you want to clarify something, please contact me!
Secret 2: divide toys into categories and sort them into boxes
Children cannot play with toys when they are stored in one big pile. Of course, it’s convenient to put them there. But why does everything end up on the floor again? The answer is simple: the child (or you yourself!) searches through everything to find the right thing (two identical cars, pyramid rings or cubes).
What to do? Sort the toys and put them in small boxes or boxes. Agree: it is impossible to put away something that has no place!
For example, we have drawers at home for the following categories of toys:
- major designer;
- LEGO;
- small designer;
- very small designer of the eldest son;
- cars, vehicles, balls, “boyish” toys;
- soft toys, toys for role-playing games, dolls - in a word, “girly” household;
- Railway;
- cubes;
- puzzles;
- wooden Toys;
- robots, spare parts;
- personal boxes.
There are also shelves for books.
Many or few? Enough! Toys in drawers should lie freely so that the child can find what he is looking for without shaking their contents onto the floor.
Recently, after another cleaning in the nursery, my daughter said to me:
- Mom, thank you for finding so many toys!
You will not believe! The children didn’t even notice that I removed two-thirds of the “good” from their room! They switched to what was left, because now they can find everything they need to play.
How to organize toy storage: ideas
You can put different boxes in the racks, into which small and not very toys can be loaded. Please note right away that wooden boxes (or made from, and other similar materials) are not the best option for small children. They are too heavy; children often injure their fingers when trying to reach toys. They also have hard, traumatic corners that can, of course, be rounded a little, but they still remain hard. Such boxes are suitable for schoolchildren. They already have more strength and better coordination. And it is better to organize the storage of toys for children in softer and less traumatic plastic containers/baskets or in thick boxes covered with colored paper or fabric.
It’s not so difficult to buy or make furniture for a wound, but teaching a child to put his toys there is a more difficult task. For girls, the rack can be decorated in the form of a house. Then she herself will resettle the “tenants” and create conditions for them.
This option will not work with boys. They usually have a lot of cars and the main task of storing the boy's toys is to arrange the cars. To do this, you can make an entire wall-mounted garage. These are long narrow shelves on which the entire fleet is located. Other options are transparent fabric pockets (sold as shoe storage systems) or a shelf assembled from plastic pipes.
To stimulate the desire to “drive” cars into the garage, you can make markings on the floor with masking tape, along which “after the shift” they drive into the parking lot.
In principle, such pockets can be used to store collections of dolls and soft toys.
When there is no longer enough space on shelves and racks in the nursery, more ideas are needed. In addition to pockets, you can make drawers (large) under a bed or table.
Drawers under the bed don’t take up space, and you can hide boring toys there
To prevent everything from being piled up in large boxes, you can put plastic baskets under small items. This way everything will be found faster than in a general heap.
Boxes can be installed in racks not only on shelves: it is possible to hang them. To do this, grooves are cut out in the side walls into which the sides of the baskets and baskets are simply inserted. You can take plastic baskets (if you find them with sufficiently rigid sides), or you can take metal ones - from the complete set of dressing rooms or wardrobes.
The largest free surfaces in a room are the walls. They can be used. For example, attach a strip of Velcro to a wall (the side wall of a cabinet, lamp shade, etc.). Sew small pieces of such tape onto the backs of soft toys. They will be easy to put in place and take off. And the decor will also become more diverse.
Velcro is one of the easy ways to find a place for soft toys
You can hang mesh pots made of wire or plastic on the walls. They also perfectly accommodate small dolls, bears, bunnies or cars.
You can borrow an idea from the kitchen: attach different bags to a horizontal pipe. To make the necks tougher, you can tighten them with a hoop or sew in elastic wire.
Pockets or bags on a pipe are another idea for storing toys in a nursery.
Pockets are also made on wooden bases. It can be cut out of plywood, painted, and several hooks, pockets and bags can be nailed on. The mini toy storage system is ready.
But not everything can be attached to the walls. Some items require baskets or boxes. For example, sports equipment - all balls, soccer balls and other equipment. They are conveniently stored in wire bins.
If desired, you can attach baskets to the walls and practice hitting the ball into the basket (away from breakable objects and windows).
Storing toys from the “cheap and cheerful” category - folding fabric baskets. Of course, they are inexpensive and look good, but they tear very quickly. Especially mesh ones: the toy gets caught, the child pulls it... there is a hole.
No matter how hard parents try, children don’t really want to put away toys. Or rather, they don’t want to at all. In this sense, a bag-mat is simply an ideal option.
This is an ingenious solution: a small “wall” is sewn along the edge of the round rug, and along its upper edge there is a drawstring through which the cord is threaded. To remove the toys, you just need to tighten the cord. The edges of the mat will rise and the mat will turn into a bag.
Then these bags can be placed somewhere near the wall or hung on special hooks. Really ideal.
Boxes for linen (MK)
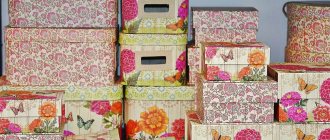
Such decorative boxes for storing books, shoes, linen and various small items can be made in large quantities; there are many different options for this. One of the practical options for the dressing room is a whole set of boxes with inscriptions or photos of shoes, so as not to search for the right pair every time. Here we use standard packaging boxes for shoes, preferably the same size.
A very necessary thing in a woman’s wardrobe is a laundry organizer box with different compartments for each item of clothing. Such an organizer can again be made from cardboard:
1. It is necessary to measure exactly all the dimensions inside the box: the frame of the box with the cells must exactly match the dimensions so as not to move in the future.
2. Strips of cardboard are cut out, covered with paper or fabric on both sides, the frame must be carefully fastened, pasting all the corners inside and out.
Related article: 6 ideas for decorating your phone - how to stand out from the crowd (42 photos)
3. For the cells, strips are cut for partitions; the easiest way is to make cells of the same size.
4. Similarly, we glue the strips of cells on both sides, leaving 1 cm on each edge (ear) for later gluing to the frame.
5. To fasten them together, slots are made in the strips at the required distance: in longitudinal parts from below, and in transverse parts from above; the strips are inserted into each other through the slots - a lattice is obtained.
6. The grille is inserted inside the frame and secured with “ears” into the frame (glued or stapled).
Making a laundry storage box
Using the same principle, a container for sewing supplies is made using a ready-made shoe box. Only it is better to make the cells of different sizes (for scissors, pin cushions, coils). It is better to make the lid of such a box hinged and fasten it with a button.
The easiest way is to buy a ready-made box in a store. But a thing made with your own hands is always unique and inimitable. Therefore, any housewife would prefer, using her labor and imagination, to create the necessary boxes for storing all sorts of small items in her household on her own, saving money.
The best posts
- 6 ideas for decorating your phone - how to stand out from the crowd (42 photos)
- DIY wedding decor: master class on creating invitations and other ideas
- Original homemade lamps for the wall: 2 detailed master classes
- Homemade chandelier for the kitchen - an exclusive component of the interior (MK)
- Do-it-yourself original lamps from various bottles (3 MK)
- Homemade products are the best gifts for loved ones (+42 photos)
- How to make a decorative cage with your own hands (2 master classes)
- Making a wall clock from cardboard: decoupage and quilling (master class)
Option 2: plywood
The author opalenyj.uzor from the website livemaster.ru suggests making a box-chest for toys from plywood. The photo of the final product amazes with its filigree and craftsmanship. The chest looks neat and will fit perfectly into the interior of any nursery.
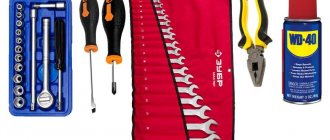
What you will need:
- Large sheet of plywood.
- Jigsaw (or plunge-cut saw with guide bar).
- Fraser.
- Groove cutter 6 and 12 dm (for milling grooves).
- Parallel stop with gauge.
- Overrunning cutter.
- Euroscrews.
- Drill.
- Water based varnish.
Manufacturing:
1. On a sheet of plywood you need to mark the dimensions of the sides of the future box.
2. Next, use a plunge-cut saw with a guide bar to cut the sheet according to the markings.
3. Check for the presence of a right angle in the workpieces.
4. Using a router and a 12-inch groove cutter, you need to make grooves in the walls of the box, since the chest is assembled not with screws, but with grooves.
5. For convenience in work, a parallel stop with a proprietary meter is used. Any other device can be used; the main thing is that the groove runs parallel to the wall and is at the correct distance from the edge.
6. Before you start milling, the workpiece must be secured to the machine.
7. To mill grooves in the bottom, a 6-inch groove cutter is required.
8. Using a jigsaw, rounded lines are cut out in the blanks using a template.
9. Next you need to cut two oval handles on the sides of the chest.
10. Using an overrunning cutter, the jigsaw cuts are adjusted to make them look neater.
11. The edges can be additionally “rounded” with a round cutter.
12. The cover is screwed on using euroscrews and a drill.
13. The box is assembled into grooves
In the manufacture of such a product, it is important to correctly mark the places for the grooves so that all the walls and bottom fit tightly to each other and can be easily removed
14. Next you need to coat the product with water-based varnish.
15. A beautiful and modern toy chest is ready!
Interesting selection: 26 shelving options - for books and toys
The big plus of the product is that it is easy to disassemble and assemble, and its capacity is enough to store all the toys in it.
Inspire us - share the material with your friends on social networks:
Read with this article:
Balcony racks - varieties
Such furniture is divided into several types, depending on what function the racks will perform.
Traditional. This type of design is distinguished by the fact that it has a standard shape and the shelves are open. It is mounted along the entire balcony wall. Owners can store any household items, canned goods or food for future use on such a rack. Each shelf is secured with brackets.
Low. Ideal for open balcony views. Typically, such models are located around the perimeter. The top of the product can be used according to your taste: as a shelf, a small sofa, or a tabletop. Angular. This type of shelving is used by loggia owners. It saves space. The name itself speaks for itself. The design consists of corner shelves, also attached with brackets to two walls. Built-in. This design is suitable for balconies with niches. It is in this space that the shelves are hung.
Requirements for the manufacture of structures
Balcony shelving
To make a balcony rack with your own hands, you need to think through all the details. First of all, you need to consider what you will store on the shelves and what weight these items will have? This must be taken into account in order to correctly calculate the load.
The balcony rack must meet the following criteria:
- Strength.
- Safety (reliable fastenings).
- Resistance to external factors (temperature fluctuations and humidity).
- Capacity. The product's dimensions must correspond to the space and not clutter it up.
- Ease of placement during use. The rack should not interfere with the penetration of sunlight and artificial light.
The balcony needs to be glazed, since wooden structures are not suitable for open spaces, and even if they are installed, they will not last long. A replacement can be a shelving unit made of plastic, glass, or metal.
DIY metal structures
The rack is made of metal and can withstand heavy loads, this is its superiority over wooden structures. To make a rack from this material yourself, you will need power tools (grinder, screwdriver), a hacksaw for metal, a tape measure, screwdrivers and an iron square pipe.
- The number of parts of the same length is calculated, then using a grinder we cut the structural elements according to the intended markings.
- To create the frame, we prepare: 6 pipes of 3 meters each and 8 fastening elements (three-sided, corner and clamping).
- An ordinary plywood sheet of standard sizes will make three shelves. It is best to choose a sheet with a thickness of at least 15 mm.
- Before cutting, the parts are aligned and measured using a bench square.
The metal shelving can be installed separately from the wall or attached to the back of the wall. This design is more reliable and safer.
To assemble a metal rack, the parts are inserted into fasteners to form a rectangular structure. Dimensional control is required, fasteners are adjustable.
The next stage is securing the frames to vertical racks. In this work you will need a tape measure and a building level to check the horizontal position. All that remains is to assemble the structure using bolts. The product is painted to protect against corrosion.
DIY wooden rack
Before you start making a wooden rack with your own hands, you need to carefully develop its design and draw a drawing. You need to take into account the location of the shelves and their size in order to already know what material and what quantity to purchase. For shelves you will need: chipboards or plastic, aluminum. For fasteners: confirmats 5x70 mm, corners 30x30 and self-tapping screws 4x16.
The first stage is cutting the shelves and processing the edges with film or sandpaper. Then we drill the fastenings for the shelves to the wall (should be marked in advance). Next, all that remains is to hang the shelves in their intended places. If doors are expected, then they are hung too. You can make hinges to fold the shelves when not needed.
What to make from cardboard boxes with your own hands
After you have used the cardboard for its intended purpose, you can give it a “second chance” and make crafts. They can be very different, from ordinary boxes with decoupage, to projects of castles, cities, various decorations, etc.
One of the main advantages is that such crafts are very good to do with children. Then they will not only develop creatively, but also receive a huge portion of interest and pleasure.
It is logical that girls will be more interested in carving dolls, various toys, and flowers. Boys will give preference to airplanes, cars and tanks. In any case, the development of perseverance, attention and motor skills will be a huge advantage.
DIY cardboard box shelves
Do-it-yourself rack shelves made of cardboard boxes step by step
Watch the master class on how to make this rack for things using the photo above.
Minuses:
- not very reliable
- not strong
Pros:
- cheap
- Just
This design uses two types of boxes
- these are the big ones from which shelves are made
- these are narrow ones from which drawers are made
All boxes are secured with regular tape.
View the embedded image gallery online at:
Adviсe:
- Light items should be placed on the upper shelves, larger and heavier items on the lower ones.
- when you cut large boxes, as shown in the pictures, then from these scraps you can make additional shelves for small items inside the shelves, for this you just need to make cuts in the trim and connect the scraps with a grid.
- These scraps can also be used as additional supports inside the boxes, in problem areas.
Photo source: wikihow.com
Chipboard product
To store children's toys, you can make a product from plywood or chipboard.
The walls and bottom of the box are fastened together with self-tapping screws; here, of course, you will need a man's help. To fix the box lid, it is best to use special spring holders. This design will prevent children from getting their fingers pinched. To easily move the storage box, it is better to install special wheels on it. They are sold in every hardware store.
The product must be varnished. The varnish must be transparent and non-toxic. The walls of the product can be decorated with various figures, numbers or letters. These parts can be easily made from wood using a jigsaw and painted in different colors, or you can consult with your children; perhaps they already have ready-made parts in their bins, for example, from puzzles. Then glue the decoration to the surface using glue.
You can decorate a wooden basket using a stencil and bright colors.
Installation of baguettes
Installing the top section of the baguette.
First of all, you should cut off a piece from the baguette to decorate the top edge of the rack. This can be done using a hacksaw and a miter box. The ends of the baguette must be beveled at an angle of 45 °
It is very important to strictly adhere to the required dimensions so as not to waste material. Apply glue to the fold of the baguette
Place the baguette and press it using clamps. The remaining parts of the baguettes are cut and installed in the same way. The last thing you need to do is strengthen the corner joints.
At the final stage of creating the rack, holes are drilled for the fastening fittings, and then finishing work is carried out: all the holes are puttied, the glue exposed at the joints is cleaned, and the finished rack is coated with a protective composition of one’s choice (most often, varnish is used).
First, markers for dowels are inserted into the resulting holes, with which you can mark the desired location of the hole on the second part so that the holes coincide when assembling. When the mounting holes are drilled on both parts, dowels can be inserted. After all this, you can hang or install the rack in the place chosen for it.
Since the toy rack is intended primarily for the child, you can decorate it not with baguettes, but in any other way that may come to mind for both the child and the parents. You can, for example, purchase multi-colored self-adhesive melamine edging, which will make the appearance of the drawers much more lively and fun. Some people buy chipboard sheets of different colors, which also looks very impressive in the finished product. You can cover the surfaces of the assembled shelving with adhesive film, which also comes in different colors and can imitate wooden or even marble textures. On sale you can find film decorated with images of cartoon characters or other fairy-tale characters. In some cases, they do it even simpler - paint the finished rack with acrylic paint and acrylic varnish (it is recommended to apply the paint in two layers, and apply one layer of varnish on top of it). To ensure that the paint dries faster and fumes from it do not linger in the room, you should open all the windows in the room as much as possible.
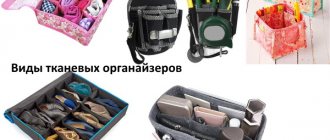
Organizers for children's rooms
With minimal sewing skills and a bit of imagination, you can please your child with functional and ergonomic organizers for toys - hanging fabric “containers” divided into several sections, or simply small bags made of colored felt, sewn together if necessary.
The advantage of this storage method is its compactness: organizers hang on the wall, the side wall of a cabinet or bookcase. They are convenient for storing not only toys, but also socks or handkerchiefs. By the way, we recommend choosing open shelves or shelves for toys, without doors, which children do not always get along with.
But not only baskets, drawers and organizers are used to store toys in the nursery. Chests, hanging bags, colored buckets, ottomans with pockets, trunks, stylized suitcases will certainly interest the little family member and awaken his interest in order. In addition, toy bags or toy nets, due to their soft shape, can easily be “hidden” in closets, pull-out shelves, under beds, which is convenient when there is a shortage of free space.
Using a Box to Create a Toy Box
After parents see prices for cute baskets or boxes for storing children's toys in stores, they want to create them themselves. This idea is not so bad, especially since it can be implemented in different ways. To create a box you will need a box made of thick, non-corrugated cardboard. Often they use packaging from household appliances of a suitable size. If there is no such container at home, then it is likely that it will end up with friends or relatives, since many people, after purchase, store the boxes throughout the entire warranty period.
Advice! If none of your loved ones have the box, then you can ask the seller at the department store for it. Usually there the goods are received in exactly this packaging.
Covering a box with paper
The found box must be freed from the lid by simply cutting it off on all sides. We cut holes on the sides that will later serve as drawer handles. For reliability and greater strength in the future, all joints inside the box are covered with tape.
To decorate the box you need to take multi-colored paper. This role is best performed by wrapping paper, as it is quite durable and has many bright patterns on the surface that can be matched to the overall design of the children's room. If paper is used in combination, it is cut into strips of equal width and length corresponding to the height of the box.
Advice! To simplify the work, you can use self-adhesive paper.
Using a brush, lubricate the area of the box to be pasted and begin to carefully apply the paper
You must try to glue carefully to avoid bubbles and wrinkles on the surface of the box. To do this, a piece of paper is ironed carefully from edge to edge.
The next sheet is placed with a slight overlap on the previous one. Thus, the box is glued on all sides.
Using scissors, carefully cut out the places where the handles of the box were previously decorated. We decorate the edge of the cut with a thin strip of the same paper. The design of the top cut of the box is created in the same way. The box is ready to use!
Covering the box with fabric
In this case, all corners and joints of the box on both sides are taped to make the finished box last longer. Next, you need to take fabric of one or more colors and cut out 2 sets of blanks from them in accordance with the size of the box. One should be exactly the same size, the other should be a little smaller.
Important! If the cutting is carried out in the shape of a cross, then the fabric consumption is greater than if the blanks are made in separate parts.
The blanks are sewn together to make 2 bags. One is pulled onto the box from the outside, the second is placed inside. Using universal glue, the blank is glued along the entire perimeter of the bottom of the box so that the bags are securely fixed to the box. Be sure to glue at the corners to prevent the fabric from moving. Hot melt adhesive works well as a fixing agent.
After the glue has dried, the upper parts of the blanks need to be folded inward and the box carefully sheathed on top. Using scissors, handles are cut in the planned places. It’s just worth noting that there is no need to cut out too large pieces of fabric. It is necessary to leave about 1 cm for a neat edge design. The remaining fabric is folded inward and hemmed. After the handles are decorated, the box is considered ready. You can leave it as is or decorate it as you wish.
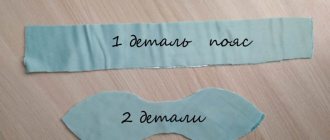
Making a box with handles
In order to make a toy box with handles using a box, you must follow the following algorithm:
We take 2 types of fabric, thick rope or tape, a glue gun or universal glue. Cut a strip of fabric that is enough to cover the bottom completely and wrap inside the box. The length should be such that it completely covers the perimeter of the box. Glue this strip to the box. In this case, the excess fabric is wrapped inward on one side and covers the bottom of the box on the other. We measure out fabric of a different color so that the piece completely covers the inside of the box.
We coat the surface inside the box with glue and glue the fabric prepared in advance
Important! Tucks are made along the edges and fixed at the junction of two types of fabric.
We measure out the tape or rope and glue it along the bottom, along the entire perimeter of the box. We measure two pieces of the same tape of the same length and glue them on both sides, forming handles. At the top of the box we glue another tape around the perimeter so that it covers the bottom of the handles.
Some tips from a professional
If a cardboard box is used as the material for creating a toy storage box, then it is worth checking its bottom and walls for strength. If they are soft, then such a box will not last long.
If you are making a wooden box, you must make holes in its walls or leave gaps so that the toys can be ventilated. For the same purpose, cardboard boxes with filling are not closed.
To attract the attention of a child, a toy box made using any technology must be brightly decorated. For example, you can use the patchwork technique, which involves gluing narrow strips of bright paper onto the entire surface of the box in a chaotic manner. Or square pieces of paper can be used for this purpose. You can go further and purchase ready-made decorative elements, for example, animal figurines or other images, bows, which are glued in random order to the surface of the box.
Advice! If there is no space in the nursery to place a box, then you can make several low boxes that can be easily placed under the bed or table.
= What can shelves be made from?
| made of wood Example: DIY flower shelves 230 | from metal pipes Example: DIY pipe shelves | from PVC pipes |
| made of cardboard Example: Shelf rack made of cardboard boxes | from paper | from plasterboard |
| from glass Example: Shelves in Art Nouveau style 180 do-it-yourself photos | from old boxes Example: DIY drawer shelves 120 photos | from pallets pallets |
| stainless steel | from glass | from old stairs |
| From bars | from bottles Example: | from driftwood and branches Example: Bookshelf made of branches and driftwood |
| made of bricks Example: | from newspapers Example: Newspaper shelf | From cans Example: DIY kitchen shelves: 456 photos, drawings, instructions |
Consumables
“You can make a box for children’s toys with your own hands from almost anything”
What exactly can you work with to get a really cute craft that will attract your baby's attention? As the photos say, you can make a box for children's toys with your own hands from almost anything. Its role can be played by:
- carton boxes;
- wooden container;
- plastic boxes;
- baskets;
- buckets.
You can make a children's toy box from almost anything.
In the end, toy storage can simply be cut out and assembled from leftover fabric. Let's see what can come of such foundations.