3/5 — (2 votes)
Good afternoon friends! Today I have an unusual topic for you, and this topic will be dedicated to an original toy called slime. Are you surprised or happy? I know that many of my subscribers have small children, and older children, who are captivated by such creations and are constantly drawn to something unusual, like a sticky and at the same time cool weirdo.
Of course, in stores and supermarkets in the toy departments now there is nothing but this rather unique souvenir toy. To be honest, I don’t really like this charm, but it’s unclear where to buy it, especially since now everything is mostly produced in China, it’s somehow dangerous and raises all sorts of doubts, so I suggest you make such funny and amusing Velcro yourself at home.
By the way, this toy is called slime. Have you ever made it yourself with your own hands? I think probably yes, since you are reading this article, let’s figure it out and learn from this work of art))).
I really liked the very last recipe, which I recommend everyone to make. The pictures and photos in this note are taken from a free Internet source, and the videos are from the YouTube channel. If you want to see your inventions here, write your reviews and suggestions below under this note.
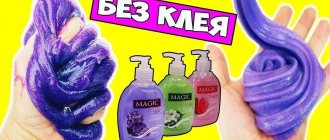
Slime without sodium tetraborate
Most parents assume that it is impossible to make slime without sodium tetraborate. However, there are more than a dozen recipes that confirm the opposite. In order to make slime without sodium tetraborate, we need to take the following ingredients.
Components and inventory
- 75 g of starch diluted in water in a ratio of 2:1;
- 60 ml PVA glue;
- 5-10 g food coloring;
- A few drops of essential oil will make the slime not only a fun toy, but also fragrant;
- One small plastic bag, it is better if it is closed with zip tape.
Cooking technology
- Pre-diluted starch should be placed in a prepared bag.
- Add glue to the starch.
- Add color base.
- Close the bag tightly and mix all ingredients until smooth.
- Remove the slime from the cellophane and let the excess liquid drain.
The toy is ready for fun. To prevent the slime from weathering, it must be stored in a hermetically sealed plastic container. If the child forgot to put the slime back and it dried out, it’s not a problem. Place the toy in a glass of warm water for five minutes.
Rules of care
- Washing powder slime should only be stored in a tightly sealed jar.
- Slime does not like temperature changes; It is best to choose a dark and cool place with a low percentage of humidity for it. Sunlight is contraindicated.
- If the elastic properties are lost, the toy is placed in the refrigerator for several hours.
We recommend: The unexpected fate of shaving foam: how to make slime from this and other ingredients?
Slimes are somewhat similar to pets: they also need to be “fed.” Lizuns “feed” on water or salt. Add a couple of drops of liquid into the container where the toy is stored. It is important not to overdo it, otherwise it will spoil.
“Feeding” with salt is also carried out in a jar. Slime needs no more than 3 grains per day.
Reference! It is strictly forbidden to wash the slime under running water: the pressure of the water can seriously damage it.
Toys based on “chemistry” can be very allergic, so they should not be given to small children. Yes, and adults need to monitor their health. Discard the slime if, after interacting with it, your skin remains red or irritated.
A simple recipe for slime made from water
This recipe will help you make a slime that, in its consistency and characteristics, will be as close as possible to store-bought toys.
Ingredients and equipment
- 2.5 g of boric acid powder (you can buy the component at the pharmacy);
- 30 ml of regular transparent glue;
- 5 g of any dye. You can use both regular food and natural vegetable juice (beetroot or carrot juice);
- 200 ml purified water;
- 2 deep cups.
Process of creation
- Pour warm water (100 ml) into one of the bowls. Send boric acid powder there and mix thoroughly until the component is completely dissolved.
- In a second container, dilute the remaining water with glue and a few drops of dye.
- Now pour the solution from the first bowl into a container with dye and glue. Mix all the collected ingredients thoroughly.
The end result will be a stretchy slurry that all the kids will love. Since sodium tetraborate was used in the process of making the slime, you need to warn children that it is strictly forbidden to taste the toy!
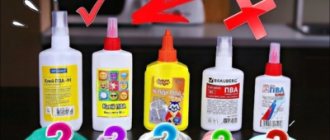
Cooking methods with glue
Despite the variety of recipes, glue is still one of the best thickeners for making slimes. Not only are such options for making “anti-stress” effective in terms of the durability of toys, but they are also simple. It is enough just to mix PVA with tetraborate, without adhering to any proportions, to be convinced of this. However, you shouldn’t limit yourself to just this option, because in stationery stores there are many different types of glue, which, in turn, allow us to make different slimes:
- silicate – great for creating transparent “slime”. Since it contains sodium solution, it combines well with boric acid and sodium tetraborate. As a result, it is possible to make a really strong and durable slime;
- PVA is the best thickener for fluffy slimes, which are made using shaving foam, gel, and other ingredients;
- glue "Titan" - paired with shampoo, gel, borax allows you to prepare elastic mucus. If the correct proportion is observed, you can make a slime with similar properties to store-bought counterparts: “Rancho”, “Ninja” and others.
The simplest recipe for slime made from PVA glue
This method of making slime will take a few seconds to implement. To do this, you need to purchase a jar of liquid sodium tetraborate at the pharmacy, PVA glue and glitter (optional) at the stationery store. Using decorations, you can make slime with bubbles that will burst in the process. The preparation procedure is as follows:
- Pour the entire tube of PVA glue into the container where the mucus will be prepared;
- Add glitter or beads;
- Add tetraborate, simultaneously stirring the composition until it begins to thicken.
As soon as he starts to grab the spoon, take it in your hands and start stirring. It is advisable to use gloves during the first stage of preparation.
Conclusion: simple and cool slime, proven.
Recipe for slime with shampoo and Titan glue
To make slime from glue and shampoo, we used thick Shamtu and Titan. Using these ingredients, you don’t have to worry about the exact proportions. It is enough to prepare the products, a container and sticks, dye with which we will mix the composition. The order of completing the task is as follows:
- Pour 50 ml of glue;
- Add shampoo ½ of the amount of “Titan” on top;
- Mix by adding gouache of your favorite color.
After a few minutes you will be able to make a beautiful slime. If it turns out too viscous, you can add glue. Place in the refrigerator for 20 minutes. It’s worth saying right away that this is not the best recipe, but it is simple.
Conclusion: good slime, but you need Titan glue.
Recipe for cologne and silicate glue
This slime option is only suitable for those children who have consulted with their parents. The fact is that perfume is expensive these days. It is advisable to have a budget option at home. For preparation you will need the following ingredients: simple perfume, dye, silicate glue. To make slime well, you must follow the following steps:
- Pour 100 milliliters of glue into the container;
- Add about 20 milliliters of dye (any color) on top;
- Mix and pour in 50 milliliters of perfume. “Triple Cologne” is excellent, which is inexpensive.
It’s worth saying right away that such a slime will smell good. Not everyone will like the scent of slime.
Conclusion: not the best option, but if there is nothing else, you can experiment.
Making matte slime from glue
To make matte slime at home, we need PVA glue, sodium tetraborate and powdered dye. Honestly, this slime is easy to make and looks really cool. First, you need to pour half a tube of glue into a container, add borax and mix thoroughly. Add 1 teaspoon of soda and matte dye on top. Silver or gold color works great. This recipe is attractive because there is no special proportion. If you added a lot of glue, just add a few more drops of sodium tetraborate. The dye is added until a characteristic shade appears. Actually, it will take a few minutes, and you can already warm up. The downside is that it is too viscous, like rubber.
Conclusion: persistent, cool handgam.
Transparent slime with glitter
By analogy with the above recipe, you can make a more viscous slime at home. To do this, in addition to the indicated ingredients (borax and PVA glue), we will need shower gel and glitter. Ingredients:
- PVA glue (transparent) – 70 ml;
- sodium tetraborate – 1 teaspoon;
- glitter (on the eye);
- shower gel - ½ tablespoon.
At the first stage, you need to pour glue into the container, then gel and mix thoroughly. Having received a homogeneous mass, add glitter and borax on top. Tetraborate should be poured as it is stirred. As soon as it thickens, knead it in your hands.
Conclusion: the recipe deserves attention.
Making slime without PVA glue
This recipe for making slime is one of the simplest and most accessible. In 98% of cases, each of us has all the components for the future slime at home.
Components
- Water;
- Gouache paint;
- Dishwashing liquid;
- Soda.
In this case, the detergent acts as an astringent. The amount of ingredients will depend on the size of the toy. Water will only be needed if the slime turns out too lumpy.
Manufacturing instructions
- Taking any convenient container, pour about 75 ml of dishwashing detergent into it.
- Next, gradually add baking soda. There is no exact number of grams, look at the consistency of the slime as you proceed.
- If the slurry is not elastic, you can add a little water.
- After adding gouache, mix the mixture thoroughly.
The slime is ready for a fun pastime. Warn your child that the toy contains a dangerous ingredient - dishwashing detergent. Therefore, after playing, you need to wash your hands thoroughly with soap.
Why is the slime too thick?
In order for the slime to be pleasant and interesting to play with, it must have a stretchy, ideal consistency. Beginners may end up with a too-hard, hard slime if they use too much thickener.
They may be presented with various substances in recipes. To obtain a pleasant texture, you need to maintain proportions, otherwise the slime will not stretch, but will only tear and crumble. We'll talk about the recipes below.
How to make slime from shampoo
Another simple recipe for making slime at home, which does not require a lot of time and a wide range of ingredients.
Need to take
- 100 ml of any hair shampoo;
- 100 ml shower gel or dishwashing detergent;
- Plastic bowl for mixing ingredients.
Step-by-step instruction
- Pour shampoo into a bowl.
- Add detergent or shower gel.
- Mix the two components thoroughly and place them in the refrigerator overnight.
- In the morning you will get a slime completely ready for fun.
As a precaution, warn your child that it is strictly forbidden to put the slime in the mouth.
Which dishwashing liquid is most suitable?
Reference. When making an anti-stress toy, detergent is used to give it volume, softness, and shine. Some of the drugs help increase the density of the composition, for example, “Fairy” and “Gala”.
When making it yourself, it is permissible to use any product:
- for dish washing;
- for washing;
- shower gel;
- liquid soap;
- shampoo and so on.
However, to obtain a well-stretched slime that optimally holds its shape, it is advisable to follow the recommendations:
- Do not use a drug that has expired.
- If there is no foam when the glue and detergent are combined, it means it is not suitable.
- Preference should be given to a thick preparation.
- The price does not matter - cheap and expensive products will do.
In rare cases, the detergent and other components of the slime can cause allergic reactions and dry skin. At the first signs of hypersensitivity, production and use of the toy should be abandoned.
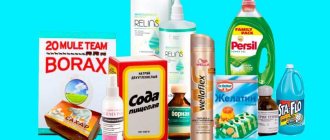
In any case, slime made at home is safer than store-bought analogues of unknown origin and composition. Means commonly used in making toys include:
- Fairy;
- AOS;
- Sarma;
- Persil;
- "Freken Bock."
When choosing a detergent for making a toy, it is important to pay attention to the expiration date of the product. This may cause the slime to fail. The liquid should be thick, the color does not matter. Although white and pearl shades allow you to accurately navigate with color when choosing a shade. Products do not have to be expensive to make good slime. The smell is of no small importance, as this is the aroma that the finished slime will ultimately have.
Homemade toothpaste slime
The advantage of using toothpaste in the process of making slime is the complete safety of the toy. By following this recipe, you will be able to prepare a toy that will be as similar as possible to store-bought slime.
Necessary components and equipment
- About 40 grams of gel-based toothpaste;
- Approximately 25 g of PVA glue. The main thing is that the glue is fresh and does not delaminate;
- Bowl and spoon for stirring all ingredients;
- A few drops of food coloring.
Step-by-step technology
- Squeeze about half a tube of toothpaste into a small container.
- Add PVA glue here and mix the ingredients thoroughly until smooth.
- Add a few drops of food coloring and mix everything again.
- Cover the container with the liquid and place it in the refrigerator overnight.
After 8 hours, you will be holding a finished toy in your hands, which will definitely bring pleasure to your child while playing.
Storage rules
The toy, which both children and adults are delighted with, sticks to surfaces and leaves no marks behind - this is the famous slime. It can be compared to thick jelly or jelly. It is made using a jelly-like material.
That is why, over time, it ceases to be elastic and attractive. If you know how to care for your slime, you can extend its lifespan. It is necessary that the toy “be neat.” So that it would be pleasant to play with.
Shaving foam slime
A fairly simple but good recipe for making slime is to use shaving foam. The beauty of the recipe lies in the simplicity of its implementation.
We will need
- About 150 ml of shaving foam;
- 100 ml PVA glue;
- Small bowl;
- Spoon for mixing.
Step by Step Actions
- Pour glue into a bowl.
- We send the foam there too. The key here is to add it gradually. The viscous and elastic structure of the slime is evidence that the right amount of foam has been added. Therefore, 150 ml of foam is a kind of guideline, because during the cooking process you yourself control the required amount of foam.
- Mix the ingredients thoroughly until you get a dense ball that sticks to your hands.
- We continue to knead the slurry until an elastic structure is formed. A well-mixed slime will not stick to your hands.
To make the slime brighter and more attractive, you can add a little food coloring during its making.
Required Ingredients
Slime requires a thickener. Washing powder or gel acts in this capacity. To enhance the action of the thickener, it is recommended to additionally use a component with similar properties. Prepare a mixture based on PVA glue. You can do without auxiliary components, but in this case the color of the slime will be uncertain. To obtain a viscous mass of the desired shade, a pigment is added - any substance characterized by coloring ability.
Additionally, the composition may include other components, for example, shaving foam, decorative elements (beads), etc. This will improve the properties of the substance and change its density.
How to make slime from soap
The following slime recipe can be made using liquid soap and shampoo as a base. To do this you will need to take.
Necessary components
- 100 ml liquid soap;
- 100 ml shampoo;
- 20 ml food coloring. You can also use brilliant green, beet or carrot juice;
- Bowl and spoon for mixing the product.
Creation method
- Pour shampoo into the container.
- Add liquid soap to your shampoo.
- Next, add food coloring and mix all ingredients thoroughly.
- After this, cover the resulting homogeneous consistency with a lid.
- We put our preparation in the refrigerator for 24 hours.
- After the allotted time has passed, we take the finished slime out of the refrigerator.
Everything ingenious is simple!
Shampoo+salt
Slimers often use multiple ingredients to create a stretchy mass. The easiest way is to combine shampoo and salt. Simple, isn't it? So, you will need:
- Shampoo (any brand, but it is best to take thick consistency);
- Salt (fine).
Preparation:
- Pour 4 tablespoons of shampoo into a prepared container.
- Add salt as the mixture thickens. It is best to add a pinch at a time, since if you add too much salt, the toy will not work.
- When the salt crystals absorb the shampoo, the future slime will thicken.
- Place the mixture in the refrigerator for 15 minutes.
And now about the disadvantages of this recipe. Due to the fact that only two ingredients are used, the mass is thick, but very sticky. You won't be able to fully enjoy the game, so it's worth adding more ingredients.
A simple slime recipe made from flour
The slime prepared according to this recipe is suitable for the little ones to play with. And even if the baby puts the slime in his mouth, nothing bad will happen. The technology for making slime consists of several simple steps that will not take you more than 10 minutes. So, to implement an exciting and safe toy you will need to take the following components.
Basic ingredients and equipment
- 50 ml water at room temperature;
- 50 ml slightly warm water (~40C);
- 400 g flour;
- Mixing container;
- Natural food coloring – 50 ml.
Procedure
- Place flour in a container.
- Fill the flour with cold water.
- After this, pour out the rest of the warm water and mix the ingredients.
- Once the dough has become elastic, you can add dye to it and mix everything thoroughly again.
- Wrap the future slime in a plastic bag and put it in the refrigerator for 4 hours.
- After the allotted time has passed, you can take out our bright slime.
Despite the safety of the toy, it is not recommended to taste it.
How to play with slime
Of course, the main function of slime is to bring fun in games. Adults and children love them because they can come up with so many different games.
- You can try inflating them. To do this, use only a straw. Place the slime on a flat surface and slide the tube underneath it. Now try to inflate the balloon. It turns out to be a lot of fun, especially if you put eyes on the inflated bubble. Small children are very interested in this activity.
- For the next game, use a syringe without a needle. Pull the toy in and then gradually push it out onto the table. It turns out to be a caterpillar. You can write words this way. This game will be fun and educational. Try mixing different colored slimes together. This way you can get a rainbow colored toy.
- A famous toy that is sold in the store is the net slime. You can make exactly the same by putting the slime in a mesh bag. This ball will be an excellent anti-stress that is almost impossible to tear.
We recommend: Why slime turns out liquid, how to make slime thick, great tips
Few people know, but slime can and should be looked after. Feed him salt (literally 1-3 pinches a day). Bathe in water, but do not overdo it so that it becomes too runny. The slime can grow if you put it in the refrigerator with a little water overnight.
How to make slime out of paper
Paper is one of the rarest components that is used in the process of making homemade slime. However, despite this, the slime turns out to be elastic.
To make it you will need
- 100 ml of fresh PVA glue;
- 70 ml water at room temperature;
- 25 g boric acid powder;
- Paper 4 sheets A-4;
- Cooking container;
- Natural dye 30 ml.
The process of creating a toy
- In a bowl, mix four components: water, boric acid, dye and glue. The mass should be sticky.
- Next, we immerse the paper in the container and begin to knead it with the adhesive mass.
- As soon as the slurry begins to resemble a lump of dough, it needs to be sent to dry.
- The ideal drying option would be direct sunlight. Duration 20 minutes.
This recipe is less popular than all the others, because the service life of such a toy is quite short - no more than 12 hours.
How to choose the right cream?
The market offers a wide range of hand creams. These cosmetics differ from each other in composition and consistency. Creams may contain:
- vegetable and animal fats;
- glycerol;
- essential oils;
- silicones;
- Vaseline and other components.
Each of these ingredients can have a certain effect on the consistency of the future slime. However, despite the above, you should choose a cream based on the following rules:
- purchase a product with a thick consistency;
- do not buy creams that have expired (this can cause allergic reactions upon contact with slime);
- do not buy a product that contains components that cause an allergic reaction.
Inexpensive creams that meet the above requirements are suitable for making slime.
DIY transparent slime
The process of making transparent slime is not particularly complicated. To make a transparent toy you will need the following ingredients and tools.
Ingredients and Tools
- 100 ml of transparent PVA glue, which can be bought at any stationery store;
- One tablespoon of boric acid (powder);
- The container itself for kneading the ingredients and a spoon (can be replaced with a wooden stick).
Step-by-step manufacturing instructions
- Pour glue into a glass container.
- We send boron powder there too.
- Mix the ingredients thoroughly until a homogeneous and elastic slurry forms.
Our slime is ready. Most importantly, do not forget to warn your child that after playing they should wash their hands thoroughly with soap.
Precautionary measures
When preparing and using slimes, the following precautions must be observed:
- Slime is a toy for 6-7 year old children. Preschool children should not be allowed to play with slime, as small children love to put everything interesting in their mouths and taste it.
- When making slime for a child or adult, you should make sure that he is not allergic to the components of the toy - a certain brand of paste, shampoo, shower gel.
- Even the most natural slime should not be given to children who have damaged skin on their hands - scratches, wounds.
- Homemade slime should be small in size - this will not only save flour and other components, but also make the toy more convenient and durable.
You should also remember that slime made from flour and additives will, sooner or later, begin to deteriorate. Therefore, if an unpleasant odor or residue appears on the surface of the slime, it must be thrown away.
How to make slime from starch
Another recipe that is completely safe and simple. This result can be achieved due to the absence of boric acid, glue and detergents. The technology for making slime from starch consists of simple steps that not only an adult, but also a child can perform.
Necessary materials
- 150 g potato starch;
- 75 ml warm water;
- 2.5 g food coloring;
- Bowl and spoon for mixing ingredients.
Step by step guide
- Pour starch into a container.
- Add dye to the starch and mix the two components.
- We begin to gradually pour in water, while stirring the mixture regularly.
- At first, the slime will look more like jelly, but with prolonged stirring, the liquid will turn into an elastic slurry.
Safe slime is ready to use. As a rule, such a toy pleases the child for two days. After this, you will need to re-use the proposed recipe to prepare a new slime.
Conclusion
Soap slimes are made very quickly and easily, and the result is a good, high-quality toy. Such slimes do not last long, but using containers with storage lids can significantly increase their lifespan.
Don’t be afraid to add glitter, balls, etc. to your slimes, this will make them more interesting and more pleasant to the touch. Also, do not forget that children under 3 years old should not play with slime; from 3 to 6 years old, children should play with slime only under the supervision of their parents.
Making slime from silicate glue
While PVA glue is mentioned in almost every recipe, we haven’t talked about silicate glue yet. By following simple basic steps, your child will soon be able to enjoy the fun of playing with slime.
You will need
- Silicate glue;
- Alcohol or regular vodka;
- Dye 5 ml. You can use either food coloring or regular brilliant green.
Manufacturing technology
- Mix alcohol and glue in equal proportions.
- If you use vodka, you will need 1.5 times more of it than glue;
- First, mix the ingredients with a spoon.
- As soon as you can form a lump from the mixture, we form it.
- Rinse the ball under running cool water.
The slime based on silicate glue is ready. Before giving a child a toy made with these ingredients, you should warn about the danger of the slime interacting with the mucous membranes of the body (eyes, mouth, etc.).
Why does it work
Persil laundry gel is an excellent choice of material for creating slime. This is an excellent thickener that works no worse than sodium tetraborate, which is usually used in slimes sold in stores.
In addition, various liquid washing powders are suitable as a thickener. You can use liquid Laska, but it will only work if you use office glue.
In recipes using PVA glue, Laska will turn the mass into granular cottage cheese, since PVA glue disintegrates when interacting with the elements contained in Laska.
Slime made from gelatin and plasticine
The final recipe of the article is distinguished by its ease of preparation. To implement it you will need to take the following components.
Components and materials
- 25 gram sachet of gelatin;
- 30 g plasticine. The color of this component will directly affect the color of the slime;
- 50 ml water;
- Bowl and spatula for stirring ingredients.
Stages of preparing the toy
- Dissolve the gelatin following the instructions on the package.
- Pour 50 ml of water into a metal container and place on the stove.
- Chop the plasticine into pieces and place in water.
- Melt the plasticine over low heat until a homogeneous consistency is formed.
- After the plasticine has melted, a gelatin solution prepared in advance is gradually added to it. At the same time, regularly stir the mixture with a spatula or spoon.
- As soon as a homogeneous mass has formed, remove it from the heat and let it cool.
The cooled slime holds its shape perfectly and has excellent plasticity.
The benefits of flour thickener for slime
All slimes are made according to the same principle. They necessarily contain a liquid component:
- glue;
- shampoo;
- liquid laundry detergent, etc.
They are supplemented with thickeners, which turn the liquid mass into elastic.
During the process of making slime, flour generates a lot of dust, so it should be used with caution by people with asthma or allergies. Flour is one of the most environmentally friendly thickeners for slime:
Flour is one of the most environmentally friendly thickeners for slime:
- It is absolutely safe for health and does not cause allergies.
- Such a thickener can be found in any kitchen, and if there is not enough flour, you can buy it cheaply at a regular grocery store.
- If the slime doesn't work out, you can always fix it by adding a little liquid or thickener.
The finished slime made from flour turns out to be very soft, but it does not stretch well enough. However, if there is no other thickener at hand, this option is quite suitable.
Precautionary measures
If you are making slime using salt, it is better to wear gloves, because if you have wounds or cuts on exposed skin, the salt will sting.
Depending on the components from which you make the toy, you may need to use protective aprons, gloves, and sometimes even a respiratory mask, as some components can cause an allergic reaction in the body. In addition, such protection will help you avoid staining your skin and clothes with dye.
Lizuna, as well as its components, should not be taken into the mouth, as chemicals can cause allergies, burns and poisoning. You should wash your hands after playing with slime. Use disposable tableware as containers. Do not use containers that will later be used for eating to mix ingredients.
What to do if nothing works out?
When creating slime, the following problems often arise:
- The toy does not stick. To do this, you need to drain the excess water from the mass, and then add a binder (glue, shaving foam, etc.) to the composition.
- Too sticky. In this case, you will need to add liquid starch or water (depending on the selected recipe).
- Too slippery. You need to add glycerin to the slime.
- Too soft. This consistency indicates excess water. To achieve the desired condition, it is recommended to add a small amount of salt to the slime and place the toy in a container with a closed lid for 12 hours.
- Not soft enough. By analogy with the previous recommendation, instead of salt, a small amount of water is added to the container.
- The size is insufficient. To make the slime larger, the slime must be kept in a container of water for three hours. After this (if the mass falls apart), you need to add salt and hand cream.
If desired, you can add essential oil or vanillin to the finished composition. Thanks to this, the toy will acquire a pleasant aroma.