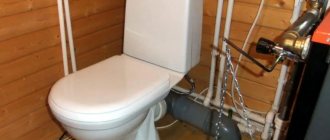
Each toilet model is equipped with a seat. This makes use not only comfortable, but also hygienic. Basically, the toilet seat has a lid. But the toilet, like any other plumbing fixture, can fail or the lid can get dirty. To fix a problem, it needs to be removed.
But even such a simple design sometimes raises questions. This is explained by the fact that, depending on the model, the fastening of different toilet seats is radically different.
What to do if you encounter such a problem? Why not call a specialist on this matter? Do not despair, because you can cope with the difficulties that arise on your own. If you have doubts about your abilities, or are afraid of damaging the structure, then this article is for you - in it we will tell you in detail about the types of toilet seats and how to remove them to clean them.
Design and material of manufacture
Based on their design, seats are divided into soft and hard. Soft models are covered with vinyl or polyethylene on top; they are very inexpensive, have a bright, cheerful design, are easy to use, but will not last long, since the upholstery will quickly tear or crack. Hard models are more reliable, they are not so afraid of mechanical stress, sharp objects and the aggressive effects of detergents. In addition, you can always put a special cover on the hard cover, which can be easily changed. The assortment includes a wide variety of covers made of plush, textile, eco-leather, vinyl, with a zipper or ties.
Today, manufacturers usually use two materials to make lids:
- Plastic;
- Duroplast.
Of course, there are also seats made of wood and MDF, but quite rarely and most often these are designer models that are rarely found in ordinary stores.
Plastic seats are cheaper and lighter, but they are easily scratched and break quickly.
Duroplast is a more modern material, it is stronger, which means this model will last longer
Another plus is that such seats often have an antibacterial coating, which is very important for maintaining hygiene in the toilet. True, such options are more expensive than conventional plastic ones.
Hinged connection
Attaching conventional structures is easy. You need to do all the steps in reverse order. Before this, you may need to assemble the purchased model. Typically, fasteners are based on plastic, metal, metal-plastic hinges.
Plastic ones are more often used in budget series. In addition to the price, they have another advantage - the absence of corrosion. Metal manufacturers use it in expensive structures. They last longer.
If the toilet lid needs to be replaced, the system can be disassembled. To do this, you do not have to remove the general mount; just remove the hinge shafts. The design depends on the manufacturer; it is better to study it according to the instructions. A locking pin at the end of the shaft is often used. You will need to tighten the pin, pulling the shaft out of the hole. There may be latches that have a lock. They must be rotated 90–180° counterclockwise. The shafts can be fixed with screws and screws.
How to remove and change the lid (seat) and fastening of the toilet with your own hands.
How to remove and change the lid (seat) and fastening of the toilet with your own hands.
It turns out that changing the toilet lid is as easy as shelling pears. Am I telling you this as a woman? The most interesting thing is that if you never look behind the seat, it seems that it is simply unreal. But one day I had to do it with my own hands, and even on 2 toilets, and everything turned out to be quick and simple. I was not too lazy to photograph everything so that girls and women could understand it even more clearly. The article will answer questions such as replacing, unscrewing, removing, installing, assembling, attaching, screwing, and securing the seat.
So what do we need?
1. Choose the right toilet lid.
Yes, yes, replacing the seat must begin with choosing the correct shape of the cover. Nowadays there is so much that is not sold in construction stores.
It is very important that your lid is not super expensive, soft, in the form of an aquarium, etc. and so on
namely the same size and shape as the previous one. In order not to bother with forms, you can simply take a photo of the old cover on your phone and show it to the consultant in the store, which is what I did
What else should you pay attention to? The fact is that the rim of the toilet may be wide, but you buy a narrow lid, in which case dirt will accumulate, plus the seat will not be stable
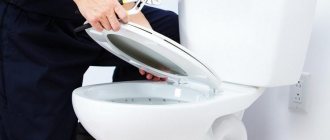
2. How to remove the toilet lid?
As you can imagine, the next step is to remove the seat. To do this, you need to look under the toilet. There you will find only 2 “nails”. We unscrew them, this is easily done by hand, without any tools. You just need to turn the beads in the right direction until they turn out. Yes, yes, the toilet seat is held on by 2 simple plastic or metal pins. So, your toilet is ready for updating:
3. Installing a new cover
We take the new toilet seat out of the box and make sure that it fits us and will be stable. We check the spare parts and prepare them, the most interesting thing is that there are a minimum of spare parts, and let me remind you that you do not need any tools for installation. Here is our “gentleman’s” set:
4. Tighten the screws
When you removed the old lid, you already realized that you need to combine these screws with the holes in the toilet itself. And insert the bent ends into the holes that connect the seat and the lid.
We insert from the inside. If you look closely at the picture, you will see them. The last moment is to screw on the caps:
Well, that's all, the toilet is ready for use!
A few points to consider:
— Cheap toilet seats have plastic screws, as you can see in the picture. When you twist them, just make sure they don't crack. Don't overdo it. Moreover, if you tighten it too much, the stability of the seat may deteriorate; if this happens, loosen one or both screws.
— For some lids it is not clear whether to insert the ends that connect the lid and the seat from the outside or from the inside. We have 2 toilets at home. When replacing the first one, I got into trouble. I screwed everything on, then I looked - the lid was sitting crookedly. I had to unscrew everything. And I still tightened it properly, and then regretted it?
— It’s not a fact that you will have exactly the same installation system. But the principle is approximately the same for everyone, so rest assured that everything will work out quickly and you don’t need a plumber at all. Well, how do they break the lids? Our husband tore off one of the lids with his foot when he was in a hurry to go to the toilet. And I tore off the lid of the second toilet when I threw some huge thing into the shower stall. Happens ?
Comments, answers to questions
How to drill or punch a hole in concrete, various methods.
Sale of fittings and components for plastic windows.
Review of equipment and technologies for foam concrete production, installation.
Operation and control of a forced-action concrete mixer.
Stages of designing ventilation systems for a home.
Aerated blocks for house construction, production and application.
Additives for concrete plasticizer and superplasticizer - application.
Installation of plastic panels - requirements and fastening rules.
Selection and application of varnish and oil on parquet and stairs.
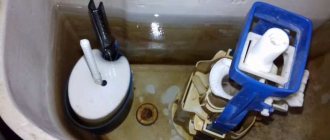
Replacing and adjusting the fill valve
Replacement involves unscrewing the nut securing the old valve and tightening a similar nut on the new valve. Of course, there must be a rubber gasket on the inside of the tank to ensure a tight seal.
However, there are a couple of nuances associated with installing the fill valve.
- Bottom fittings are often equipped with a fine plastic filter, which must be placed between the fill valve and the hose. Throw it away immediately: it will constantly become clogged with fine sand, which is safe for the operation of the valve. A coarse filter at the entrance to the apartment is much more effective.
- The flexible hose is connected without tension or bending with a small radius. The load on the fitting will significantly reduce the already short service life of the hose.
Attention: when tightening the union nut, do not use too much force. Not only are they unnecessary for soft padding; Excessive force can also cut off the threads on the valve.
How to adjust the valve actuation level in modern kits?
There are two options.
- The float can move with some effort along a plastic rail with projections
. To raise or lower it, just move the rack to the wider part of the hole in the float slot.
- Screw adjustment is no less common
. The float is adjusted by turning (using a screwdriver or manually) a long plastic screw.
( 2 ratings, average 4.5 out of 5 )
Related materials
In addition to a set of tools, before changing the toilet with your own hands, you need to purchase building materials for installation, including:
- pipe for connecting to the water supply system;
- sealant;
- corrugated pipe for connection to the sewer riser;
- tap;
- FUM tape;
- fasteners.
When exchanging a toilet - an old product for a new one - the main point is to ensure a reliable seal. Any loose connection or gap may result in a leak. When connecting a plumbing fixture to a sewer system, the best solution is to use silicone sealant in a cylinder.
Before replacing a toilet in an apartment or house, you should purchase plastic corrugated pipe products to connect it to the pipeline that discharges wastewater. This product is convenient because it is flexible and suitable in most cases. When bending, the corrugation can take different positions, compressing and stretching. It is suitable for both horizontal outlet and angled outlet.
To seal the joints, use sealing tape or do it the old fashioned way, using tow. The set of fastening elements includes screws, bolts, dowels, nuts, washers, plugs for connecting all components and carrying out installation work. If any fasteners are missing, they can be purchased additionally.
Independent design replacement
The replacement procedure is quite simple - everything needs to be done approximately according to this scheme:
- If the element is simple, in other words, made of plastic, then you need to find and unscrew the two thumbscrews, which are actually always located in the back of the seat. In most cases, this does not require any keys, since everything can be easily unscrewed with your own hands. But for some sets, a special wrench may be useful - a hexagon or a simple nut (as a rule, if such a tool is needed, it is included in the set upon purchase).
- When the screws are unscrewed, it turns out that all the elements “lose” their fixation and are easily removed from the toilet.
Installation and repair of a toilet lid with a microlift
Before installing the microlift cover on the toilet (wall-hung, floor-mounted, corner), you need to make sure that their fastenings match. The installation diagram for this product is similar to a regular toilet seat:
Four rubber inserts are inserted into molded recesses located on the underside of the seat. This ensures a soft fit of the seat to the ceramic body of the toilet.
- To ensure that the cover fits gently against the seat, two rubber inserts are inserted into it.
- The seat and the lid are connected to each other using a plastic sleeve, followed by the installation of a fastening bolt in it, connecting the fittings to the toilet body itself.
- An adjustment cup is screwed onto the mounting bolt, making it possible to adjust the height and uniform fit of the seat to the toilet. There is a rubber gasket on top that comes with the seat.
- The resulting structure is connected to the body of the plumbing fixture by inserting mounting bolts into the corresponding holes.
- Plastic nuts are screwed onto the mounting bolts on the underside of the toilet, which allows the seat to be firmly attached to the toilet. A tighter fit of the seat is achieved by metal adjustment cups.
In addition, there is a “demo version” of a seat with a microlift. It is represented by a removable seat with a lid with a “smooth lowering” mechanism. A lightweight option for attaching a toilet lid with a microlift is made using two adjustable hinges made of stainless steel, which is resistant to chemical and mechanical damage. Thanks to these hinges, it is possible to adjust and install the seat on the toilet. The “Click and Clack” fixation system makes cleaning the toilet easier and simpler. By pressing the button located on the inside of the hinge, you can release the seat from the attachment and remove it from the toilet. To return the seat to its original place, you must also press the hinge button located on the inside.
The microlift system is characterized by faster wear compared to conventional toilet systems. It works on the principle of a door closer, and if it is closed manually, the toilet lid microlift breaks. In this case, the microlift can retain the ability to move, but when lowered it creaks, although in normal condition this process occurs without noise. In addition, the lid may slam against the toilet, which can lead to chips and cracks in the plumbing fixture.
In order to know how to repair a toilet lid microlift, you need to correctly determine the cause of the breakdown. It is possible that the base with the lift mechanism has become detached and rotated from the toilet. The lift mechanism is connected to the back of the cover with two plastic bolts, screwed with nuts from below. These nuts must be unscrewed; if the bolts break, replace them. After which the toilet lid is reinstalled. When the nuts are tightly secured, the cover is well fixed and will not dangle. Complications of this process may be associated with the inability to reach the nuts without removing the toilet. To do this, you need to unscrew the device from the floor, disconnect it from the drain, replace the lid and reinstall the toilet. This process can contribute to problems with the tank.
To install and repair a toilet lid lift, it is advisable to use the services of professional plumbers. As practice shows, repairing such a device is almost impossible. It would be more advisable to replace the broken seat with a new one.
Problems when replacing a seat
Some problems when replacing a toilet seat or lid may occur on plumbing fixtures that have served the owners for several years. Removing fasteners on an old toilet seat is especially difficult if metal bolts and nuts that are susceptible to corrosion were used.
The high level of humidity in the toilet area is created by the water present in the flush cistern. This is the main reason for the appearance of rust and oxides on threads.
In this condition, it is extremely difficult to unscrew the nuts from the mounting bolts, and sometimes impossible using traditional methods. We have to resort to radical measures.
Metal fastenings of toilet plumbing fixtures, which do not have protection against oxides and corrosion, tend to “boil”. In such cases, only non-standard approaches help to unscrew the nuts
So, if the thread of a bolt or stud is damaged by corrosion and twisting the nut is not possible even with a wrench, the problem can still be solved.
Why do the following:
- Use an electric drill.
- Place a drill bit with a diameter slightly smaller than the wall thickness of the nut into the drill chuck.
- Carefully drill the nut from its bottom edge to the top.
- Insert a suitable metal rod into the hole.
- Try to “break” the nut using the pumping forces of the rod.
Sometimes a similar situation occurs on plastic fittings. It happens that during installation (during cleaning) the threaded part of the stud is accidentally damaged. A defect in the plastic thread will also prevent the seat mount from being removed in the usual way.
If you cannot twist the nuts using a tool, you can cut them off with a sharp thin knife, after heating the knife blade to the melting temperature of the plastic (120-130º C).
Part of the fastening fittings for seats with covers is made of brass and bronze. This metal does not corrode, but has the ability to quickly oxidize in the presence of moisture. The oxides, in turn, form “growths” on the threads, which over time become comparable in hardness to the same metal.
It helps to unscrew such connections by pre-wetting them (and holding them for a while) with machine oil. Apply lubricant to the connection easily and conveniently with a plastic disposable syringe.
Automatic seats
The product is a modern toilet lid, which has the following functions:
- automatic lifting when a person enters the room;
- automatic lowering after a person leaves the bathroom;
- smooth lowering and lifting;
- heating.
What to look for when choosing a product
To select a toilet lid without errors, you need to check its compliance with the following criteria:
- convenience;
- lifetime;
- dimensions;
- seat type and additional functions;
- colors;
- quality of material.
If you take measurements of the product before going to the store, there will be no problems with the third point. Colors should be selected depending on the decoration and style of the room. The quality of the material must correspond to its price.
Types of toilet seat designs
Difficulties with the toilet lid are in second place among the breakdowns of this sanitary device.
A few years ago, the toilet seat had a simple design and was limited in the number of models. These days, the plumbing market offers a wide range of products. In addition, the covers can be equipped with additional functions. For example:
- built-in bidet;
- seat heating;
- micro-lift.
Several factors can lead to product failure:
- long-term operation;
- manufacturing defects;
- careless use.
As a result of any of the above reasons, cracks may form on the toilet lid or the fastenings may fail. In both cases, you will need to replace the old toilet seat with a new one. The products themselves have two varieties:
- Articulated. The most common option. It is a structure made of a toilet seat, which is fixed to the base of the toilet using hinges. Hinges can be either plastic or metal. The first option is not subject to corrosion, but is inferior to metal hinges in strength and service life. Therefore, this design has to be changed more often. Chairs with metal hinges are installed on more expensive models, for example, with a micro-lift. Whereas the plastic option is inexpensive, so they are used to equip more affordable plumbing fixtures.
- Micro-lift. This is a more modern mounting option. It is a semi-automatic design that raises and lowers the toilet seat. The installation method for a micro-elevator is no different from the conventional version. But there are several engineering nuances that should be taken into account when replacing the product. Thus, the fastening mechanism consists of a spring, a rod, a cylinder and a piston. They are the ones that move the lid. Failure of any element leads to the replacement of the toilet seat. After all, without the appropriate skills, it will not be possible to repair a micro-elevator.
Reference! The first mention of the toilet is dated 1 AD. e. It was invented in Ancient China. The covers for the plumbing fixtures were made of varnished wood.
Removing the old seat
Before removing the old seat, you need to prepare the necessary tools. The degree of complexity of the work will depend on the material of the bolts. If they are plastic
, then you can simply cut them off with some old knife, previously heated over a fire. Even if melted plastic gets on the toilet, there won’t be any special problems with its removal.
Broken lid fasteners are the most common reason for repairs.
We tried to tell all the secrets in our review.
Brass
The bolts can also be removed relatively quickly. If the nut on them does not give in even with a little force, you should moisten the threads with a drop of kerosene or kerosene lubricant (from a car dealership).
It is more difficult to deal with steel
bolts. High humidity in the restroom can have a negative impact on them - they become rusty and difficult to handle. You can remove them using one of two methods.
- Carefully cutting off the heads with a metal grinder.
- Cutting through with a hacksaw for metal, having previously placed plywood or thick paper under the cut area so as not to touch the toilet itself.
Plumbers' advice
The most common reason for toilet seat mounts to break is the wrong choice of the toilet seat itself. Inappropriate shapes result in constant movement that takes its toll on the bolts. As a result, they or the areas that secure the covers to the seats break.
Holes for screw fasteners are characterized by a noticeably larger diameter than the bolts themselves. To prevent the toilet seat from moving on the threads hidden in the opening, you can wrap electrical tape and additionally place soft non-slip washers under the caps.
There is an opinion that the fastenings of hard seats break faster than those of soft ones. This fact depends on the installed shock absorbers. In any case, it is recommended to use metal ties.
Watch the video on the topic:
Disadvantages and advantages
The toilet lid with a microlift has become quite famous today, because this design has many good qualities:
- the microlift mechanism makes it possible to lower the toilet lid carefully and smoothly, and therefore the decorative coating will remain without scratches and the lid will not break;
- the service life of a seat with a microlift becomes much longer;
- the microlift mechanism works quietly, which is considered especially important at night when everyone is sleeping;
- The microlift design can work automatically: when you enter a plumbing unit, the toilet lid rises on its own; when you leave the room, it goes down. But only expensive models equipped with motion meters or thermal meters play this role;
- installation of this mechanism is considered very simple and quick.
A seat with a microlift also has certain disadvantages:
- the smoothness of the design prevents the lid from quickly closing when this kind of need arises;
- if physical force is used to close the toilet lid, the mechanism may fail;
- the structure is quite difficult to reconstruct or repair;
- if the mechanism is dismantled, then parts and internal connections can be damaged;
- When assembling, you should memorize the instructions exactly.
Conclusions and useful video on the topic
An installation video will help you quickly install the seat on gas lifts.
The toilet is a household plumbing fixture, the frequency of use of which is not comparable with the use of other household accessories.
It is not surprising that many citizens are puzzled by the problem of removing one toilet seat and then replacing it with another. But this task is solvable and can be done, if desired, with your own hands. .
Have you repeatedly changed the fasteners without changing the cover? Or do you prefer to buy a new seat to replace the boring old one when it breaks down? Or maybe you use one of the exclusive lid options - with a bidet function or with illumination? Share your opinions and recommendations in the comments below.
When is it necessary to replace a toilet tank?
Replacing a toilet cistern yourself is a completely doable task, so it is not necessary to involve professionals. There are many reasons why there is a need to replace the tank. Among them are the following:
- mechanical damage to sanitaryware (breaking, cracking, etc.);
- the formation of plaque on couplings, joints and other internal parts of the tank;
- covering the inside of the tank with a thick coating of limestone.
There are other reasons, but in all cases the step-by-step guide for replacing plumbing fixtures is approximately the same. To work, you will need a new tank, supply fittings, gaskets, bolts, sealant, and fittings.
Brass fasteners
If the toilet lid mount is made of brass, dismantling it will be quite simple. Such elements unwind easily, but if problems arise, you can use a method that reduces surface friction.
To do this, you will need a few drops of kerosene or special lubricant (use, for example, WD-40). The substance is used to treat the threads and surface of the plumbing fixture at the mounting location. After this, the toilet lid mount should be easy to unscrew. Then proceed as in the previous case: clean the surface and begin installing a new plastic product.
Installation
To install a toilet, you need the necessary tools and equipment.
Equipment
Before you figure out how to install a flush cistern to the toilet, you need to acquire the necessary equipment. You need to select it according to the following parameters:
On fixing the tank. It can be combined with a bowl, hung on a wall or installed hidden.
By supplying water to the tank. The inlet can be from the back, side or bottom. The lateral approach is the most common. The bottom liner allows you to carefully line the pipe, but makes installation difficult. The rear supply is almost never used.
By type of fittings. There is equipment with a lever, a button. The last type is used most often, it helps to save water consumption.
Also for installation you will need:
- shut-off mechanism - mounted on the water supply system, it can be used to shut off the water entering the tank from the general water supply network;
- liner - connects to the inlet pipe, can be steel, copper or rubber;
- drain mechanism - mounted inside the tank to regulate the drainage and collection of water;
- sealing tape – used to seal joints.
Tools
- drill and drill bits (one for ceramics, the other for concrete);
- wrench for connecting the water supply;
- core, for drilling marks, to avoid sliding of the drill along the plane;
- a rubber spatula to remove remaining sealant;
- pencil for marking.
What is double flush
To wash away waste and clean the bowl itself, a flow of water of a certain power and duration is required. Consumption rates for plumbing fixtures have long been determined and calculated. However, in many cases such power and size of the jet are simply not needed. But the regular model does not involve any adjustment.
The dual flush model allows you to reduce water consumption and ultimately pay less for using your water supply.
We are talking about a special mechanism that creates 2 drain modes:
- economical - only half the standard volume is supplied;
- normal – full volume of water.
The flow power in both cases is the same, but the different values allow for savings. The most famous representatives of this category include products from Roca and Jika. The adjustment is made by pressing the double button located on the drain tank: the part labeled ½ - economy mode, or the larger one - normal.
A variety of models with this mechanism are produced: floor-standing, for example, Roca Victoria, compact JikaLyra, hanging Gustavsberg.
Repair work
It is worth saying that the microlift system is characterized by faster wear compared to conventional systems. In addition, when you close the lid of the toilet cistern, which has a microlift system, manually, you reduce its service life. Of course, in this case the system can continue to be used, but it is best to make repairs so that it does not creak. To properly repair such a system, it is necessary to correctly determine the cause of the problem and only then carry out repairs. Quite often a problem occurs that the base with the lift mechanism is disconnected directly from the toilet. You can fix this damage either yourself or with the help of specialists. If you decide to repair such a cover yourself, then first of all you will need to unscrew the nuts that are screwed to the bolts connecting the back of the cover near the tank and the elevator mechanism. If these nuts are damaged, then they must be replaced with new ones.
If you cannot reach the nuts, then you cannot do without removing the tank and the toilet itself. In this case, you will need to disconnect the toilet from the drain and disconnect it from the floor, then install the lid in the right place and reinstall it. After such a procedure, problems may arise related to the operation of the tank.
For example, water can continuously flow into the tank or, conversely, it leaves from there all the time. The solution is that the float located inside the tank will need to be installed in the optimal position for you, approximately 2.5 cm below the inlet of the underwater pipe. In addition, other problems associated with the operation of the tank are quite common. For example, a faulty release valve. In this case, valve repair is most likely the last resort, short of completely replacing the valve.
https://youtube.com/watch?v=34_EhH10M8w
To solve this problem, the water must be released so that the valve moves and then leaks. If the movement of the valve was recorded, but no water flowed, then the problem is the float, which is most likely already worn out, which means it needs to be replaced with a new one. If advancing the valve and replacing the float did not help solve the immediate problem, then most likely the cause of the breakdown is something else, which means replacing the valve or float will not help you.
Additional functions
Today, a toilet seat can be equipped with the following additional functions and capabilities:
- Microlift. The lid is equipped with a special closer that ensures smooth closing. This function is also called soft close or soft closing. The microlift not only protects against loud noise when closing, but also against the appearance of cracks that can occur with a strong impact. Please note that the lid with a microlift cannot be closed by force, this will lead to rapid breakdown of the mechanism;
- If there are kids in the house, pay attention to models with a built-in pad for children. This will allow you to save on the purchase of an additional accessory;
- Heated seat. In this case, a connection to electricity is required; it is necessary for the operation of the device, which maintains a constant temperature of the surface of the seat in the region of 34-36 degrees. Using plumbing fixtures with such an accessory will be very pleasant;
- A separate category is smart seats; they can react to the approach of a person and include a bidet and hairdryer function.
Smart toilet seats originated in Japan in the 80s. These models are not very common here. They include many functions and require water and electricity connections. Bidet lids allow you to combine a toilet and a bidet in one piece of sanitary ware. The fact is that special nozzles are built into the rim of the seat, through which water is supplied. Such devices are usually controlled using a panel located on the case or a remote control. Additionally, such seats can be equipped with heating, an ozonizer, filters to remove unpleasant odors and a hairdryer.
What is the device used for?
A children's toilet seat cover is necessary for convenience. The dimensions of the toilet are designed for adults, so children do not feel very comfortable. Often children are simply afraid of falling into a hole, so they refuse to leave their favorite potty and give preference to the toilet. Of course, there is also special plumbing for children. However, not every family has the opportunity to install such an additional toilet. In this case, a special children's pad will come to your aid.
The device can be attached to the toilet in several ways. Manufacturers often make special mounts that come included. They allow you to hold the accessory on a standard seat. Also, some companies offer Velcro and brackets that securely hold the pad when a standard seat is lowered onto it. How to choose a device? If you decide that you need a children's toilet seat cover, then you need to take many parameters into account. Let's look at them.
If a breakdown occurs
It often happens that the fastening elements or the seat itself with the lid break, crack, and various chips occur. The reasons for these minor troubles are very different: they threw back the toilet lid too sharply, stood on it or on the seat unsuccessfully, dropped something heavy... But you never know the reasons, as they say: “breaking is not building.” You don't always want to go to the store for a new lid. Let's try to fix these minor problems ourselves:
- To fix a crack, there is a simple method: apply a little acetone to the cracked plastic - it is known to dissolve most types of plastic, then connect both parts along the fracture line and let dry. Dichloroethane has the same effect.
- If parts made of polyethylene or polypropylene break, fire will come to the rescue: you need to melt the edges of the cracked part a little, and then connect them and let them cool. Then carefully sand the seam - it will become almost invisible.
The models have one common “trouble”: often either the shelf itself or its ear breaks. This is due to the fact that the cistern is not installed correctly, without using any supports, and all its weight rests directly on the plastic fasteners. With this installation method, it is enough to lean your back on the tank while sitting on the toilet, or simply push it with your hand - and problems cannot be avoided.
Don’t rush to immediately run to the store for new fasteners or a shelf. Repairs can be carried out without leaving your home:
Clean the broken surface of any debris. We wipe it dry (you can use a hairdryer) - the surface should not be wet. Use any available means to degrease the surface (acetone or gasoline will do). If the chip is completely fresh, you don’t have to do this. Next, carefully mix the hardener and epoxy resin in any unnecessary clean container. Lubricate both sides of the chip with the resulting mixture and press them firmly against each other.
Important: any mixture that appears must be removed immediately before it hardens. Then firmly fix the connection. When the resin has hardened, we put everything in place: the tank with the shelf, and the seat with the lid
And don’t forget to support the tank this time - don’t step on the same rake twice.
We hope that these instructions for attaching the toilet lid and eliminating problems that may arise during its installation and dismantling will help you cope with such a simple task as replacing a toilet seat.
The topic of our article is the mount for the toilet lid. It would seem that what could be simpler - put the lid and seat in place? However, as in any business, there are subtleties here.
We will figure out how the seats are attached to the toilet and what problems may arise during their operation and replacement.
Are there any standards in the production of seats and covers? Or are they, like toilet lid mounts, produced entirely by manufacturers at their own discretion?
Nothing like this. The production of seats is regulated by no less than GOST number 15062-83. It also specifically specifies the fastenings used.
What interesting things can you learn from the text of the standard?
Plastic seats can be manufactured both with and without covers. Wooden ones are produced without lids.
- Plastic seats can be made from acrylic plastics, low-density polyethylene, high-density polyethylene, polypropylene, plastic polyurethane and ... any other plastics that are beautiful, pleasant to the touch and durable. The wording is, frankly, vague.
- Wooden seats are made from birch plywood. Only from her. In the paragraph above we have already seen a refutation of this point of the standard.
- Seat shock absorbers (rubber inserts that are located between the seat and the toilet) should be made of chemically resistant rubber of medium hardness.
- The toilet seat mount should be made of any plastic that is strong enough to hold the lid in place. For toilets with a separate shelf, however, low-density polyethylene is especially recommended.
- The seat must have at least four shock absorbers (see also).
- The toilet seat mount must allow it to rise and fall freely.
- The assembled and mounted seat must withstand, without cracking or destruction, a load of 120 kg, distributed evenly over the seat, or 80 kg along one edge. If you weigh more, you stand on the edge of the seat entirely at your own peril and risk.
The seat and lid package should include toilet lid fasteners and an assembly drawing.
Well... It’s interesting and informative, but the range of seats in construction stores does not always correspond to this standard.
Why?
Brief overview of manufacturers
The variety of products on the Russian market is explained by the presence of a large number of foreign manufacturers, since there are quite a few well-known and proven domestic brands. Among Russian companies producing toilet accessories, we can highlight such brands as:
- SANITA LUXE;
- Santek;
- Keramin;
- IDDIS.
Seat cover Sanita Luxe CLASSIC white thermoplastic. The cost of a set with a toilet is 5,750 rubles. A model with a microlift costs 150 rubles. more expensive than without it
Real high-quality products are presented to the Russian market by well-known foreign brands:
- Geberit (Switzerland);
- Cersanit (Poland);
- Laufen (Switzerland);
- Roca (Spain);
- Ifo (Sweden);
- IDO (Finland);
- Jacob Delafon (France);
- Villeroy & Boch (France);
- Vitra (Türkiye);
- Jika (Czech Republic).
The Laufen company is focused on producing luxury sanitary ware and accessories, and is also concerned about the problem of water conservation, so the products surprise with both their perfect design and technicality. The assortment includes many designer models for floor-standing and wall-hung toilets.
Model in pink color Laufen Mimo for a wall-hung toilet with a micro-lift, the color of the fittings is chrome, there is the possibility of quick dismantling. The lid is treated with an antibacterial coating. Cost – 8,600 rubles.
The Geberit company aims to produce the most comfortable products and every year surprises with new modern models with electronic support. Of course, the cost of seat covers is quite high and reaches 160 thousand rubles, but there are models for 25-30 thousand rubles.
Geberit bidet lid from the AquaClean collection with automatic rinsing, heating, infrared sensor, spray setting, hairdryer and remote control. Cost – 159 thousand rubles.
The Spanish company Roca specializes in the production of mid-level plumbing fixtures, but from high-quality materials. The assortment is varied - from inexpensive models for 3-5 thousand rubles. to electronically controlled seats for 50 thousand rubles.
Roca America seat cover in cherry wood-look Thermodure. Microlift, metal fastenings, convenient quick removal system. Cost – 11,500 rubles.
If you want to purchase an inexpensive and safe model, pay attention to the products of the Czech brand Jika. The cost of most models is 1.5 thousand rubles
– 5 thousand rubles. Classic type products, environmentally friendly, easy to use
rub. – 5 thousand rubles. Products of a classic type, environmentally friendly, easy to use.
The Jika Vega seat cover is white in a modern style, with an antibacterial coating, without a microlift. Material: duroplast, chrome-plated fasteners. Cost – 2,300 rubles.
Some useful tips for choosing:
As you can see, the choice is quite large and largely depends on financial capabilities. If funds allow, you can purchase more comfortable models with additional options, but there are also convenient, inexpensive models in a classic style with a microlift. When purchasing, do not forget about the size, quality of the material and the suitability of the style of the product to the environment.
From time to time you still have to change the toilet seat along with the lid. The process is actually simple and easy to do yourself. Even if you have never done this, the work will not be difficult.
Today our task comes down to telling you in clear language how to properly remove the old seat, what needs to be unscrewed and where, and then showing with your fingers how to assemble and screw on the new one.
Microlift device
Plumbing manufacturers are improving their models. There is a mechanism for lowering the lid called a microlift. It consists in the fact that the toilet closes on its own.
The structure needs to be secured in much the same way as a regular model. There are differences in the hinge mechanism. If the cover has to be replaced, it would be useful to study the operation of the device.
Parts that make up the microlift:
- cylinder,
- stock,
- piston,
- spring.
Breakdowns are usually associated with a malfunction of one of the listed parts. It is difficult to carry out repairs without experience, although sometimes the problem is hidden in the lack of the required amount of lubricant on the surface of the piston cylinders. This is due to improper operation of the mechanism when a person tries to close the lid by force.
It is worth disassembling the structure and trying to evenly distribute the lubricant over the entire area of the cylinder. Some owners decide to buy a new seat cover. There are those who find a microlift system for a specific model.
To install a new cover you need to perform a number of steps:
- Place microlifts on the pins of the platform patches.
- Place the seat cover on the floor, side up.
- Place microlift bushings into the holes of the ears.
- The left one is marked with the Latin letter L, the right one – R.
- Spacers should be placed on top of the holes located on the rear edge of the toilet.
- The structure, together with the microlift, is installed on the toilet, the pins are inserted into the holes.
- Everything is secured with nuts that are included in the kit.
There are models that are much easier to attach; just use a hex wrench. It is usually included in the kit.
There are all kinds of seat covers on the market, which differ in the type of material and the presence of additional functions. Good toilets and related products cannot be cheap. In order not to have to constantly replace the lid and toilet seat, you should choose a design based on quality, not external data.
Seat cover mounting options
The type of toilet shelf plays a fundamental role in the installation process, since the overhead copy, popularly called “eared”, will require more work and attention than a solid model. This is due to the need to fix the lid in the same holes where the water tank is attached. Before attaching the lid to the toilet with “ears”, you need to purchase auxiliary equipment - polyethylene clamps. They will be needed to secure the bolts holding the entire structure.
Fastenings for mounting the toilet lid
A few tips to make the process easier:
- the optimal mounting for the toilet lid is plastic or brass;
- when screwing in brass parts, it is advisable to use intermediate plastic washers (otherwise you can easily break the entire toilet);
- You should not choose steel elements for new structures and, if possible, you should replace them on old toilets;
- If, after installing a new seat, the toilet shelf moves and water begins to leak, you need to check the rubber cuff (for this you will need a flashlight and looking under the rim: if the structure is simply askew, just secure it with wire, and if there is a rupture or dilapidation of the element, a complete replacement will be required).
Installation of the toilet lid
The procedure for replacing the cuff is simple, but it still takes time. First you need to turn off the water supply, then disconnect the drain tank, and then remove the cuff itself. Before installing a new part, it is advisable to thoroughly clean the mounting area from lime and plaque. And only then proceed with installation:
- the narrow part of the product is placed on the toilet shelf;
- the water tank returns to its rightful place;
- the cuff is straightened and the wide part is thrown over the bell of the body;
- By draining the water, reliability and absence of leaks are checked.
Installing the toilet lid on metal fasteners
Installing fasteners for a toilet seat on a solid cast shelf is as easy as shelling pears: in such options, separate holes for installation and special clamps for “clamping” are already prepared.
First aid in case of breakdowns
Situations where the lid or mount for the toilet seat is damaged are by no means uncommon. There can be a lot of reasons for this: long service life and normal wear and tear, careless handling by the owners, a blow from something heavy, too much load on the surface of the product (for example, if you stand up with your feet), and many other options. If there is no opportunity or desire to purchase a new model, you can try to “reanimate” the old one.
Screw the lid tightly
Acetone or dichloroethane will help eliminate a crack on the surface of a plastic seat: just drop a little liquid on the accident site and tightly join the edges, then let it dry thoroughly.
Damaged polypropylene or polyethylene elements are susceptible to fire: the broken areas must be carefully melted to a soft state, connected and allowed to cool. And then lightly sand it. With care, the joints will become almost invisible.
“Eared” toilets have a characteristic unpleasant feature: if the initial installation is incorrect, the weight during use is distributed unevenly and for the most part the emphasis is on the plastic structure. Sometimes it’s enough just to lean harder on the tank or carelessly touch the product with your foot for the surface of the lid or seat to burst and the “ears” to fall off. The easiest way to fix it is to buy a new cover and install it carefully. However, you can correct everything yourself.
To do this you will need:
- thoroughly clean the damaged area from dirt and plaque;
- dry thoroughly (you can use a hair dryer);
- completely degrease (for example, acetone, gasoline);
- mix epoxy resin and hardener in any not too valuable container;
- Carefully coat the chipped areas with the resulting composition, while it is very advisable to remove excess mixture immediately, since the composition quickly hardens and is difficult to remove;
- Connect the edges of the chips evenly and press firmly against each other.
After final hardening, you can put everything in place, but it is advisable not to forget about the cause of the damage and put up supports or correct the entire structure. Otherwise, after some time the same problems will appear, but on a larger scale, which will require a complete replacement of the structure.
Plumbing, like any other equipment, breaks down sooner or later. However, in most cases, fixing these breakdowns yourself is not difficult. In this article we will look at how to dismantle and install a cover with a seat.
Conclusion
As we found out, anyone can dismantle and install a toilet seat on their own. The only thing is that the procedure should be performed carefully, especially if tools are used for this purpose, so as not to damage the toilet itself. (See also the article Valve for the flush tank: features.)
You can get some additional information on this topic from the video in this article.
Did you like the article? Subscribe to our Yandex.Zen channel
Installation tool kit
The process of connecting a toilet to a sewer requires a preliminary assessment of the necessary materials. The choice of plumbing and connecting fittings depends on the type of sewer riser supply, the intended installation location of the toilet and its type.
In addition to the equipment itself, when installing a toilet yourself, you may need:
- Sewer corrugation.
- Plastic corners and adapters.
- Eccentric cuff.
- Silicone.
- Rubber seals and adapters.
- A saw for plastic pipes or a regular hacksaw for metal.
- Tape measure, pencil, hammer.
- Tools for dismantling old sewerage elements and fixing the toilet to the floor.
To remove old cast iron pipes, you may need a professional hammer drill and grinder, but in such advanced cases it is better to invite specialists with their own tools for dismantling.
Replacing the seat cover
One of the significant reasons for fatal mechanism failure is the wrong choice of model and errors during its installation. Therefore, when purchasing a new cover, you should be guided by the following rules:
take into account the dimensions of the plumbing fixtures; pay attention to the shape and configuration of the toilet; give preference to products from trusted manufacturers.
The seats on sale with a lid equipped with a closer are suitable for toilets of any design: floor-standing, side-mounted, wall-hung.
When choosing a new model, it is important to take into account the features of the plumbing fixture and pay attention to ensuring that the distances between the system fasteners coincide with the seat fastening locations
To replace a broken cover with a closer with a new one, you will need a set of tools:
- hacksaw;
- pliers;
- socket wrench.
The materials you will also need are silicone or oil to process dried elements. Ideally, it is better to use a special lubricant that, penetrating into the cracks, freezes the rust.
Traditionally, the lid with the toilet seat is secured with two bolts. But in some models a metal pin may be used instead. To dismantle you just need to lift the cover and then unscrew the pins.
If the cover has been used for quite a long period, there is a high probability that the bolts have become clogged, and the fastening points have become coated and “fused” to the body.
To ensure easier unscrewing, simplifying your task, the bolts will have to be pre-coated with oil or silicone, but this is not always effective
Using pliers, carefully, trying not to damage the decorative surface of the toilet, unscrew the clamp and bolts. To protect your plumbing from possible damage when working with pliers, it is better to cover the surface with rags or pieces of cardboard. This recommendation should not be ignored. Otherwise, at the slightest mistake, you will have to change not only the lid, but also the toilet.
As a last resort, if the processing did not give the desired result and the bolts do not give way, they can be sawed with a hacksaw or cut off with a hot knife blade. There is no need to worry that melted plastic will stain your plumbing fixtures. After hardening, it will not be difficult to remove from the surface.
Having dismantled the old lid, the remnants of dirt, accumulation of rust and limescale are removed from the grooves on the toilet, after which bolts are inserted into the fastening points and the structure is fixed.
Installation of the new cover is carried out in the following sequence:
- 4 rubber inserts are inserted into the new seat cover. They will ensure a soft fit of the product to the seat.
- Fasteners are installed in the cast holes on the toilet. They are screwed using rubberized seals, supplemented with a clamp or by means of a bolted connection.
- Seals are installed in the seat, connected to the fastenings on the toilet.
- Fix the cover to the seat using a bolt, a plastic sleeve and a cup, which will be responsible for adjusting the height.
- The structure is centered and the seat is checked for fixation strength.
Since the key cause of mechanism failure can be the incorrect position of the lid and seat, it is so important to accurately adjust the system when installing the structure. The adjustment process to ensure uniform fit of the device over the entire surface of the sanitaryware is carried out by rotating the cups screwed onto the bolt
An important point: adjustment and alignment are carried out at the stage when the fixing nuts are just attached, but not yet firmly tightened
The adjustment process to ensure uniform fit of the device over the entire surface of the sanitaryware is carried out by rotating the cups screwed onto the bolt. An important point: adjustment and alignment are carried out at the stage when the fixing nuts are just attached, but not yet firmly tightened.
To consolidate your knowledge and better imagine the process of repairing and installing a toilet lid, we offer useful and interesting videos.
Toilet mounting repair:
How to install the system correctly:
In the future, in order to reduce the risk of premature failure, it is important to periodically check the position of the device and adjust it during operation. And remember: a seat with a lift device is a “smart” mechanism that requires careful handling
The microlift in the toilet is similar to a door closer. Thanks to this element, you can really smoothly lower or raise the lid along with the seat
If you want to purchase similar equipment for a toilet, be sure to pay attention to its advantages, disadvantages and selection criteria
The final stage
At the end of the work, you need to securely fasten the tank, since this is the main part of the toilet and damage to it is unacceptable.
If you wish, you can install the toilet installation yourself. This is a special assembled system with a tank, the height of all elements can be adjusted, so installing the toilet is very convenient.
Recently, toilets with a compact tank have also become very popular; it is located on an elongated shelf of the toilet.
Now we will look at how it is installed:
- Secure the tank to the wall using 2 long bolts.
- Then put a special cuff on the pipe going to the tank; it is supplied in the kit.
- Next, connect the pipe to the tank; first, you need to wrap the thread with fum tape.
- Now turn the cuff back, so all connections will be perfectly blocked by it.
If you have installed a standard toilet tank, then you can use an interesting trick.
We hope that our article will help you in carrying out work on installing a toilet. We wish you success!
Making a toilet seat
To build a toilet seat for a country toilet with your own hands, you don’t need to make extra efforts - such a design can be made by anyone who knows how to handle a standard set of working tools.
The easiest way to make a rectangular wooden structure is to consider the sequence of its construction: You can make a wooden toilet seat with your own hands
- Prepare wooden blocks: four long and four short for the base rectangle, and four for the cross supports.
- Assemble a frame from the base bars, connecting the parts with self-tapping screws. Strengthen the top and front sides of the resulting rectangle with cross bars. The height of the structure must be at least 40 cm. The width of the frame must completely cover the opening of the toilet.
- Prepare boards or plywood sheets and cover the installed frame with them.
- Using an electric jigsaw, cut a hole in the center of the top trim for a direct seat.
- Construct a toilet seat from the boards: cut four parts according to the dimensions of the previously made hole and connect them using self-tapping screws. Cut out a cover for the seat from the same boards. The latter can either be tied to hinges or fixed to the seat with bolts.
- Install the seat onto the frame structure.
- Attach four shock-absorbing rubber pads to the back of the seat.
- Treat the outer and inner sides of both the toilet seat itself and the entire frame structure with water-repellent and antimicrobial compounds.
Thus, there are two ways to get a toilet seat - buy a ready-made model for your toilet or make it yourself from scrap materials. Whatever option you choose, always focus on the operational requirements for the toilet seat - both store-bought and home-made designs must meet a number of the above indicators so that visiting the country toilet does not cause discomfort.
Selection criteria in case of replacement
If it so happens that the question of replacing the toilet seat has arisen, you need to choose a toilet seat that matches the existing plumbing fixtures. It is recommended to take measurements of the plumbing fixture in terms of dimensions and shape. You should also clarify the location of the mounting holes under the seat.
The width size is measured at the points of greatest “run-up” of the structure. The length dimension is taken from the edge of the front part of the curb to the point of the center line passing between the centers of the holes intended for attaching the toilet seat.
Standard dimensions of plumbing fixtures for different designs. Based on these parameters, a toilet seat is selected in case of a new installation to replace the old toilet seat. If you know these dimensions, choosing a seat of a suitable configuration is easy.
Often, toilet owners who have had to change the toilet seat prefer to choose more advanced models instead of the standard design. This choice is explained by their desire for novelty.
Meanwhile, new products “with heating”, “with backlighting”, “with motion sensors” in practice turn into even bigger problems. A serious manufacturer of plumbing fixtures is not yet in a hurry to offer such an “exclusive” to the buyer. Such proposals usually come from Chinese companies.
Recommendations for choosing a new seat
Multifunctional Toilet Seat
Ceramic bowls come in different shapes and sizes, most of them are oval, but you can also find square and round ones. In any case, both parts will need to match each other in order for use to be convenient, comfortable and safe.
It is recommended to adhere to the following recommendations when choosing a lid:
- Take a photo of the item on your phone to have an idea of what to look for, as well as the opportunity to show the desired item to the seller, who can quickly navigate and help.
- Measure the bowl in all positions and write down the data. A good idea is to make a template from thick fabric, cardboard or wallpaper. With such a pattern, errors in shape and dimensions are completely eliminated.
- Think over the functionality . It may make sense to spend a little more time and money, but buy a product with useful options.
- If you are looking for a lid for a children's seat , it is advisable to give priority to sloping shapes. Sharp corners can injure a child or tear clothes.
- The color can be matched to the bowl and cistern, but it is quite possible to settle on coloring or contrast. It's a matter of the owner's taste.
- It is worth choosing a material that gets dirty less and is resistant to abrasion. Otherwise, very soon the new thing will lose its representative appearance and will seem old and dirty.
Valera
The voice of the construction guru
Ask a Question
Before paying for the product, you must carefully inspect it for damage, completeness and functionality. If there are gaps, squeaks, or jams, it is better to refuse such a thing, even if there is a discount on it. It is imperative to make sure that the accessory comes with a warranty. The receipt and accompanying documents must be retained.
Overlay shelf
This design is also called “eared”. You will need to install the toilet lid in the same holes as the cistern, which complicates the work. Attention is paid to:
- Type of fasteners. For fastening, only brass or plastic fasteners are used, since steel is susceptible to corrosion.
- Plastic washers are provided for brass bolts. If secured using metal elements, the toilet may be damaged.
- Preventing the shelf from moving relative to the toilet. In this case, the tightness of the tank structure will be broken and leaks will occur.
- Steel fasteners must not be used. Their use will lead to corrosion and problems during further repair of the device.
To install the seat, you need to lift the toilet tank. At the same time, check the integrity of the cuff between the tank and the toilet.