Cheerleading has become the most popular area of artistic gymnastics in recent years. Cheerleading is a sport that combines elements of dance, choreography, and gymnastics, requiring certain physical training.
The cheerleading movement originally arose abroad, but recently in Russia this sport is actively gaining popularity.
As a rule, this area of artistic gymnastics is of interest to teenage girls, who are called “girls with pompoms” due to the obligatory presence of sports equipment in the form of bright pompoms of a wide variety of colors in their performances. Today it is not difficult to purchase equipment for performances and for fans in specialized stores, but there is an alternative option - making it yourself .
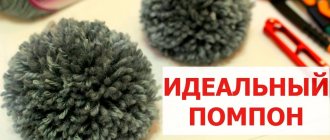
How to make pom-poms for cheerleading with your own hands from bags: master class
The following description tells how to make beautiful rustling attributes for a support group from the most ordinary cellophane bags. We will find out what is needed for the creative process from the list of materials:
We lay out the bags one by one in stacks of 15-20 pieces. Next, we cut off their top edge (with handles) and bottom (bottoms of the handbags). Let's start making the “petals”. To do this, cut the entire stack into strips, not reaching the bottom edge of about 10 centimeters. In this way we arrange all the stacks of bags. Next, we place them one on top of the other, gather the bottom edge and wrap it with tape, forming a handle. We straighten all the petals. The product is ready.
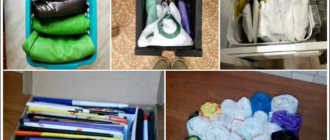
Today, self-made cheerleading pom-poms are used not only for their intended purpose. These items decorate festive halls and just the interior of the room. It looks elegant and fun.
Alexandra Kisarova
Such pompoms
They are perfect for step aerobics and will colorfully decorate a performance, especially if the performance is held in honor of a holiday.
Find at least bags of different colors
, there should be enough of them so that
pom-poms
for your whole team.
To create pompoms
you need to prepare:
1. Garbage bags
, 35 liters, in the amount of 10 pieces per 1
pompom
(5 pieces each in blue and pink, you can take other colors if desired)
2. Elastic bandage, tubular, No. 3
3. Scissors
4. A bottle
5. Lots of patience)
Let's get to work.
We tear off 5 packages
from rolls of blue and pink color, cut off the bottom of each.
Cut each one crosswise in half.
And again in half, this time lengthwise.
Let's start cutting the bandage.
Also in half.
We put it on a bottle or other cylindrical object, the main thing is that it is slightly narrower than the wrist of the hand on which the pompom
.
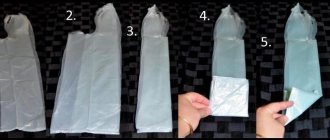
Let's start attaching 1 part of the bag to the bandage
.
Fold 1 part of the bag in half
and insert it into one of the holes in the bandage, as shown in the photo.
Let's make a knot.
We continue the row down the bandage from the five-piece package
, there should be 8 rows along the bandage.
4 of each color, alternating.
When finished, straighten and fluff. Pompom is ready
.
Publications on the topic:
M. Montessori said: “A child is his own best educator. The pace of development of each child is individual. The task of an adult.
I bring to your attention a busy board - a do-it-yourself educational board for children. The purpose of creating this board is to keep children busy with interesting research.
I work as a teacher in MBDOU kindergarten 155 of the Leninsky district of the city of Nizhny Novgorod. I came to this kindergarten about 8 months ago.
Traditionally in Rus', ritual dolls were made with their own hands for the Maslenitsa holiday. The children and I offer you our master class on making.
Form of delivery: master class Participants: educators and music directors of preschool educational institutions. Goal: developing motivation to use the system.
The purpose of this work is to develop creative abilities in children. Tasks: - creating jewelry with your own hands; - development of imagination in children;
Dandelions grew in the clearing in the morning. I'm walking through a sunny meadow, hurray! I don’t pick spring flowers, but I make them with my own hands! To do.
Cheerleading has become the most popular area of artistic gymnastics in recent years. Cheerleading is a sport that combines elements of dance, choreography, and gymnastics, requiring certain physical training.
The cheerleading movement originally arose abroad, but recently in Russia this sport is actively gaining popularity.
As a rule, this area of artistic gymnastics is of interest to teenage girls, who are called “girls with pompoms” due to the obligatory presence of sports equipment in the form of bright pompoms of a wide variety of colors in their performances. Today it is not difficult to purchase equipment for performances and for fans in specialized stores, but there is an alternative option - making it yourself
.
How to make poonpon at home? The greatest demand for purchasing pom-poms arises among people who devote their time to cheerleading. Sports stores today offer a wide range of this must-have cheerleading attribute.
like pompoms.
In this case, it is worth considering the option of making pompoms with your own hands, taking into account a number of undeniable advantages:
What is needed for production
The simplest option for making pompoms is to make them from plastic bags. In order to make sports equipment from bags, you will need the following tools and materials:
- plastic bags in the amount of 10 pieces;
- scissors with sharp blades;
- strong tape.
The main material for creation can be garbage bags, the thickness of which is ideal for creating pompoms. As a base, you can also use ordinary bags for products with low density. The color combination of the future product also depends on the selected colors of the packages. It can be a single color or a combination of different shades. The most striking combination of contrasting colors looks:
- red and blue;
- black with white or yellow.
The listed list of tools and materials will be enough to create sports equipment. If desired, each pompom can be decorated with foil stripes to give the product a more festive look .
Flower with beads or rhinestones
What can you make from T-shirt bags with your own hands?
For this flower you can use the leftover material from sewing a skirt - a tutu. It will make a wonderful decoration in the same style for clothing or a headband. You can glue the flower to the brooch base and decorate your blouse.
Let us describe step by step the process of its creation.
You will need:
- Fatin;
- Threads to match;
- Felt circle for the base;
- Scissors;
- Glue (hotmelt adhesive or moment crystal);
- Center decoration: beads or rhinestones.
Progress:
- Cut the tulle into squares of the same size.
- Take one square and fold it with a corner to form a sharp petal.
- Sew it to the felt base. You can also use glue, but sewn petals will stick better.
- Do the same with all the other squares. Make sure that the petals are evenly spaced in a circle. Don’t let the threads scare you at their very sight - they will be decorated later. It’s better to make not one layer (circle), but two or three: it will turn out more magnificent. Sew each of the petals of the new layer between the petals of the previous one.
- Cut out five or six circles from tulle of the same or contrasting color according to the size of the center. They are needed to hide the seams. Carefully, using small stitches, at a short distance from the edge, sew them to the middle of the flower.
- Glue or sew a large rhinestone (bead) in the center of the flower. You can stick a scattering of small adhesive rhinestones on the petals in any order.
IMPORTANT TO KNOW: How to be the ideal girl in a relationship
Photos of the best sultans
Beautiful New Year's plumes for kindergarten emerge from the fluffy rain. It is advisable to choose good quality rain. Sometimes poor quality rain begins to crumble. But this problem can also be solved with the help of a stapler.
Fluffy rain sultans
Beautiful do-it-yourself plumes can be not just panicles, but also suns, clouds or a rainbow.
Sultana "sun"
Pultants made from feathers or faux fur also turn out very bright and fluffy.
Artificial feather plumes
Interestingly, cheerleaders often add rubber bands to their pom-poms to prevent them from falling off during difficult acrobatic moves. This trick will also be useful for kindergarten students to perform complex dances.
Pompoms with safety bands
Flowers
Crafts from plastic bags - a selection of interesting master classes and photo ideas
The simplest crafts are flowers. You can make roses, chrysanthemums, peonies, and poppies with your own hands from plastic bags. They decorate pots with rarely flowering indoor plants and place them in vases.
To work you need:
- main material – used or new;
- thin but elastic wire;
- scissors and nippers;
- pliers and/or round nose pliers;
- pencil and ruler;
- corrugated paper (for some types).
Wrinkled bags can be ironed through thick paper by setting the iron temperature to minimum.
Rose
Miniature roses, made with your own hands from ordinary plastic bags, will decorate peony bushes that have already faded. In addition, such a craft can be “seated” on a stem and placed in a vase or pot with a house plant.
They are very easy to make. The bottom and handles are cut off from the “source” and cut into wide strips.
In total you need to prepare 10 strips of the same width and length. We fold the blanks in half lengthwise, roll them up, and secure them with matching threads and tape.
The roses are ready, all that remains is to decorate the bush with them.
Experienced needlewomen can use a more complex technique. Each flower petal “sits” on a wire base and curls into a circle. The blanks are ironed through thick paper so that the polyethylene is well fixed to the wire. The finished petals are collected into a bud and secured with thread, glue or thin double-sided tape.
Peonies
These flowers are easier to make. You need to cut several circles of different sizes, stack them one on top of the other from largest to smallest, and secure the center with a stapler. Then take the workpiece from below by the middle, slightly lift it, and secure it. Peony is ready.
Chrysanthemums
These delicate flowers are easy to create with your own hands. For this craft, household or garbage bags of suitable colors are suitable. In addition, you will need:
- green material;
- cocktail straws;
- PVA glue;
- scissors and vase.
We cut off all excess, roll the workpiece into a square until its size decreases to approximately 10*10 cm. Then we fold the square diagonally to form a triangle. We fix the sharp tip with a ribbon or sewing thread.
We cut out chrysanthemum petals on the free edge of the workpiece, carefully so that the tie does not slip, straighten the flower.
Using glue, fix the base of the chrysanthemum in the tube. We wrap the tube itself with strips of green material.
The last step is leaves to decorate the stem. We cut out green ovals or triangles, trim the edges into thin strips, assemble the base into an “accordion” and glue it.
We fix the leaves on the stem-tube. The chrysanthemum is ready, you can put it in a vase.
Video tutorial:
Craft ideas
How to make pompoms from napkins with your own hands
Using bags as material, you can make animals. In any case, the basis will be pompoms.
It's easy to make a pompom from bags.
- The bags are cut into narrow strips.
- A circle of the required diameter with a hole in the middle is cut out of cardboard.
- The tape is wound on a cardboard circle. The more ribbon is wound, the more magnificent the pompom.
- The tape is cut along the outer edge with scissors, and the middle is tied with thread.
The pompom is ready.
The rest depends on the needs of the child and the imagination of the master. From pompoms you can make funny chickens, a cute dog or cat, a hare, a hedgehog and so on. To do this, you just need to fasten the pompoms and add small elements to them. Eyes, ears, bows can be secured using universal glue.
What material can be used
On the market for handicrafts there is a huge offer of a wide variety of materials for creativity. Pompoms can be made from a variety of materials . The choice of a particular material largely depends on the future purpose of the pom-poms and the creative imagination of the master. To create hats and children's clothing for the purpose of decorating, in most cases fur or yarn is used as the main material. Instead of fur and yarn, it is recommended to use materials such as paper or thin plastic bags to create a sports one.
To make pompoms we use:
- yarn;
- fur;
- wool threads;
- newsprint;
- tissue;
- thin bags
Fabric ball
To get 1 ball, you will have to prepare pieces of fabric 1.5-3 cm wide and 2 crescents of cardboard. Wrap sections around the crescents, but do not overtighten. The end is fixed with a speller or glue. Using scissors, the strips are carefully cut in the middle and removed. The thread is also pulled together and tied. If desired, it is possible to cut in a circle.
So, pompoms can be made from any available materials. You have convinced yourself of this. If you add creativity, then seeing your efforts and the beauty of the product, others may also be interested in it. Pompoms can be bought in a store, but shaping them with your own hands is unique, unusual and valuable.
And it's not a problem if you've never made pompoms. It's very easy to learn. I hope that by using the tips from this article you will become experienced craftsmen! Happy experimenting!
How to make a pompom for cheerleading?
ready-made pom-poms for cheerleading made from rain One of the easiest options to make is a pom-pom for cheerleading.
The technique for making it is quite simple:
- take a solid piece of the material from which you plan to make a pom-pom
- on both sides, cut the canvas into strips of equal width, which you set at your discretion
- leave a narrow space in the middle without cutting
- twist the cut fabric with a pipe and pull it in the middle
- If desired, glue a loop here to prevent your hand from slipping while dancing
So, we looked at the technique of making pompoms from different materials. We got inspired by looking at photographs of their placement in space and on the hats.
Use your imagination and pick up scissors, cardboard blanks and thread for attaching the centers. You'll definitely make some interesting pom-poms!
What can pompoms be made from?
various pom-poms assembled into products
Classic pom-poms are made from knitting yarn. Other materials for their creation are:
- fur pieces
- paper of different textures and colors
- bags from small to trash
- napkins
- foil
- New Year's rain and tinsel
- fabrics, for example, tulle, felt
In addition to the basic materials, you will need:
- scissors
- blanks for winding thread or fastening other types of materials
- thread, thin wire or decorative tape to secure the middle
How to make a pom-pom from yarn, threads on a fork: step-by-step instructions, design ideas, photos, videos
Needlewomen often decorate their work with pom-poms. They know how to make them in different ways. Let's consider a classic one using round cardboard blanks and a regular fork.
The peculiarity of the first method is that you wind the thread on 2 cardboards with a hole in the middle to the desired thickness. Then carefully cut the threads between them, and thread the thread to fasten the middle of the pompom. Pull it together and remove the blanks. The larger their outer diameter, the larger the pompom will be.
Below are instructions in pictures.
step-by-step production
In the second method, the finished product will be small in size. The reason is the small distance between the 2 teeth. Proceed like this:
- place a short thread in the middle between pairs of teeth so that its ends hang down towards the handle
- wrap the thread around the outer teeth of the fork to the desired thickness
- pull one free end of the cut thread up so as to connect it to the other
- tie them tightly and remove the thread from the fork
- cut all the windings on the opposite side from the knotted place
Below is a visual cue in the photo.
step by step photos
How to make a fluffy pompom for a hat?
girl in a hat with a fluffy pompom
The fluffiness of a pompom for a hat directly depends on the diameter of the object around which you wind the yarn. The second important factor is the volume of the ball of yarn. It will correspond to the diameter of the future pompom.
In addition to the classic cardboard round blanks, you will be suitable for:
- own palm
- cardboard rectangle
- mobile phone
- plastic bottle
- glass jar
The main thing is that you can pull the thread around the winding on both sides and tie all the threads tightly.
- Cut the circle to the right and left of the fixed center.
- Align the threads, cut off those that stand out in length.
How to make pom-poms for cheerleading with your own hands from bags: master class
The following description tells how to make beautiful rustling attributes for a support group from the most ordinary cellophane bags. We will find out what is needed for the creative process from the list of materials:
We lay out the bags one by one in stacks of 15-20 pieces. Next, we cut off their top edge (with handles) and bottom (bottoms of the handbags). Let's start making the “petals”. To do this, cut the entire stack into strips, not reaching the bottom edge of about 10 centimeters. In this way we arrange all the stacks of bags. Next, we place them one on top of the other, gather the bottom edge and wrap it with tape, forming a handle. We straighten all the petals. The product is ready.
Today, self-made cheerleading pom-poms are used not only for their intended purpose. These items decorate festive halls and just the interior of the room. It looks elegant and fun.
Anna Pogodina
Master class on making sultanas for sports dances and outdoor switchgear
MASTER CLASS on making SULTANCHIKS for sports dances and outdoor switchgear.
To make the first pair of plumes we will need:
1. colored T-shirt package – 16 pcs.
2. cardboard – 1 sheet
Fold the bags in half. At the fold line we fasten them with a stapler (at three points)
.
Cut off unnecessary parts (handles and bottom of bags)
.
We made it:
We cut the bags into small strips, slightly short of the fold line.
Take cardboard (I took an unnecessary cover from a coloring book)
.
Fold the cardboard in half and cut it in half (you get 2 long strips)
:
We twist the strip into a tube, and to prevent it from unwinding, we secure it with tape (I took thin and transparent)
.
Let's start making our sultana!
We take 2 parts of cut bags (4x4 = 8 bags)
and one tube
(handle)
.
We attach one part to the tube with tape, twist it, secure it with tape, and attach another one, also twisting it and securing it with tape.
We make a handle and secure the bags to the tube more tightly. To do this, I took wide colored tape (I have the inscription gift - we work with what we have, if it’s colored tape to match the color of the bags or colored electrical tape, it will be beautiful!
And the final touch) FLUSH our plume, I use a rubber glove for this (you will understand why if you try it)
.
And here comes HE - THE SULTAN!
All that remains is to do the second one - exactly the same!
I hope you and your kids enjoy it! Mine are delighted)
Master Class. Making headbands for dancing Master class. Making headbands for dancing. Hello, today I wanted to show you what kind of performance tapes I have for children.
Master class on making flowers I haven’t been here for a long time, but today I decided to show you my master class. You can see for yourself what is needed for work and production.
Master class on making handicrafts “Fishing” Materials for fish: 1. fabric of four colors, threads for lining 2. padding polyester for stuffing 3. scissors 4. office clips 5. sequins Stages.
Master class on making a photo album Handmade gifts have many privileges over souvenirs bought in a store; their main advantage is exclusivity.
Master class on making a gnome To make a gnome you will need: 1 large bead (head, 4 small beads (feet and palms), fleecy wire sticks (torso,...
Master class on making “Carousel” On June 10, Soyuzmultfilm studio turned 80 years old. We could not ignore this and the project “Soyuzmultfilm” was launched in our garden.
Master class on making plasticine roses We usually think about gifts on the eve of the holidays. Currently, stores offer a rich assortment and selection of different ones.
Master class on making an owl Master class on making an owl from cardboard and autumn leaves. + Photo report. Autumn gives us a lot of surprises. The weather is changing.
Master class on making Topiary Topiary is a fairy-tale tree, a decorative original work, the crown of which can take on a wide variety of shapes and be made.
Master class on making a horse To make a horse we need: colored paper, toilet paper rolls, woolen threads, glue, scissors, a horse head template.
Polyethylene bags are used not only for waste disposal. You can make an interesting accessory to decorate your apartment - pom-poms from garbage bags.
Wool pompom
Making a wool ball is very simple. Moreover, you can use 3 methods:
- Using a fork, wrap it around the tines. Next, you need to pull it across the middle, tie it, remove it and cut the loop. The product remains to be fluffed and the ends trimmed.
- By hand. Wrap a thread around the 4th fingers of your hand. Tie the winding in the middle. Take off. Trim the loops. Fluff.
- On a round base.
It can be attached to woolen items. For example, for a hat, scarf, mittens. It will look very effective on a rug, blanket, or chair pad.
After unraveling, the yarn (wavy) must be moistened and then dried in a straightened form. To get more volume and fluffiness, you need to use more yarn.
Multi-machine method
So, you can make a lot of balls in a fairly quick time. To get started you will need a children's chair. It must be turned so that the legs are at the top. 2 legs around the chair are wrapped immediately. With a stronger thread you need to wrap the winding every 2-3 cm in a circle. The smaller the gap, the tinier the pompom. You need to cut the threads in the middle. All! All that remains is to correct the lumps and rejoice in success!
Lush pompom made from napkins
To make a pompom you need to follow the step-by-step instructions for the craft: If you want a voluminous product, then you need to use more napkins. For a medium size, at least 3 napkins will be useful. For beauty, the edges of each can be trimmed with curly scissors.
It's better to stack them. The middle must be secured with wire. Each layer needs to be sorted out and leveled. For pomp, it is recommended to level one side and leave the other unchanged. Connect 10-15 napkins together to make them tender. They will look great on the ceiling, on the wall and anywhere else in the house.
Corrugated paper pompom
Cut sheets of paper into equal rectangles. Approximate size – 20x30. Be careful with the center of the paper when you center the thread or wire, as the paper is thin and can tear. To make it more interesting, you can fold paper into an “accordion” of different shades.
Crepe paper pompoms will decorate any room. You'll have to take a lot of crepe. The scheme of work is similar to the previous idea.
- Lay out the sheets. Cut into A4 size.
- Fold with an accordion to 2 cm.
- Secure the middle with wire. To secure it to the ceiling, you need to leave a larger tail.
- Connect the ends of the paper and smooth them out.
That's all. Can be mounted to the ceiling.
Polyethylene and ecology
Many plastic bags are produced every day. They are used in stores as packaging material and for waste collection. Not all are used repeatedly.
Few people think about their harm:
- Polyethylene products are dangerous to the environment and living organisms living in it. Toxic lead and other hazardous metals are used in production.
- Once in the soil, it decomposes over 500 years. In water bodies it has a detrimental effect on local inhabitants. Fish and birds mistake the particles of the bags for food and swallow them. This leads to death.
- When plastic is burned, hazardous substances are released into the atmosphere. They pollute the air and affect climate change. They enter the human lungs, causing diseases.
Bags are rarely recycled. They often end up in landfills along with other waste.
This is especially true for garbage bags. For safe use, they must be free of harmful substances and decompose quickly.
Crafts from pompoms for the holidays
Not a single spectacular event, whether at home or in public, would be complete without balloons. To these you can add pompoms on sticks - elements common in cheerleading.
- You can make a wide variety of crafts from pompoms for the New Year. Using your imagination and sleight of hand, you can easily build a gnome or Santa Claus, a bag of gifts or a decorated Christmas tree, a Christmas wreath or Christmas tree decorations.
- New Year's crafts made from pompoms will help you get rid of the need to buy special gifts for your neighbors or classmates. Original souvenirs can be given from the heart and with pleasure.
For physical activity
In kindergarten, teachers often use various objects for physical education, which both focus attention and are a bright element of the classes.
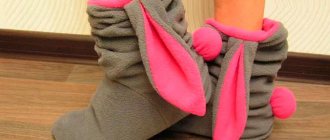
Simple exercises with plumes can turn any physical education lesson into a holiday. When performing various tasks, children wave iridescent and rustling plumes, creating a great mood.
For kindergarten, bright crafts are indispensable. With its help, a child can turn into a magical fairy-tale character, which is indispensable when holding children's matinees. Using sultans, children have more fun, for example, calling Santa Claus with a big bag of gifts.
Or the same dance of snowflakes using plumes becomes magic - the rain rustles and shimmers, a great mood is guaranteed not only for children, but also for adults.
Such an easy-to-make craft as a sultan is very multifunctional; its use can be used in many areas.
Do-it-yourself pom-poms from bags
Pompons today are used in many areas of life - they not only decorate halls and make all kinds of crafts from them, they are also actively used in dancing, gymnastics and other leisure activities. Children often return home from school with the task of making pom-poms from bags; most often they are used for cheerleading, a sport that combines dancing, gymnastics, acrobatics and show elements.
How to make pompoms for cheerleading with your own hands?
To make 2 bright, fluffy pompoms for cheerleading, prepare:
- 2 packs of plastic bags - 2 different colors will be enough, although one is possible;
- Scissors;
- Scotch;
- Wooden or plastic stick.
- Fold the bags one on one, cut off the sharp corners and cut the joints.
- Fold the bags in half, defining the middle.
- Make cuts on both sides without cutting to the fold line. Try to make the strips the same width. If your task is to make a fluffy pompom, measure out the strips narrower.
- Fold the stack of bags in half, twist and tape them around the stick to create a handle for the pom pom. Ready!
Sultans
How to easily, simply and beautifully make sultans for dancing, choreographic compositions, morning exercises and outdoor games with your own hands is described in the materials in this section.
To make these pompoms, various improvised or waste materials will be useful. For example, colored ribbons, New Year's tinsel and "rain", old markers, "T-shirt" bags from supermarkets. Step-by-step master classes on creating plumes are supplemented with visual photos. Here you can also find gymnastics complexes and scripts for dance compositions with sultans.
Toys from bags
Your little one will definitely like the idea of making real toys from ordinary bags. This is a very original way to please a child and develop his perseverance and patience.
You can make any animal your baby wants: a chicken, a dog or a bear. The creation algorithm is the same for almost everyone, with the exception of the form.
You will need trash bags of different colors, scissors and cardboard.
Step-by-step instruction:
We cut out the base from cardboard - two hollow circles of different sizes. They will be used for the head, legs and body. We cut the bags into long strips. We wrap polyethylene on the cut rings
Your child can help you here, because this activity is long, but very important. The tighter and more stripes you wind, the more magnificent the pompom will be. When everything is ready, cut the rings around the circumference and fasten the middle so that the bags do not fall apart
You should get a pompom that needs to be fluffed. Using the same pattern, we make several more pom-poms. If necessary, experiment with sizes. At the end, glue all the parts together and add a nose and eyes. They can be made from beads or buttons. Ready!
Historical facts
No one knows the exact reason for the origin of pom-poms. However, there is one humorous version. She says that during the development of American football, children and teenagers ran around the stadium with armfuls of hay. They waved it and shouted words of encouragement, thereby cheering and supporting the athletes. A little later, hay began to be replaced with more convenient attributes. Today, several ways have been invented to make pom-poms for cheerleading. They are made from paper, polyethylene, foil, fabric and other materials. In this article we will look at two master classes that anyone who wants to make bright and fluffy pom-poms at home from improvised materials can follow.
How to easily make pipidastras with your own hands
This article will tell you how to make pipidastras with your own hands, saving your budget and adding a bright note to any holiday.
The very name “pipidastr” is a rather rare word in the Russian language, which has become increasingly used in colloquial speech. Translated from English, it means “brush”, “duster” or “broom”, made of thin threads. In other words, this furry thing is used to brush dust off fragile objects.
The initial version involves its manufacture from a synthetic material - polypropylene. Dust brushes are made from almost any suitable material. For particularly valuable items, dusters made of down or feathers are best suited.
Another meaning of decoration is a pompom for cheerleading. Girls wave them during breaks between sports competitions, attracting the attention of spectators.
In other words, cheerleading pipidastras are large, bright pom-poms. The shaggy design is easy to make yourself. Moreover, this activity does not require special skills and abilities. PS: We wrote about how to make pompoms with your own hands from different materials in this article.
How to make sultanas from garbage bags?
Do-it-yourself sultanas for kindergarten are made from both small bags and large garbage bags. But bright garbage bags are easier to find in stores, and they will make the sultanas for kindergarten more magnificent. Therefore, we will tell you in more detail exactly how to make sultanas from garbage bags.
The first step is to tear off all the bags from the roll and place 40 bags on top of each other. If you do not come across straight bags, as in the next photo, but bags with a rounded bottom, don’t be upset. From such bags you need to cut off the bottom edge and straighten them, then they will also turn into a regular rectangle.
We put bags for sultanas on top of each other
The next step is to cut off the top edge of the bags. In our example, bags with puffs are used. We don't need these puffs; we carefully cut them off and send them to the tank.
Cutting puffs from bags into plumes for kindergarten
Next you need to cut off all the other sealed edges. To make the plumes from garbage bags soft and fluffy, we cut the garbage bags around the entire perimeter.
Cut off all sealed edges from the bags
Now you need to fold the blanks for the plumes from the bags in half. The folded edge should be placed on the opposite side of you.
Fold bags for sultanas in half
Let's start cutting the fringe. In our example, the stripes are about 2 cm thick. The thinner the stripes are, the more magnificent the plumes for kindergarten will be. It is better to use good and sharp scissors.
Cutting the fringe for the pompom
When the strips are cut, you need to roll the bags. Try to wrap them as tightly as possible.
We roll up the future dance sultana into a roll
All that remains is to wrap the handle with tape. Do not skimp on tape, try to secure everything well. Instead of tape, you can use electrical tape or adhesive tape, in short, any sticky tape that you have.
Wrap the handle with tape
All that remains is to fluff up the plumes well with your own hands. Just rub the fringe with your palms.
Ready-made fluffy sultana from garbage bags
For those who want to learn more about how to make sultanas from garbage bags, the following video.
Making pompoms
You can make interesting accessories from garbage bags that will decorate your home or be useful for other purposes. One of these crafts is pom-poms. They are easy to make with your own hands.
For this you will need:
- polyethylene bags;
- cardboard;
- scotch;
- ruler;
- scissors;
- pencil or pen;
- decorative elements.
The sizes of garbage bags are selected depending on the purpose of further use. Small products are used as a bright accent in the interior, when decorating a New Year tree and as a keychain. Larger bags are needed when making pompoms for cheerleading.
You may also like: How to properly dispose of batteries?
The color is chosen based on personal preference. But bright shades are better. White products will replace paper snowflakes on the Christmas tree.
Small size
To create a small pompom, follow a certain procedure:
- Cut off the bottom and top of the bag.
- Using scissors we make strips. They should be long and narrow.
- Cut out 2 rings from cardboard with small slits in the middle. Let's connect together.
- We wrap rings around the entire circumference with each strip. You can add decorative elements in the form of satin ribbons or metallized threads. They will decorate the pompom.
- After wrapping the rings, use scissors to cut the bag along the edges of the circle.
- We tighten the thread in the middle so that the strips fit tightly to each other.
- We take out the cardboard rings, fluffing the resulting pompom.
You can attach a thread to the center, hanging the decoration anywhere on a special hook.
Large size
Large items require a lot of trash bags. The manufacturing method differs from the previous one:
- We stack 10-15 bags on top of each other. When using different colors, alternate layers in the resulting stack.
- Cut off the top and bottom parts along with the ties.
- Fold it again, but in half. The edges must be aligned.
- We open the packages. Cut in half along the resulting fold.
- We make 15 cm cuts at the top and bottom on each side. The width is 2 cm. There should be an untouched strip in the middle.
- We find the center of the packages and tie them tightly with tape so that they do not fall apart.
- We fluff up the accessory by separating the strips from each other.
For cheerleading you need a second pompom of the same type.
How to do it right
We offer you several step-by-step instructions on how to properly make beautiful pom-poms from yarn in various ways and with a minimum of equipment.
How to make a pompom from yarn with your own hands
In order to make such a bubo, you only need yarn and scissors.
- Wrap the thread in a fairly thick layer around the four fingers of your left hand (refer to the photo).
- Carefully remove the wrap from your left hand.
- Holding it in the middle with your fingers, measure 20-25 cm of thread and cut it with scissors from the ball.
- Wrap this thread around the middle of the coil several times and tie it in a knot with a chain loop.
- You now have two loops that need to be cut in the middle with scissors.
- Now fluff the ends of the threads to form a ball.
The larger the winding, the fluffier and more voluminous your ball will be.
How to make a fluffy pompom from yarn
This manufacturing option is classic and requires additional accessories.
- Cut out two rings 2-2.5 cm wide from thin cardboard.
- Prepare cutting threads up to 1 meter.
- Using your finger, secure the tip of the thread to the cardboard rings taken together and wrap it around the entire circumference of the cardboard. Make the winding dense and multi-layered, as in the photo.
- Cut all the threads along the outer end of the ring.
- Tie an additional thread up to 1 meter in length into a knot between two cardboard rings, and then remove them.
- Fluff the ends of the threads with your hands and form a ball.
How to quickly make small pompoms from yarn on a fork
Believe it or not, using a fork you can make very small buboes in a matter of minutes.
- Wrap the thread around the tines of the fork in a thick layer.
- Using another piece of thread, tie a knot between the second and third cloves.
- Remove the winding from the fork and cut the loops formed on both sides in half.
- Fluff the ends of the yarn and form a ball.
How to make a beautiful pompom from yarn
And with this method you can form curly buboes with a pattern. First, try making it in the shape of a lemon.
- Make two blanks in the shape of a horseshoe from cardboard.
- Use white and yellow yarn, as well as the winding pattern in the photo.
- Cut the threads along the end of the winding and tie a knot on the bottom fold of the winding with additional thread.
- Now you can remove the cardboard blanks and fluff the threads.
Therefore, first we learn how to create pom-pom balls
Step-by-step making of crafts with your own hands, starting with pom-poms. Making them from threads is as easy as shelling pears. And we will have to use polyethylene “threads”. There is no need to buy them because they are handmade.
This process is labor-intensive and consists of two phases:
Cutting threads from bags. Using scissors, cut narrow strips of as long as possible from purchased bags - no more than 5-7 millimeters wide. There will be 5-7 strips, connect them into one length with quick super glue. And as much footage as possible. If it's not enough, do more.
Cut out a pair of identical rings from cardboard, approximately 15 cm in diameter, with a hole 3-5 cm in diameter inside.
The outer diameter will become the volume of your pompom, so determine the proportions of the circles yourself. Place the circles together and wind the “threads” tightly together and without gaps.
Otherwise the pompom will seem lopsided. Wind until the inner hole allows no more threads to pass through. Finally, tie the fixing threads and cut those along the edge of the circles.
You take off the rings, and from the large pom-pom you get almost the entire “body” of Fat Piglet from the cartoon, who loves to visit.
In the same way, make a pom-pom head on a smaller diameter circle, and then on four smaller circles, pom-pom arms and legs.
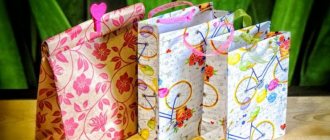
Pipidastras from plastic bags
In order to make pipidastra from bags, you will need to take quite a large amount of them. The more bags you use, the more magnificent the pompom will be. The most budget-friendly option is to use garbage bags. The most beautiful option is holiday bags for wrapping gifts, or wrapping roll paper.
Step-by-step instructions with photos
Below are different options for making shaggy ones:
- The bags are straightened and stacked. 30 - 35 pieces will be enough.
- In order for the bags to lie flat when cut, without slipping, they are pinned along the center line, or stitched with large stitches.
- Trim 3–4 cm around the perimeter, thus removing unnecessary folds and handles.
- In the area of stitching or chipping, fold in half.
- Make cuts in the direction from the edge to the fold, not reaching 5 cm.
- Carefully unfold the workpiece and remove the pins.
- As a result, we got cuts along the edges, and in the middle there was a smooth, whole area.
- Start rolling this area into a tube, starting from the edge.
- Wrap the resulting tube with tape to create a holder.
- Fluff the resulting fringe along the edges, separating the ribbons from each other.
This is interesting: if the strips are short, you will get a pompom, and if the strips are cut long, you will get a plume.
- Cut off the handles of the bag. The cuts are not made across the entire width, but not a few centimeters from the edge. The free area will become a stick - a holder.
- The untouched area is rolled up into a tube.
- The stick is wrapped with tape and decorated with wrapping paper.
- Separate the fringe strips and fluff them up.
Plastic bags are stacked on top of each other. All unnecessary things are cut off: handles, folds. Cut into even strips of required length
This should be done carefully to prevent them from spreading. The strips are neatly stacked parallel to each other and tied in the center with strong thread
A holding stick is attached to the junction.
Fluff the pompom with your hands, separating the ribbons.
Pipidastras from New Year's rain
Pom-poms made using rain look the most impressive. They shine and shimmer beautifully, especially if material of contrasting colors was used.
- The raindrops are carefully laid in a bunch of the required thickness.
- They are tied in the center with a strong thread. Several of these blanks are made - the more of them, the more magnificent the panicle will be.
- A stick-holder is attached to the dressing site. During attachment, it is advisable to distribute the bunches around the stick, then the panicle will look more neat.
- The length of the plume's raindrops is adjusted - cut to the required size.
- Wrap the top of the stick with beautiful adhesive tape or wrapping paper.
Pipidastras from yarn for washcloths
The threads used to knit bath washcloths are perfect for creating fluffy designs. They have a wide range of colors and are easy to use. To make one pompom, one skein will be enough.
- Turn the four-legged stool upside down.
- Start wrapping the rope around the two legs.
- Find the middle of the winding and tie a secure knot in this place.
- Cut the resulting loops on the sides.
- Attach the handle-holder with threads and tape.
- Decorate the handle.
Colorful pom-poms are increasingly gaining popularity. They are not only an indispensable attribute in cheerleading. They are used in bright shows and at children's matinees. Made with your own hands, they will decorate any holiday and save the family budget.
A visual video will show you how to easily make decorations with your own hands.
Preparation
This type of dance and sports is called cheerleading. Modern girls and young women around the world are often keen on it. The performances of cheerleaders make sports competitions more spectacular and vibrant. The name “pipidastr” is rarely used by the Russian-speaking population of the planet. But every year it sounds more and more often in colloquial speech. In the English dictionary, this word can be found under the definitions - “brush”, “broom” or “dust”. Pipidastras are held in the hands of girls who entertain the public during breaks between sports competitions. These accessories give the dance a special flavor. They make the performance brighter and more dynamic.
Large “brooms” for dancing are easy to construct yourself. This will require quite a few packages. The more of them there are, the more magnificent and beautiful the pompoms will be. The most budget option is to make them from garbage bags. Such accessories will cost very little due to the low cost of conventional packages. In this case, the work will take a minimum of time - a maximum of half an hour!
Ordinary “T-shirts” and oversized garbage bags come in different colors. Therefore, pompoms for the cheerleading team can be assembled to match any outfit or sports uniform. They can be single-color, two-color or variegated.
To make pompoms you will need:
- a couple of packages (rolls) of bags;
- sharp scissors;
- scotch;
- a suitable stick (plastic or wood).
Since the sports wardrobe of cheerleaders consists of several outfits, each one needs lipsticks of a suitable shade. Purchasing several sets seems to be too expensive an option for many. And it’s not always possible to find pom-poms on sale that harmonize with the style of the outfit. A team of dancers often consists of a large number of participants, which also makes it difficult to find the same “brooms” for everyone.
Making products with your own hands is an excellent way out of the situation. If you make them using the same technology and from specific materials, you will get a very cool result. Moreover, even a young girl can cope with the work. Bags of matching colors are available in most stores. All that remains is to first cut them at the joints.