Types of plastic corners
Before gluing a plastic corner, you need to understand its types in order to choose the right option.
The product is available in a wide range of colors, including plain versions, as well as wood, marble, metal and other natural materials. They are made in different shapes and sizes. The most popular two options are in the shape of the letter L with the same or asymmetrical width of the shelves (from 10 to 50 mm in width, from 2 m in length), and curved, which are used for similar openings (arches, etc.), from Why are they called arched corners? They are produced in two versions – for angles of 90° and 105°. Standard length – 3 m.
Plastic corners of different sizes
They are also manufactured in a T-shape, which hides the joints between the slope and the wall cladding. The most rarely used option due to the increased cost is removable. This corner is made with a latch, which allows you to carry out repair work without removing the profile. It bends easily, and at the end of the process it falls into place.
Corners are also classified by type of finish - external and internal. The latter are made with double-sided coloring.
Difference from other species
This type of trim is made not from paper, but from non-woven fabric. This is a non-woven gasket material based on cellulose fibers.
These cellulose fibers can be sized or not, modified or not.
There is a purely non-woven version using up to 70% long cellulose fibers and special additives.
Pros: air and vapor permeability of the material, smoothing of wall irregularities and reinforcement of microcracks.
Pasting is carried out without bubbles, without longitudinal and transverse shrinkage.
There is an option with a non-woven base instead of paper. They are classified as vinyl. The surface of such material can be smooth, foamed and embossed, ready for painting.
The downside is the airtightness of the material. Pros: leveling and reinforcing effect, possibility of wet cleaning using detergents.
If you want to update the finish, the top layer of material is removed from the wall, and the non-woven base remains, acting as a reinforced base for new wallpaper.
Installation of corners on drywall using corners
When starting to install a corner on drywall, you need to have tools and material on hand.
Required material
- the selected type of corner will need to be purchased with some reserve;
- by using ;
- It is best to buy Vetonit putty, which is of high quality.
Tools
- metal scissors will help you cut out the necessary parts correctly and quickly;
- a brush that will be needed to apply the primer;
- wide and narrow spatulas will be needed for;
- The sanding block will remove all unevenness on the plane, while the angle will be perfectly even.
This is what mounted corners on drywall look like. When starting installation, you need to familiarize yourself with the sequence of leveling the corners with putty so as not to damage this fragile material.
Stages of work
- First, the surface must be thoroughly cleaned and treated with a primer. You need to proceed to the next stage only after it has completely dried.
- Measurements are taken and the required length of the corners is cut. They are applied to the drywall as a sample.
- For further work, you will need non-woven tape, serpyanka mesh for the internal corners, one of the types of perforated corners: plastic, adhesive, rounded, either made of a metal profile or paper-based.
- Before you make a choice, you must make a choice. To form internal and external corners, it is better to buy a dry gypsum mixture. It has a reasonable price, good quality and can securely fasten elements to the structure.
- The putty is prepared following all the steps: poured, poured, stirred, allowed to settle, kneaded again.
- When working with external corners, you need to remember that they are most often subject to mechanical stress; it is better to mount metal samples, in some cases having a rounded shape.
- Check the flatness of the end.
- Putty is applied to the area to be treated with smooth movements. Without allowing the composition to dry, you need to secure the corner with pressure, check the accuracy with a level, and if necessary, you can tap with a rubber mallet.
- Sometimes the corner is attached to the drywall with a stapler or glued with glue, and then covered with putty.
- Another layer of the mixture is applied to the installed element and now alignment occurs with the general plane of the wall. Applying a second layer of putty
- After thorough drying, the slope corner is polished.
- Installing corners inside the structure looks similar, even a little easier. Carefully coat the adjacent sides and the gap between the corners with a spatula, and remove excess mixture. On a dry, sanded surface that has the desired shape. You can buy it, just apply it to wet putty.
- check the fastening of the corner on the plasterboard, then use the next layer to hide the unevenness.
- After thorough drying, the surface is finished with sandpaper or a sanded block, forming a perfect angle.
- To facilitate the leveling process, so-called beacons are used, attached to the surface with a plaster solution; here you can do without fastening parts.
- Separately, I would like to mention the semicircular plastic corner, used in rooms with the maximum possible impact on the corners. It is made of flexible plastic and has a semicircular angle rather than an acute one. Its price is quite reasonable, and its durability is beyond doubt. It differs in some features at the installation stage, namely cutting the end by 1.5-2 cm with an angle of 45 ͦ . A corner is pressed into the applied initial putty, fixed with a stapler, and the edges are treated with the mixture.
A video of arranging corners will help you see how parts of the drywall are reinforced, and will also allow you to select and buy the necessary elements.
Finishing internal and external corners will not seem difficult with the right approach and the necessary training. The main thing is that during installation there should be items that require minimal finishing.
Repairing or starting to create an interior in a house is associated with the issue of arranging corners in the apartment. Various materials and components are used for this purpose. Today we will try to understand this issue and come up with the optimal solution.
Polyethylene tape
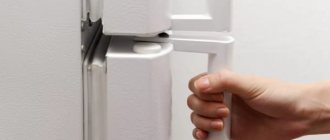
Before installing the tape, remove the protective film
When choosing polyethylene tape, you need to remember that although such a bathtub rim is the simplest option for sealing a joint, its service life usually does not exceed 2 years with active use. Such ribbons can have different colors and strip widths, as well as embossed decorative patterns. Advantages include flexibility, resistance to the growth of fungal bacteria and ease of installation. The installation process is as simple as possible:
- Before installing such a self-adhesive corner for the bathroom, you must thoroughly clean the joint area from dust and grease stains, then dry the installation area thoroughly with a hairdryer;
- if the size of the gap exceeds 3 millimeters, then it must first be sealed using a neutral sealant.
Important. When using tape, do not use acid-based silicones, as such sealant will corrode the polyethylene, which will lead to seal failure and damage to the product.
- after the sealant has dried, measure the sides of the bathtub that need to be sealed and cut off the pieces of tape we need with a margin of 2-3 centimeters;
- We start gluing from the long side, remove a few centimeters of the protective tape from the adhesive layer and glue it to the joint, avoiding tension on the tape.
Installing the tape at the joint
Important. Before sticking the border to the bathtub, do not remove the protective tape from the entire section
When installing, do not use a hairdryer, as the tape will stretch under the influence of temperature. The corner joints should be glued overlapping each other; this is why we left a margin of a few centimeters when cutting.
After installation, we trim the corner joints using a utility knife to remove excess overlap and additionally seal the corner with sealant.
At this point, the installation of the tape is completed and you need to wait 4-5 hours for the product to completely shrink, after which the bath can be used.
How and what is the best way to glue a plastic corner
Such a decorative element as a plastic corner has, among other things, important practical significance. Its main task is to protect corners, as well as external finishing materials from mechanical damage.
Such wall materials include wallpaper, slopes for windows and window openings, arched structures (arches), and sometimes baseboards. Today we will take a closer look at how to glue a plastic corner, what glue to use, what types of this structural element there are, and what size is best to choose.
The main purpose
As noted just above, the main reason for attaching a protective PVC corner for wallpaper, arches and tiles to the corners of the walls. is not only a decorative function, but also the protection it provides for certain construction or finishing materials in the interior of apartments and houses. With this design, you can protect various vulnerable areas from damage that can be caused by impacts from pieces of furniture of various sizes, careless handling of household appliances, and sometimes overly playful children and pets.
Attention! If you decide to stick on a decorative plastic corner, then be sure that this mounting element will not only provide safety for wallpaper, PVC panels and window slopes, but will also make the interior of the room more “complete” and attractive. So, let's look at the gluing process in more detail.
Types of plastic corner
It should be noted that in terms of its purpose, as well as in appearance, this fastener may be different.
Description of finishing material
Plastic corners belong to construction fittings, which are often used for decorating external protrusions. These can be slopes, niches, boxes, columns and other architectural elements with 90-degree turns. The material is used to solve the following problems:
- masking installation seams;
- transition between different finishes;
- protection of corners from mechanical damage, penetration of moisture, dust, dirt.
In most cases, a plastic corner is installed on slopes. This gives the opening a finished look. The polymer product is not afraid of moisture, lasts 20-25 years, and is easy to wipe clean. The advantages also include light weight, a wide range of colors and sizes, simple installation, and low cost. But scratches become a place where dirt accumulates, and if excessive pressure is applied to the workpiece, irreparable deformation of the soft strip occurs. It is worth noting the release of toxins when the polymer burns and gradual fading under ultraviolet rays.
Variety in color Source sense-life.com
General algorithm of operation
Before moving on to the procedure itself, you need to figure out how to glue plastic corners to wallpaper. Below is a detailed algorithm, following which you can easily carry out this procedure:
Cut the corners - as a rule, they are commercially available in strips of 270 cm.
- Apply adhesive to the decorative item or wall and press the corner to the desired location. The exception is polyurethane glue.
- Iron the decorative item with longitudinal movements - this is necessary for even distribution of the adhesive.
- Secure the corner using masking tape.
- After the time specified in the instructions on the tube, remove the tape and get rid of traces of glue on the wallpaper.
Before gluing the corners to the wallpaper, you need to responsibly choose the glue that will hold everything in place. From this article you learned basic information about different types of adhesives and learned how to properly finish the outer corners of a room.
The article describes a simple and uncomplicated method of gluing a regular plastic corner. The presented material will be useful for people who have virtually no experience in the field of repair and construction.
Thanks to plastic corners, we were able to quickly and effortlessly make any external corner in our apartment or house with smooth, neat edges. These corners are especially good for framing the joints of wallpaper and a painted or plastered wall (photo 1). The corner presses the wallpaper underneath, thereby ensuring its safety. Once caught on the edge, you will not pull up the wallpaper paper.
The process of fixing with a corner involves 5 main stages: trimming corners and lengths; applying adhesive composition; fixation in place; docking; sealing joints.
Now let's talk about this in more detail.
Pruning is perhaps the most important and crucial part of the whole process.
It is very important on your part to do everything with the utmost care. Where the corners fit together, they need to be trimmed
It is best to trim the corner using construction metal scissors (photo 2). Why metal? Ordinary scissors do not cut thick plastic well. End trimming or, more simply put, trimming to length can be done with a power tool: a miter saw (photo 3). However, be careful: when trying to cut a small piece, you can break off the edge of the plastic if you move the saw too sharply. All movements must be smooth!
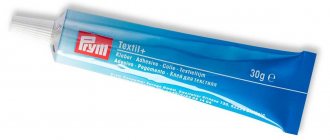
Applying the adhesive is a much simpler task. In a building materials store, you will have to get a tube of sanitary white silicone, as well as a silicone gun for squeezing out the above-mentioned product. Silicone is applied to both sides of the corner, closer to the center, in a thin continuous sausage (photo 4). If you apply too much silicone, it will come out during the wallpapering process!
When fixing the plastic corner in place, try to initially place it in the required position so as not to smear the silicone on the wallpaper and not cause it to be squeezed out from under the corner. After making sure that the corner is where you want it, crimp it tightly with your fingers (photo 5-6).
Docking involves tightly joining two previously cut corners. If you have completed the first stage conscientiously and diligently, the connection of the corners will be almost imperceptible and very beautiful. Having installed everything in place, by analogy with the previous stage, glue the docked corner to the wall (photo 7-8).
Do you have a small gap that you want to get rid of? Proceed to the next and final stage: sealing the joints. Add the same white sanitary silicone to the cavities that you want to hide (photo 9-10). Excess can be removed with a rag or a piece of toilet paper (photo 11-12).
Finally, carefully check the corners on all sides for any escaping silicone. Now, while it is still fresh, you can easily and discreetly remove it. Then you won’t be able to do it with the same degree of accuracy! If you find a defective place, simply, as before at the joints, gently remove the silicone with paper or a cloth, but so as not to smear everything on the wallpaper (photo 13-14).
That's it, absolutely no complications! Start with the little things, and you will definitely be ready for serious repairs on your own. All comes with experience.
How to glue plastic corners onto non-woven wallpaper?
The following types can be distinguished: external, internal, perforated, colored, decorated “like wood”. In addition, some of its types can be used for work on the ceiling.
Advice! If you are not satisfied with the color of the PVC corner and want to paint it, then you should use the same rules and instructions as when painting other PVC surfaces.
As for which size is better to choose: look at the situation, guided by both aesthetic and practical considerations.
How to stick it correctly
Before fixing the corner, it is necessary to carry out certain preparatory work. To begin with, the plastic material must be cut and adjusted. This can be done with a sharp knife, or durable metal cutting scissors, since their household counterparts can be easily damaged during the cutting process
Please take into account the fact that working with a knife is fraught with danger, therefore, it must be done with extreme caution, in compliance with all necessary safety measures.
In addition, pruning work can be performed using a grinder. Please note that in this case it is recommended to use a metal carving disc
Take into account the fact that the overall quality of the work depends on how smoothly and efficiently the trimming was done.
Do not forget! There is no need to use silicone to hide the imperfections of an uneven trim. The fact is that after some time, areas covered with silicone may begin to become covered with dust, spoiling the overall appearance of the corner, as well as the area that was covered with it. If the work is performed not by you, but by hired specialists, then we also recommend carefully monitoring how they perform their work.
Think for yourself: it’s better to have a small but even gap along the entire length of the corner than a dirty one that is not always neatly covered with silicone or acrylic sealant. The point is also that this fastening element can have different colors and be colored.
Here are the most common color options:
What to glue and what glue to use
So, what glue is best for gluing plastic corners? One of the best options is the so-called. "liquid Nails". With their help, you can firmly and reliably glue this decorative element not only in all rooms, but also in the bathroom or kitchen, which, as you know, are places with high humidity, requiring all fastenings to be made with increased resistance to such difficult conditions. By the way, choose liquid nails that will become transparent after installation. In addition, it is possible to use acrylic sealant of the appropriate color.
In addition to purchasing glue, you will need to buy a special gun with which you can apply liquid nails to the work surface. When applying glue, you must be careful: apply the glue in a thin wavy line, closer to the middle of the wrong side of the corner. This way, you will significantly reduce the likelihood that glue residue, when pressed, will fall on the decorative front side. In those cases when glue residues do get on the front side or on the wallpaper, you must first wait for them to dry completely, and only then carefully remove them using a sharp knife, scalpel or blade.
Now a few words about how to properly fix the corner while the glue dries. If when working with smooth and flat surfaces (for example, window slopes) you will have fewer problems, then, for example, when installing on arches that have a curved silhouette, certain questions may arise. In order to secure the corner, in such cases it is advisable to use various types of tape (choose in each specific situation, based on your conditions). The most common types of mounting tape are:
- Painting.
- Packaging.
Watch useful video instructions:
Conclusion
In our case, of course, the most correct solution would be to use masking tape. With its help you will need to fix the corner. The adhesive tape must be removed the next day, provided that the glue has completely dried. By the way, many people wonder: how to bend a corner. In fact, in arched structures this is not required, since it is soft enough and will itself take on the contours of the arch (if they are not too sharp, of course).
In cases where the angle of the working surface is quite sharp (for example, 45 degrees), or the radius of the arch is small, you can cut the plastic corner into several parts and secure each of them separately in the manner described above, carefully joining them.
No comments yet!
If the internal angle is more than 90 degrees
The problem is the same: lack of fittings. In this situation, we get out of the situation in the same two ways. We are just finalizing the connector. It will close such a corner if the internal fastenings are broken.
We take into account that we will have to glue this part, since it will not stick naturally.
Well, “artistic cutting” has not been canceled either. Having suffered quite a bit with the grinder, trying to join two elements in such a corner, you can achieve the desired result.
How to attach a plastic plinth if you need to cover the end of the podium
In such a situation, it is convenient to initially adjust the height of the podium to the height of the baseboard. At least the podium should not be lower. But this is not always possible. And it's not always worth it. If this is an exit to a balcony, then a high threshold will spoil the interior.
And with a plinth you can cover a threshold that is lower than itself. After all, plastic is easy to cut, and it is enough to accurately measure and carefully trim its lower part. It will look something like this.
If you try, it looks very interesting.
Even more interesting than in the case where the threshold was the same height as the baseboard.
Such situations when installing plastic skirting boards are still quite rare. But, nevertheless, they take place. You are now armed with the appropriate knowledge to deal with them.
How to glue an arched corner with your own hands
The topic of today's article is the arched corner. We will talk about the types, purposes and methods of attaching this finishing element.
First, let's define the terminology: which ones are called arched and what is their difference. In general, such angles are used to design curved structures made of various types of finishing and building materials.
The main purpose of these elements is to protect the decorative coating of corners. They prevent paint, wallpaper, etc. from shedding and abrasion. Also, these corners seem to highlight the shape of the structures on which they are attached. For example, arches (see), plasterboard niches, figured ceilings.
Decorative
Arched element PVC
So:
- The decorative element has a different width on each side. For example, 20x10mm or 20x5mm. From the very name of this angle it is clear that it serves to decorate arches and highlight them against the background of the overall interior of the room.
- In addition to its design function, this type of finishing allows you to hide small irregularities in arched openings. This is especially true when the arches are made with your own hands. For example, from plasterboard (see).
- And, of course, such decor protects the finishing coating of the walls from various types of influences: wallpaper from abrasion, putty and high-pressure paint from delamination and chipping from the surface of the corners.
- Decorative corners are produced with a length of 2 meters 70 centimeters. They have different colors: white, wood-like (repeating its structure), colored.
- The main material for production is polyvinyl chloride. It is the PVC arched corner that has become most widespread among finishers. You can also find cork corners for arches on sale in stores.
Perforated plastic element, photo
Plastering
So:
- This type of finishing auxiliary materials has perforations (holes) throughout its entire surface. One side has petals (like cuts). Thanks to this design, they bend perfectly.
- Basically, the perforated arched element under consideration is used to give a smooth edge to curved structures. For example, when installing plasterboard arches, figured suspended ceilings, elegant partitions. It will not be difficult to bend it, because it is very flexible.
- Corners for plaster are made of plastic. The most common length is 3 meters.
Everyone knows whitewash
We glue the corners to the ceiling on top of the wallpaper ourselves
When it is necessary to improve an old apartment, the question often arises: how to glue wallpaper to old whitewash? I have read more than once that in order to do the job well, it is necessary to completely remove the old coating. However, what to do if you want to save time and effort?
Here is the sequence of actions:
- If we glue on whitewash, then choose only high-quality primers
- When the first layer is applied to the whitewash, leave it to dry and only then apply the second
- The water-repellent properties of the primer can protect the surface from the appearance of mold fungi
- Secure this process with a weak glue solution. Dilute it with water in equal parts and apply it to the walls. After this you can safely glue it to the whitewash
- To glue trellises onto whitewash, choose glue taking into account the choice of the finishing material itself
Important! It is forbidden to glue canvases to whitewash, which falls off in pieces. In this case, using warm water and a spatula, clean all the walls from the coating and thoroughly prepare the base.
Application of skirting boards
In addition to the traditional floor plinth, the main tasks of which are:
- Elimination of cracks where the flooring meets the wall.
- Holds soft floor coverings (linoleum, carpet).
- Protecting walls from impacts and damage when cleaning the room.
In modern interiors, with a claim to “European-quality renovation”, ceiling skirting boards are often used. They allow you to level out the unevenness of the top edge of the wallpaper and give the room a more elegant look. These skirting boards are made from pressed foam and are very lightweight.
Regardless of which skirting board you choose, you will be faced with the task of strengthening (gluing) it in place without staining the ceiling and wallpaper with glue, traces of which cannot be removed.
The advantages of this material over “liquid nails”, PVA emulsion, and other adhesives are its water solubility, excellent adhesive properties to all known types of building and finishing materials, high viscosity, non-fluidity, the possibility of dismantling without violating the integrity of the glued baseboard and without damaging the surface layer of wallpaper or ceiling.
To work with ceiling plinth you will need:
- Miter box.
- A hacksaw with a fine tooth (you can use a hacksaw for metal).
- Retractable construction knife with replaceable blades.
- Rubber spatulas from 25 to 100 mm wide (sold in sets).
- Masking tape.
- A narrow (1-1.5 inch) paint brush.
- Gun for cans of sealant.
To file the edges of the plinth at the joints at the corners, use a miter box into which the edge of the plinth is placed and sawing is done at an angle of 45°. Without using a miter box, it is almost impossible to achieve even alignment of the edges of the plinth in the corner. The skills to use this simple device are usually mastered within 10-15 minutes. The main thing is to learn how to properly file external and internal corners.
The foam ceiling plinth should be glued only after the paint on the ceiling, walls, or when the wallpaper has dried completely. Acrylic sealant is applied along the entire length of the baseboard in a uniform, slightly curving strip along both shelves of the baseboard. It does not flow, does not drip, holds well on the baseboard and, after pressing it against the wall and ceiling, perfectly fixes the part, without requiring long-term holding or additional fixation.
Another feature of acrylic sealant is that it allows the foam ceiling plinth to level itself and take an even shape if the wall is uneven. After an hour, the sealant polymerizes under the influence of air and you can begin the final stage of finishing the room - sealing the cracks between the baseboard and the wall.
To do this, apply masking tape under the plinth with an indentation of 1-2 mm. from the bottom edge of the baseboard. A thin “sausage” of sealant is squeezed out from the mounting gun along the entire edge of the plinth, which is immediately coated with a finger or a narrow rubber spatula. Excess acrylic sealant is removed with a damp cloth. She also removes excess sealant from her hands and spatula. If necessary, the upper edge of the plinth at the junction with the ceiling is also processed.
Masking tape does not stick to the ceiling. After 10-15 minutes, the foam ceiling plinth is painted with the same paint that was used to paint the ceiling. In the case of a suspended ceiling, use water-based paint that is similar in tone. Immediately after painting, remove the masking tape. (You should never leave it until the paint dries! It can damage the wallpaper.)
Which glue to choose for PVC panels and plastic corners
In case of gluing a plastic corner to a PVC panel, you can use a sealant. It is used for small work areas. And besides, if in the future you have to dismantle the corner, this can be easily done without compromising the integrity of the parts. Before working with such glue, you need to degrease the surface of the panel and dry it thoroughly.
Secure the gluing area with paper tape until dry. Liquid nails are also suitable, but they are known for the fact that it will be impossible to peel off the part. There is a Panneling series, specifically designed for gluing PVC panels. For bright corners, it is recommended to buy colorless liquid nails.
They are also perfect for installing plastic slopes.
From this series of durable adhesives, there is also one like Cosmofen, but you just need to be extremely careful with it, you can stick it yourself. With these types of glue, the panel and corners do not require special preparation.
When gluing plastic, polyurethane adhesive is also used. Today this type of glue is very popular, as there is a variety specifically for plastic corners, and for gluing plastic, in general.
Types of adhesives
Before gluing the plastic corner, choose the right product for the procedure. Today, there are four items to choose from, familiarize yourself with the characteristics of them before work - how to apply, how long it takes to set, whether it is suitable for the material, etc.
Types of glue for plastic corners
- Liquid Nails.
They have good durability. This glue spreads easily over the surface of the plastic corner. Apply dotted or zigzag. Liquid nails are capable of connecting glued products for more than 20 years without losing their properties. The setting force after complete hardening is 40 kg/m2. It has anti-corrosion properties and does not damage or pollute plastic. When purchasing, give preference to a colorless composition, especially if you have to work with light-colored surfaces.
- Silicone sealant.
Used to connect corners with wallpaper, as well as tiled and ceramic walls if acrylic is present in the composition. It is characterized by the absence of toxic chemicals and high adhesive properties.
- Polyurethane glue. Durable, elastic and does not leave stains. Hardens quickly.
- Liquid plastic. Suitable for use only on plastic surfaces (for example, window slopes). Fast-acting, highly durable and reliable.
You need to apply glue from the inside of the part, closer to the middle. The spaces between dotted drops are 1-1.5 cm.
Example of glue application
There are also self-adhesive corners, which are glued immediately after measuring and creating the required size and shape. To do this, remove the protective tape and press the product against the protruding corner.
Corners for protecting wall corners: selection options
This technique for decorating wall corners - protective corners - is not liked by everyone, but there are no special alternatives. In any case, on walls covered with wallpaper, a corner is still better than sticking out and torn canvases.
There is only one solution available for the integrity of the wallpaper without the use of decorative corners - to make a rounded corner rather than a sharp one. In this case, there will be no problem with finishing it. You can simply roll up the wallpaper without cutting it. But the corner must be drawn out perfectly, otherwise you will have to cut it again, which means that the question of protecting the wallpaper joint at the corner will again arise.
It is important to choose the right decorative corner so that it does not look alien. There are special techniques for this
The interior looks good in the appropriate style
You need to select corners to protect the corners of the walls based on the overall design of the room. There are several standard solutions:
- To match the wall decoration.
A complete color match is desirable, and even better if the texture is similar. Either match the wall trim or match the doors - Matches the doors. It is better to choose the same material - wood, MDF. And match the color one to one. This technique is often used in hallways and corridors where there are many doors. In rooms it is more appropriate to match the tone of the walls.
- The one with skirting boards.
One of the options is quite logical - Use one of the additional colors, which will be not only on the corners, but also in the framing of pictures or in the upholstery of panels, decorative medallions, etc.
- Same color and texture as the floor covering.
In general, you need to select corners to protect the corners of the walls depending on the design of the room. This can be done after the furniture has been arranged and textiles have been hung. In this case, it is easier to imagine the end result. Because the picture in our head can be very different from reality.
One of the transparent protective cornersIf you just can’t find an acceptable color, and you need to protect the corners in your apartment, pay attention to the transparent plastic corners. They are of different types - rigid, flexible, with different wall thicknesses
Decorating corners in an apartment: how to decorate a room with corners
Options for using decorative corners in the interior design of a room depend on many factors:
- Surface materials. A white plastic corner glued to the corner of clapboard walls will look ridiculous.
- Finish colors. Under no circumstances should a red element be placed in a room designed in pastel colors.
- General stylistic solution of the interior. A polished stainless steel profile will not fit into a classic interior; a polyurethane “stucco” profile will not fit into a high-tech style.
- Purpose of the room. Silicone corners are great for children. They will keep the corners intact and help protect the child from injury.
Wallpaper design options
To complete the finishing after wallpapering, a profile made of any of the above materials can be used. The main criterion when choosing a corner will be its color. The choice of color can be approached in different ways. If the joining walls are approximately the same shade, you can choose the product to match the color of the walls; if they are different, you can match the color of the wall to which the eye is most often drawn. For example, when finishing the corner between a room and a hallway, it is more logical to choose a profile that matches the color of the room’s decoration.
One of the finishing options is decorating with a wooden corner, tinted to match the color of the doors or floor using impregnated stain and coated with varnish. Products made of MDF and PVC, decorated to look like wood, are suitable for the same purposes. When decorating a strict, laconic interior, metal corners will look good.
Solution for corners on slopes: the better way to seal corners in an apartment
To complete the finishing of the slopes, corners are used in the color of the slope, almost always white. Often the material for slopes is a sandwich panel, therefore, to ensure that the material does not differ much, PVC corner profiles are used. The width of the shelf is selected so that it covers the end of the panel or gypsum board. If there are any finishing defects near the window opening, for example, unevenly cut wallpaper, the corner is chosen to be of such a width that these errors are covered.
The angle between the wall and the slope is usually more than 90°; in order for the corner to lie flat, it should be slightly “bent” - placed on a flat surface or a large-diameter pipe and lightly pressed with your hands, moving along the corner.
In the cold season, the profile must warm up to room temperature before use.
Option for decoration under wallpaper
For walls covered with wallpaper, the option of wallpapering a corner may be suitable. For these purposes, profiles made of PVC, MDF, wood or smooth polyurethane are suitable. The profile should be a light shade, because... dark may appear from under the wallpaper. Wallpaper is pasted onto it, the glue is allowed to dry, then, no earlier than the next day, it is mounted on the wall. The wallpaper on the corner should be glued in one piece, of such a size that the wallpaper extends onto the inside of the shelves.
Glue selection
Before gluing corners to slopes or other architectural elements, it is necessary to select the correct installation composition. Today there are 4 solutions to the problem. Let's look at each of them in more detail.
Liquid nails and sealant
In modern construction markets, sealants with liquid nails are presented in gun tubes or tubes. Moreover, they have the same volume. Buyers often get confused in this variety.
For installing lightweight plastic, only 2 options are suitable: liquid nails or adhesive-sealant
Here it is necessary to pay attention to the fact that the composition also exhibits good adhesion to the base. So, for absorbent surfaces you can use acrylic-based glue or neutral
They practically do not emit odor, can be wet cleaned before drying, and dry quickly. If work is carried out on concrete, plastic, metal or glass, you will have to make a choice in favor of universal compounds.
Universal compositionSource stpulscen.ru
Sealants are often used to install corner profiles. This is justified by additional waterproofing. However, this approach is incorrect due to the weak adhesive ability of the material, and the dry residue can only fill the voids. A corner fixed with sealant does not always last for a year.
Liquid plastic
Liquid plastic is sold in the same containers as liquid nails. But the cost of the composition differs significantly from them in a larger direction. This is justified by high performance and technical characteristics. So, among the advantages the following are highlighted:
quality indicators and shape remain unchanged 10 years after installation of the fittings;
color change under the influence of ultraviolet rays, oxidation does not occur over time;
Due to minimal shrinkage during the drying process and good adhesion, a monolithic structure is formed, which additionally protects the base from moisture penetration.
Liquid plasticSource pvcwindow.ru
Liquid plastic belongs to the group of universal building materials. They can be used for gluing corners on slopes and filling/sealing joints between the window frame and adjacent planes. In addition, the composition is characterized by high mechanical stability, which allows it to be used for fastening window sills and sheet finishing of the opening. The only drawback against the background of numerous advantages is that the use is limited to PVC bases.
Polyurethane glue
Before gluing the plastic corner to the plastic panel, you should find out in advance about the color of the synthetic glue from light beige to dark brown. If the work surfaces are white, then the excess will be visible here. It can only be removed using organic or special solvents until it dries. Before using the material, you also need to find out about the working time of the glue in the open state.
Classic version of polyurethane glueSource sdelais.ru
The main advantages of polyurethane adhesive are as follows:
- resistance to biological damage and corrosion, which is important for areas with variable humidity;
- low thermal expansion allows the glue to be used in conditions from -60 to +150℃, which is not typical for the listed analogues;
- resistance to oils and organic solvents allows the composition to be used for finishing in laboratories and industrial enterprises;
- plasticity helps maintain the characteristics of the dry residue under vibration load;
- high adhesive ability determines the versatility of the glue to work with any substrate.
They also note the uniqueness of the polyurethane composition regarding the drying process. The higher the relative humidity, the more active it is. This allows you to install decorative corners for slopes in the bathroom without prior ventilation.
Geometric shapes and types of PVC corner
Plastic corner is a decorative element that provides a protective function to the corner edges of panels, made on the basis of: polyvinyl chloride, stabilizer fillers and color pigments. It is the corners that are most susceptible to mechanical damage and contamination. They are arranged on planes:
- external and internal corners;
- window, arched and door openings;
- in places where the wall adjoins the ceiling plane;
- window sill niches.
PVC corner panels have a palette of different colors and textures, are available in lengths of 2.5 m, have different widths, as well as double-sided coloring and different shape geometries:
- equilateral corner panel;
- L-shaped arched profile;
- T-shaped profile.
To install corners to plastic panels, you need to purchase an adhesive that has high-quality characteristics and is suitable for connecting plastic bases. And here a completely logical question arises: what glue should I use to glue the plastic corners? To answer this, it is worth considering the possible options that the modern market offers.
Types of adhesives
It is necessary to consider the types of glue suitable for finishing the window. They differ in characteristics and application.
Liquid Nails.
Durable composition. Spot or zigzag application is allowed. Liquid nails will preserve the window for 20 years and will not cause chemical reactions leading to darkening or yellowing.
Liquid Nails
The composition comes in different colors, colorless is preferred.
Silicone sealant.
Poured into joints and gaps. Contains no toxic chemicals. However, it tends to darken over time.
Polyurethane glue.
Durable, elastic, hardens quickly.
Liquid plastic.
Robust, durable, suitable for plastic surfaces only. It won't stick to a brick wall.
Recommendations from professionals
Useful tips will help beginners with DIY installation.
- Be precise when marking so that there are no gaps between the joints. To prevent this, you can increase the length of the workpiece by 0.5-1 mm. They will still fall into place due to the elasticity of the material.
- It is not recommended to fill the joints with silicone, as over time it will darken and it will stand out against the background of the slope.
- To be on the safe side, do not glue the corners right away, but first attach them with tape and take the necessary measurements.
- To create the correct shape for the arch, use a hair dryer.
- When processing areas in openings where the angle is not 90°, but more or less, it is necessary to take measurements locally and cut them with a knife.
Plastic corners serve as reliable protection for slopes from damage, and also add aesthetic completeness to the entire interior. Among the wide range of shapes, sizes and colors, it is easy to choose the best option for a specific design. And it’s also easy to attach them yourself, having all the necessary tools and work skills. Reinforce your knowledge by watching the video.
Classification
Plastic elements vary depending on the purpose and type of finishing work.
| Name | Appearance |
| Equilateral. They are used when finishing window slopes. | |
| Versatile. Most often they are used to decorate arches. | |
| T-shaped. Used for window slopes when it is necessary to mask the joint between them and the wall. | |
| f-shaped. Used for finishing joints and for reliable fixation of plastic plates in grooves. The starting profile provides a decorative appearance to the end and levels the overall plane. f - shaped profile is used for finishing the window opening. | |
| Removable. They have a latch, which facilitates repair work that does not require removing the slope profile. |
Depending on the type of work performed, installation of corners can be external or internal.