These days, it’s rare for a person to live without a computer. Communication on social networks and on thematic forums, learning and running a business, watching movies and even reading books - all this is done with the help of a “smart machine”.
In this regard, the amount of time a person spends in front of a monitor is constantly growing. As a result of frequent use, the keyboard quickly becomes dirty, greasy fingerprints remain on the buttons, and dust accumulates. In addition, many users indulge in the pleasure of having a snack or drinking coffee without interrupting communication or watching a movie.
In order for the device to work properly, the keys not to “stick” and many other problems not to arise, every user should know how to clean a computer keyboard at home.
Keyboard cleaning gel
In specialized stores you can find not only a wide range of gadgets, but also various care products. There are many computer cleaning kits that contain a variety of brushes, wipes, liquids and gels.
Using these products, you can easily clean your device from dust and crumbs. How to clean the keyboard with gel or liquid? The main thing is to strictly follow the instructions for using this or that product, and you will cope with the task perfectly.
Keyboard cleaning slime
Today you can buy a sticky product called "slime". This method of cleaning keys will allow you to remove the maximum amount of dust and small debris from the most “hidden” places on the surface of the keyboard.
Before you begin processing, check the strength of the parts, since the sticky substance can “pull” them along with it.
Causes of pollution
A large number of people spend several hours in a row at computers and, accordingly, use keyboards.
Due to intense and long work, sometimes there is not enough time for a banal meal, so PC users often have to combine work and lunch.
As a result, crumbs and small particles of food, and sometimes cigarette ashes, gradually clog the computer keyboard. Another natural and inevitable process is the clogging of the device with household dust.
See also
How to remove paint from linoleum, how to quickly wash off dirt
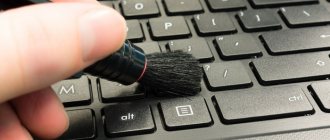
How to clean dust from your keyboard
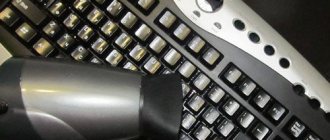
The keyboard can be cleaned using a hair dryer in the “cold” mode.
If you handle the device carefully, do not spill tea or coffee on it, and do not eat at the computer, you can clean the keyboard without disassembling it. You can do this as follows:
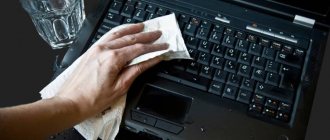
- Wipe the surface with damp wipes. It should be noted that it is better to use special products designed for computers.
- Remove dust using a vacuum cleaner. It is better to use the car version of the unit, but if you don’t have one, use a regular household vacuum cleaner, setting the power to minimum. Before you start cleaning, make sure that all the keys are firmly seated and will not be pulled into the dust bin.
- Clean the keyboard with a hair dryer. This method will allow you to “blow” dust out of the space between the keys without the risk of damaging the device. The main thing is to set the “cold” mode.
- Use compressed air. You can buy a can at a computer store. By pressing the dispenser, you will use strong air pressure to “push” dust out of the most inaccessible places.
After cleaning, all you have to do is wipe the surface of the keys to remove any greasy fingerprints, and the job is done.
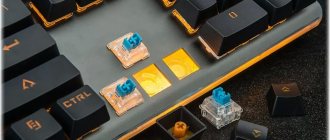
Switch desoldering
Unsoldering the switches of a mechanical keyboard is no longer included in the disassembly itself, since it is associated specifically with repairs. However, it is still worth clarifying a few points about this. First, prepare a soldering iron, soldering flux and tin that you will use to solder the new switch. Ideally, you should also have a vacuum gun that will allow you to pick up old molten tin, but rarely does anyone have this tool, especially since you can completely do without it.
Pay attention to the board itself. There you should find the desired switch and notice the two legs on which it rests. All you have to do is melt the tin of the legs so that they fall off freely and the switch can be removed.
All that remains is to insert a new switch in this place and solder it in exactly the same way. Before assembly, be sure to connect the keyboard and check that it functions correctly after repair.
We are glad that we were able to help you solve the problem. In addition to this article, there are 12,721 more instructions on the site. Add the Lumpics.ru website to your bookmarks (CTRL+D) and we will definitely be useful to you. Thank the author and share the article on social networks.
Describe what didn't work for you. Our specialists will try to answer as quickly as possible.
How to clean a computer keyboard: disassemble, clean, assemble
Before disassembling the keyboard, be sure to photograph the location of the keys.
If superficial cleaning is not enough and the keyboard is very dirty, serious cleaning is necessary. To do this, you will need to disassemble the device, first disconnecting it from the computer. Cleaning the keyboard is done as follows:
- Take a photo of the layout of the buttons on the keyboard.
- Turn the device over with the keys facing down and unscrew the bolts.
- Open the keyboard and remove the keys.
- Wipe the chip with a napkin, avoiding the green part.
- Rinse the keys in warm water or remove dirt from them using napkins.
You can start assembly only after all the parts are completely dry.
General cleaning
To carry out general cleaning, you will need to completely disassemble the keyboard and thoroughly clean the rubber bands and each key. This process is carried out in several stages.
Disassembly
To begin with, the computer keyboard should be disconnected from the network (if a laptop, turn it off). Then it’s worth taking a photo of the device so that you can later know where each key was placed. Next, you should prepare a screwdriver, a bag, a cleanser, a soft toothbrush and follow the instructions:
- First you need to remove the back cover from the keyboard by unscrewing all the bolts.
- Next, you need to unscrew the bolts again to remove the film with the contact tracks.
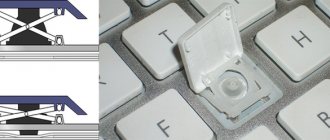
- Now you need to remove the buttons - carefully pry each one up and disconnect. This can be done if you arm yourself with a screwdriver or a table knife.
See also
How to wash resin from your hands, TOP 8 products and prohibited methods
If you need to disassemble a laptop, for example from HP, the disassembly process will be similar. First, the device is turned off, and then each key is removed.
Cleaning
Cleaning a computer device is carried out as follows:
- After disassembly, place the removed keys in a bag, add cleaning agent and a small amount of water. And after twisting it, you need to shake it well many times.
- Next, the buttons should be washed with running water and dried thoroughly on a paper towel.
Using a brush, the main part of the device is cleaned. For best results, it is recommended to moisten it with a cleaning agent.
Assembly
At the final stage, all that remains is to assemble the computer keyboard in the reverse order: insert the buttons, install the board, elastic film and screw the case. Next, the device is connected back to the computer.
Can I wash my keyboard with water?
You can wash the keys under water after removing them from the keyboard.
As you know, one of the main enemies of technology is moisture. The ingress of liquid leads to corrosion of the contacts and, as a result, to premature failure of the device. Therefore, you cannot simply wash it under the tap. How to properly wash your keyboard at home? Individual parts, such as buttons, can be wet-treated by first removing them. The parts should be installed in place after they have completely dried.
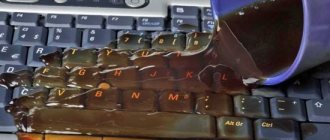
What to do if liquid is spilled on the keys
There are situations when water is accidentally spilled on the keyboard. Sometimes this leads to buying a new device or going to a repair shop.
However, if ordinary water is spilled on the keyboard, the chances of saving it are much greater.
To do this, you need to quickly disconnect the device from the network and turn it upside down at night.
If sweet liquid gets on the buttons, you won’t be able to get rid of it with regular drying. It must be washed according to the sequence described above. Usually this helps to cope with the tragedy, especially when all the manipulations are completed within the first minutes.
Otherwise, most of the buttons will fail and the only way to restore functionality will be to buy a new device.
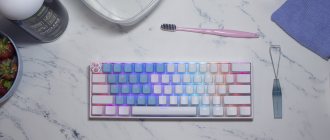
How to wash a computer keyboard: clean the buttons
After cleaning the keys, dry them thoroughly.
How to clean the keyboard using the “wet” method, or rather, wash the buttons? To do this you will need a warm soapy solution. You can use washing powder, dishwashing liquid or grated laundry soap.
Place the keys in a container with the solution and leave to “soak” for 1–2 hours. After this, you need to thoroughly rinse the parts in clean water. Once the remaining detergent has been removed, lay out the buttons to dry.
How to wash your computer keyboard without disassembling it
Instead of disassembling the keyboard, you can wipe the keys with alcohol using a cotton swab.
If you are not confident that you can properly disassemble and reassemble the device, use isopropyl alcohol to “wet clean” the keyboard.
This product will do an excellent job of removing grease and dust deposits in the space between the keys. Apply the solution to a cotton swab and thoroughly clean all hard-to-reach areas.
How to clean a membrane keyboard
A computer keyboard can be mechanical or membrane type. The latter are the most popular because their price is much lower than the cost of mechanical devices.
It’s easy to find out what type of keyboard you have. To do this, you need to turn the device over with the keys facing down, and on the back you will find the necessary information in the form of a sticker or engraving.
One of the differences between the mechanical version and the membrane version is the disassembly method. Remove the keys from the membrane device horizontally, from the left edge to the right. The choice of method and means for cleaning does not depend on what type of keyboard needs “cleaning”.
By properly caring for and cleaning the device on time, you will significantly improve the quality of its operation and extend its service life.
Simple Troubleshooting
In cheap keyboards, sometimes the keys that are pressed most often (for example, “Enter”) begin to jam. This occurs due to the wear and tear of the guides and protrusions in the keys and the top cover of the keyboard.
They rub against each other and wear out. In addition, burrs may appear there. If you press a key not strictly vertically, but at a certain angle (which most often happens), it will “overwrite” and stick. To prevent this from happening, you need to lubricate the worn rubbing parts with a drop of silicone oil .
Sometimes keyboards get hit too hard. This happens during the game, when monsters are surrounded on all sides.
Over time, the guide in the top cover (this again applies to cheap keyboards) may crack and the key will fall out of its socket.
And in this case you can help. You need to put a wire bandage on the ledge with the guides. It should fit tightly enough so as not to slip off during operation. You can even fuse it into the top cover with a heated soldering iron.
The inscriptions on the keys of cheap keyboards are erased quite quickly. This does not apply to mid- and high-end products. On high-quality keyboards, the inscriptions on the keys are already protected by a special coating. To protect the characters on an inexpensive keyboard, you can apply a thin layer of clear varnish .
There are special adhesive-based stickers - in the form of transparent square pieces of plastic film with the image of font characters. But they, as a rule, are not very durable, and the inscriptions are erased quite quickly.
